Roundshot VR Drive Kit
PURPOSE
Used for High-resolution panoramas in VFX.
COMPONENTS
VR drive y-motor
VR drive y-motor back rail
VR drive A rail
VR drive long nodal rail
VR drive x-motor
Camera release cable
X-Y motor cable
RS USB key
Cable clips
Spirit level
Allen key
Allen key 4mm red handle
Universal charger 110-220V
Wifi router
Wifi router ethernet cable
PACKAGE ACCESSORIES
Canon EOS 5D Mk IV
Lenses: prime or Zoom lenses - this can vary and should ask production what the preference is. All lenses must have UVP filter on.
Manfrotto Tripod + carry bag
Canon LP-E6/ Hahnel - HLX-E6N battery x 3
SD/ CF memory card (min 64GB) x 3
Canon Battery charger x 1
Multi-card reader x 1
Pelicase iM2500
CURRENT SAMPLE QUOTE
VFX KIT SAMPLE QUOTE - Roundshot VR Package
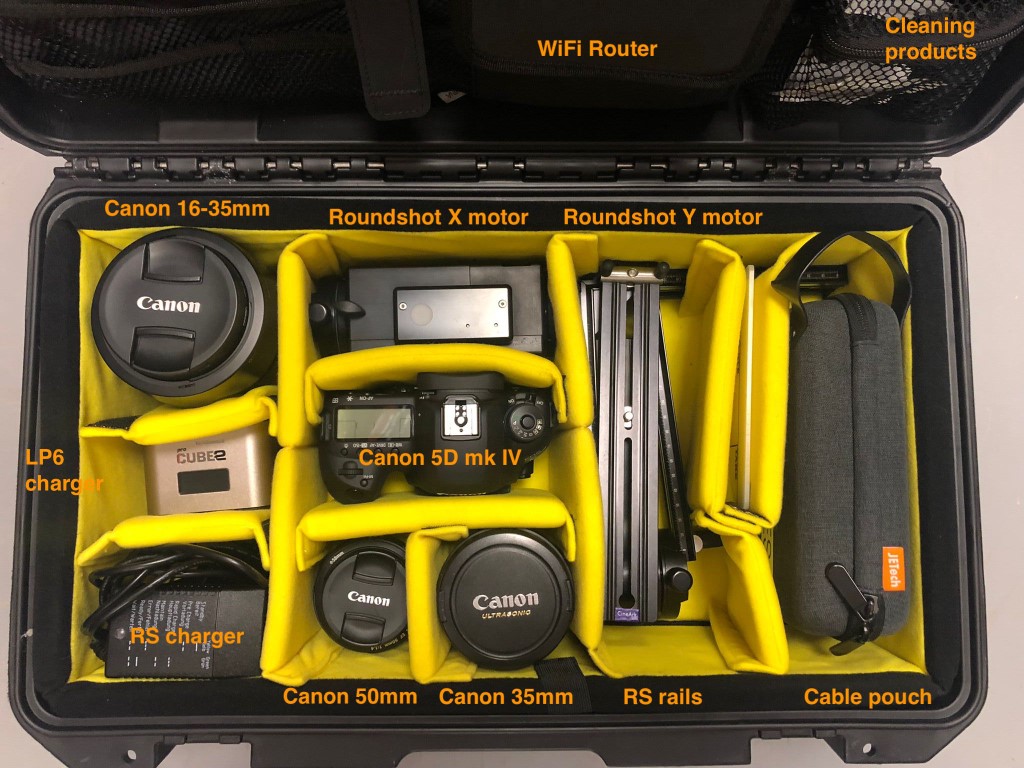
PELICASE APPROVED LAYOUT
NOTES
Roundshot can be hired as motorized head only or as a package
Spare Roundshot motor cables are with Engineering
RIG SET UP & TEST
Screw the X-Motor directly onto the tripod. Make sure is not too tight and use the dedicated allen key (red handle) to secure (turn clockwise)
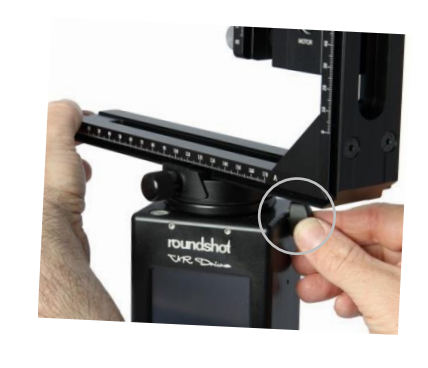
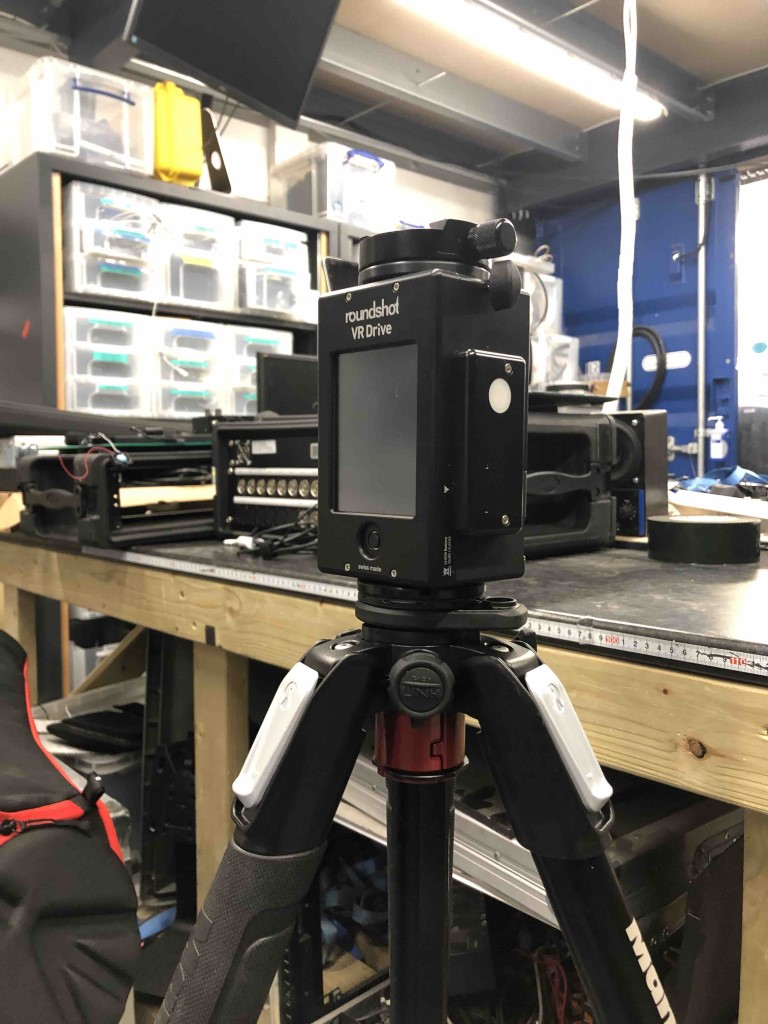
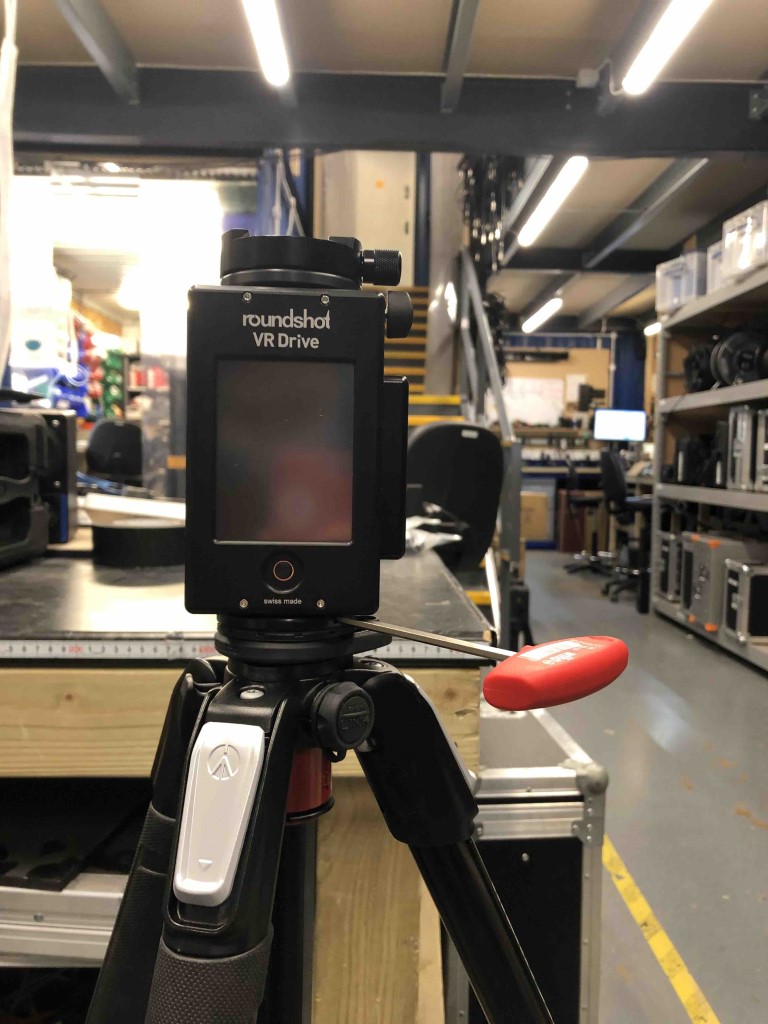
Open the quick adaptor release (top right of X-motor) and twist the round base 90 degrees clockwise. The nod should be facing you. Once in position close the quick release tightly.
Slide the Y-Motor into the round base on top of the X-Motor. Use the little knob to loose the clamp and to secure the L bracket once in place.
Attach the camera on the nodal rail - make sure the camera touches the rubber pins at the very end of the rail. Secure tightly by using the red handled allen key. Nodal rail must be aligned with the lens.
Slide the nodal rail through the round base on top of the y-motor. Camera must be facing up. Connect cables BEFORE turning on the Roundshot:
x-y cable goes from motor port (side of x-motor) to motor port (side of y-motor)
Camera release cable goes from CAM port (side of x-motor) to the camera (3 pins port bottom left of camera body)
Note: Each lens has a different nodal point - The program description will tell you where A rail and B rail needs to be positioned.
SOFTWARE INFO - see the full manual here
Each Roundshot VR can hold up to 99 different programs.
A program is indicated with P followed by a number (P1, P2, P3..). Each program belongs to a specific lens (make & focal length), previously registered and is associated with a specific camera body.
When turning on the Roundshot you will see the latest program that has been used. You can navigate through the programs by pressing the blue arrows on top of the screen.
Testing Roundshot VR
Set up the RS as per instructions above
Turn on Roundshot by holding the black button for 2 seconds
Turn on Camera
Make sure the camera is facing opposite direction of the touch screen (not towards you)
Press the green arrow to start the panorama
If cables gets tangled or you want to stop the Roundshot press red square
Turn off Roundsot before unplugging any cables.
UPDATING THE ROUNDSHOT VR
Setting up VR Drive software after factory reset:
Press the VR Drive “on/off” button to start the VR Drive, then press the settings icon.
Select language. Now set the year, month, day and time by using the number keypad. Confirm by pressing next button (blue arrow).
Loading a new camera:
Click on the button to add Canon 5D camera from the database available.
Program management:
By pressing P1 blue button you will access the program management tool. Here you can create, delete, copy and move different lenses programmes.
To create a new program press "new" then assign an ID number and select "QUALITY" mode (“quality” is the basic mode of the VR Drive. In this mode the VR Drive stops and releases the camera in every position, which is what we need for VFX purposes).
In info add description of the program, include camera model, lens, shooting order. For example:
Canon 5D MKIV - 24mm - Top down (meaning the program will start shooting from 90 degrees up to 90 degrees down).
Select the camera and confirm
Enter focal length.
Note that on zooms you can add 1 focal length at the time. We tend to use the widest option available. For example on 16-35mm zoom we often use the 16mm size.
A/B value represent the specific numbers on the rails (A & B) where the camera must be positioned. It's key to get these values right so the sensor is on the nodal point based on the lens that is mounted on the camera.
Common settings on a Canon 5D mk III & mk IV bodies:
Select angle mode "CYLINDRICAL"
Set up coverage for X & Y axis. To complete a full 360 panorama we need:
X motor to rotate 360 degrees
Y motor to tilt 180 degrees
Overlap value should be set at 30% for both X & Y and orientations should be set as "PORTRAIT"
Select "VARIABLE" image number
For rows/page 1 leave nothing selected as default
Sequence options can be "ZIG-ZAG TOP DOWN" or "ZIG-ZAG BOTTOM UP"
For release with usb cable leave off as default and leave pause start/end position, auto exposure, and bracketing as default
Program completed.
Update firmware:
Firmware update are provided by the Seitz - an updated key will be sent upon request and can be installed with the USB Key.
Latest firmware: v. 2.025
Cheatsheet Monday Board: