Setup Bolero Cheat Sheet
Bolero User Guide can be found on SharePoint under:
If you route through a network switch, ensure it uses PTP (Precision Time Protocol). If the same switch carries LAN, Bolero, and Dante, create a separate VLAN for each system so PTP traffic doesn’t conflict.
Default Aruba network
Network:
192.168.43.1/24Switch:
192.168.43.2
For more information on factory resetting and the Initial setup of your Aruba Switch, follow this Guide: HP Aruba Switch Factory Reset and Initial Setup
Bolero Antenna
Connect an Antenna to a Network Switch with POE+ or with a separate mains power supply.
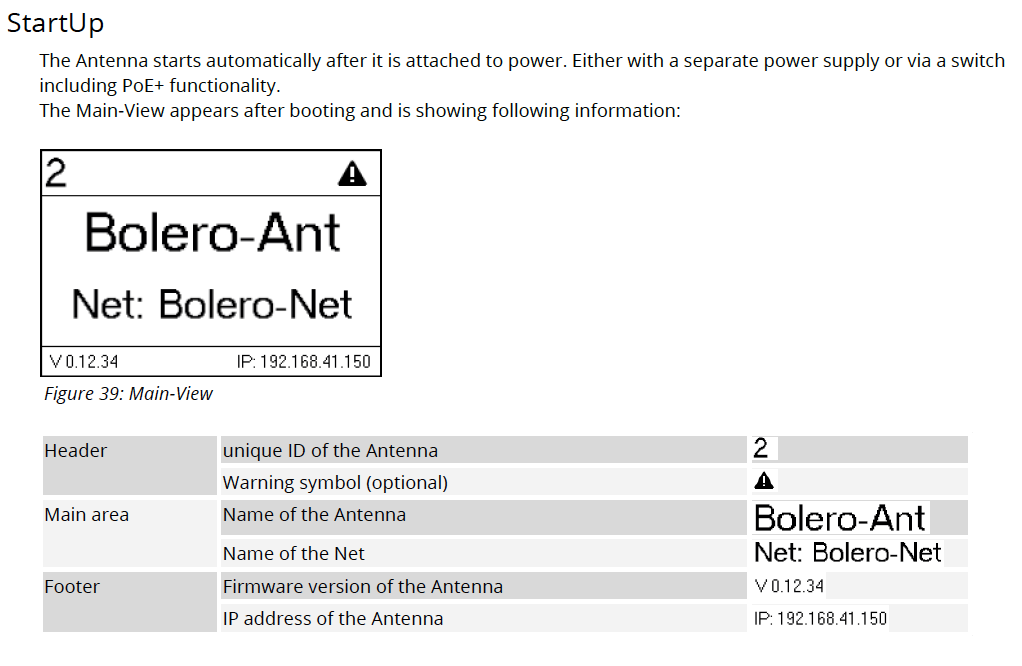
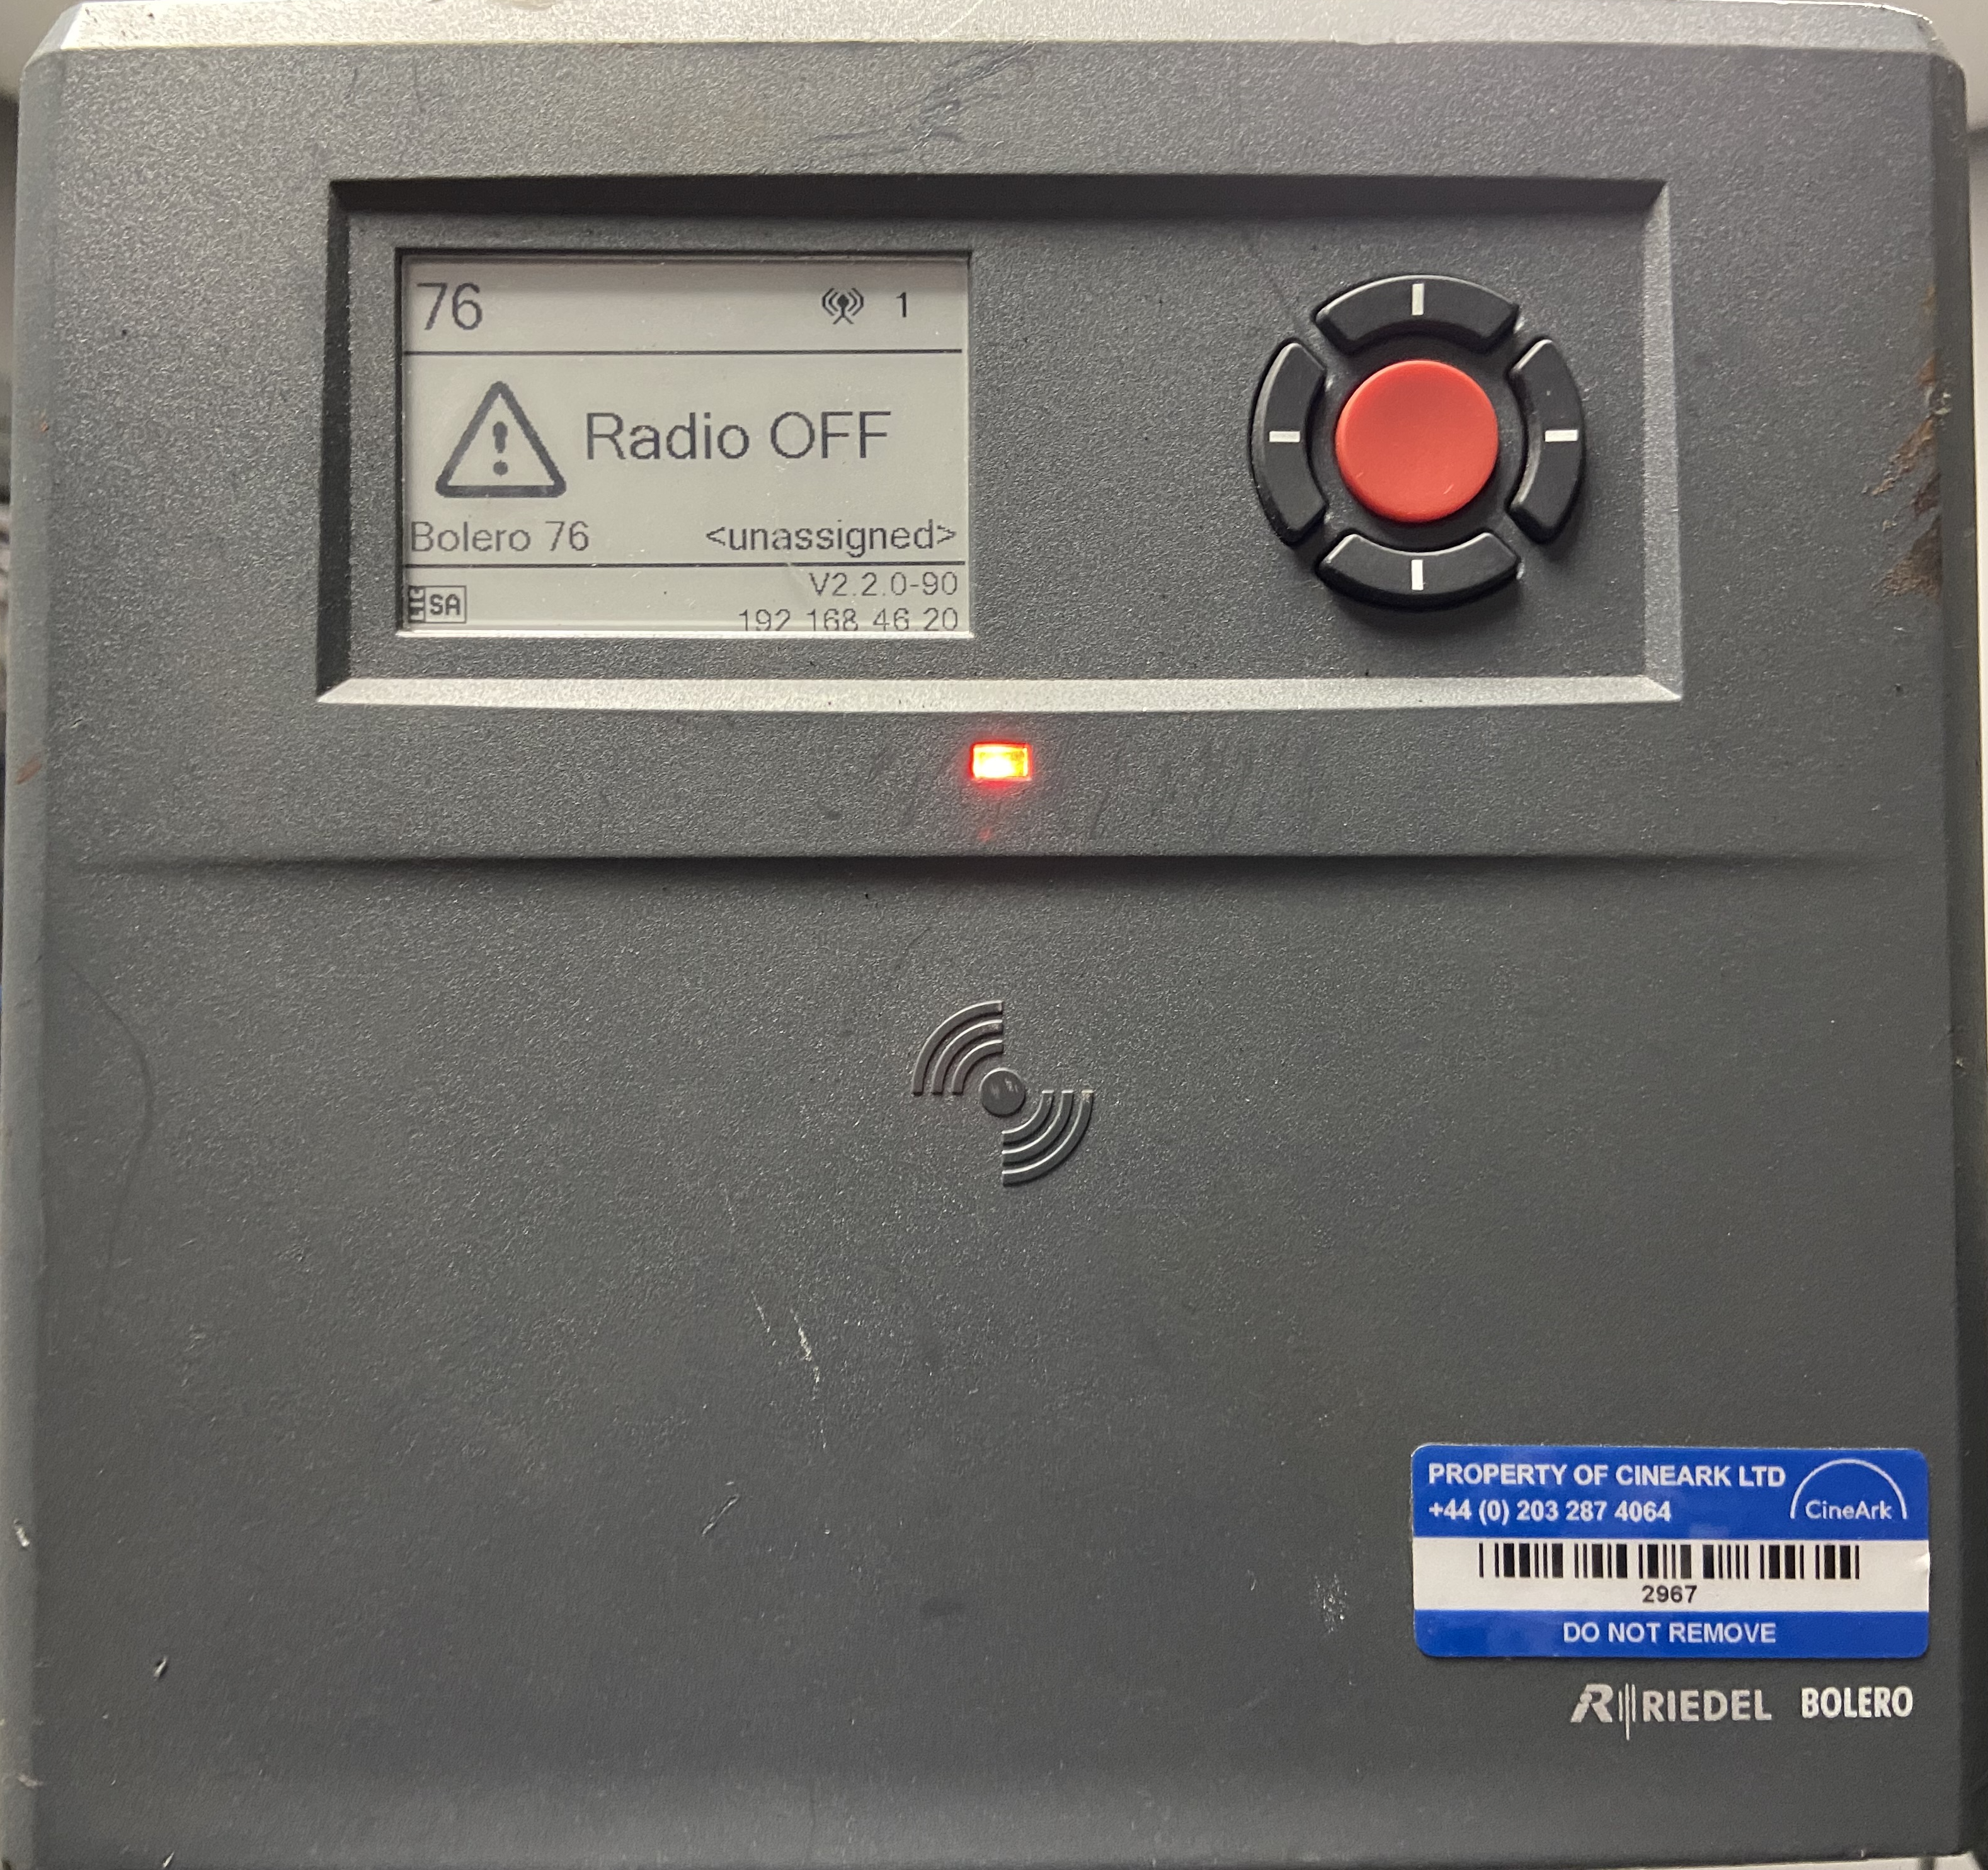
The Antenna will display an IP address in the bottom right hand corner.
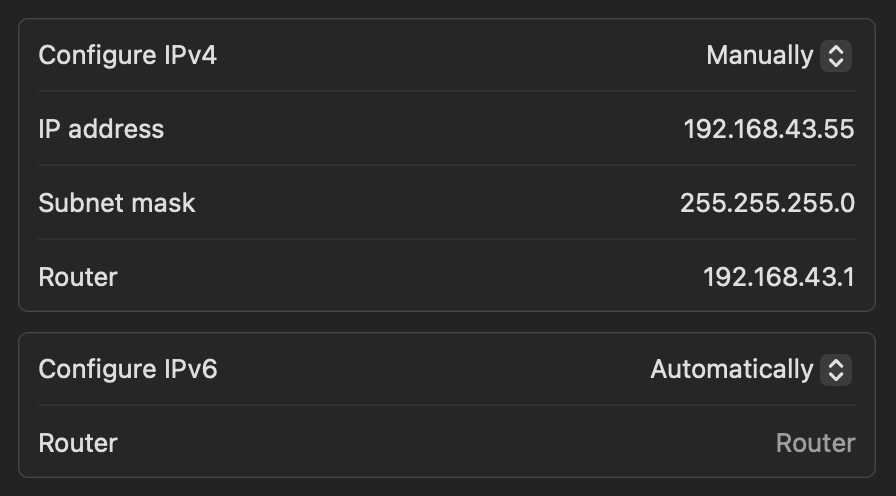
Connect you Laptop/Desktop to the same network switch and ensure your network settings are configured to the same IP range.
Open a web browser and connect to the IP address of the Antenna.
If the Antenna has been previously configured; The Default password is usually 0000. This can be selected once clicking the padlock icon in the top right hand corner of the configuration box.
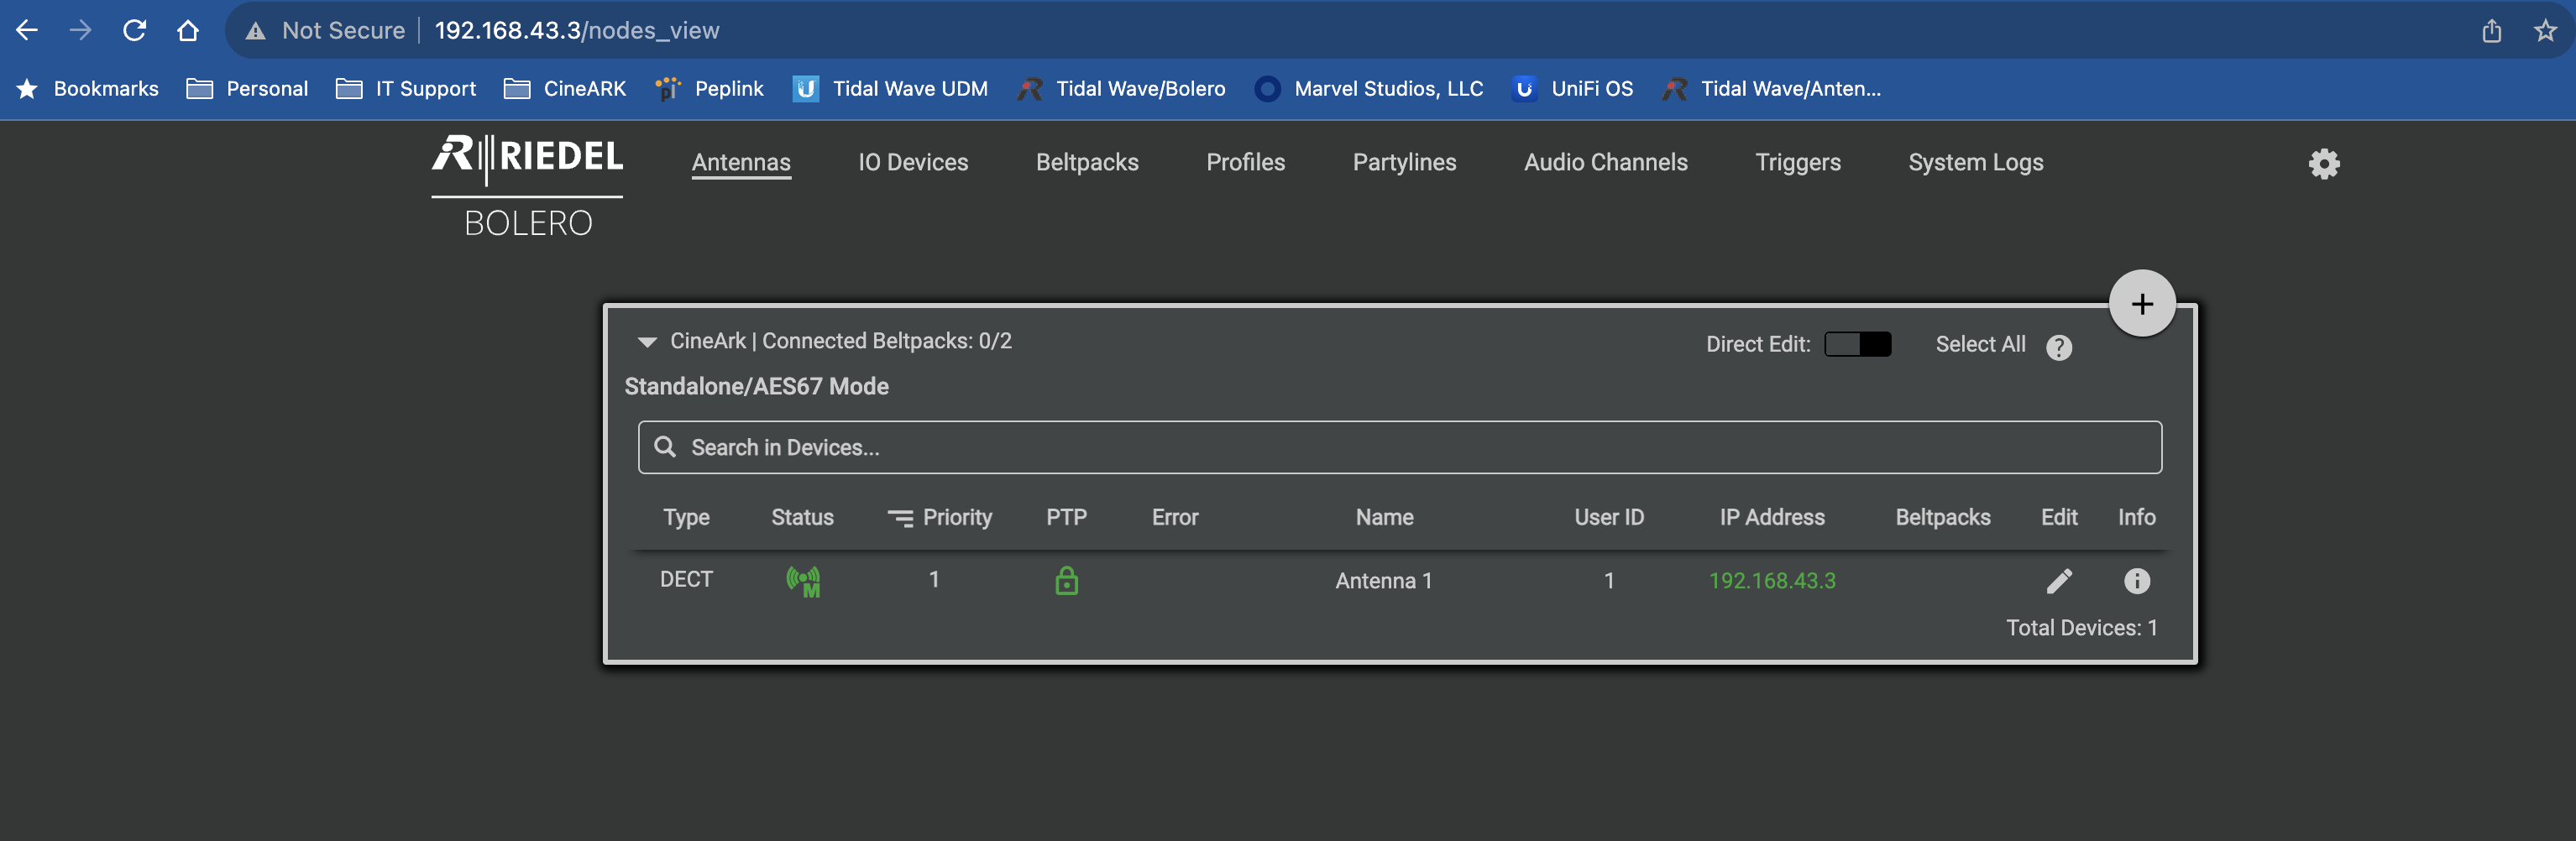
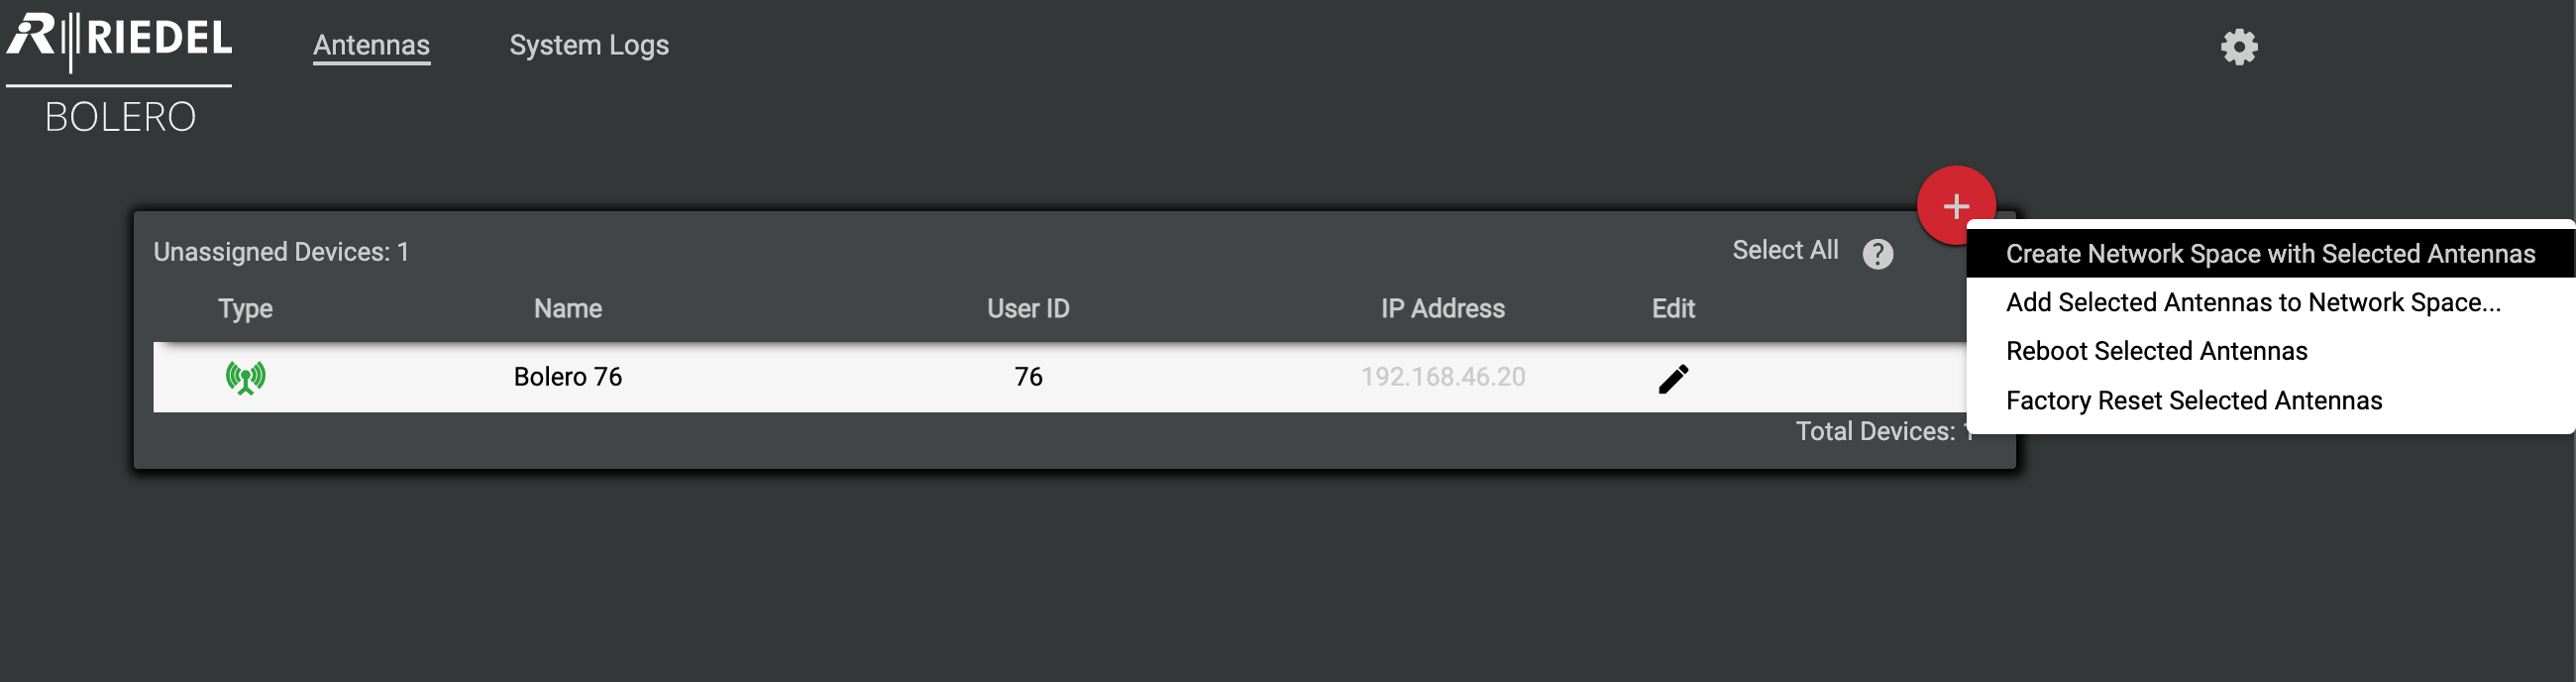
Highlight the Antenna and select the + icon and Create a new Network Space:
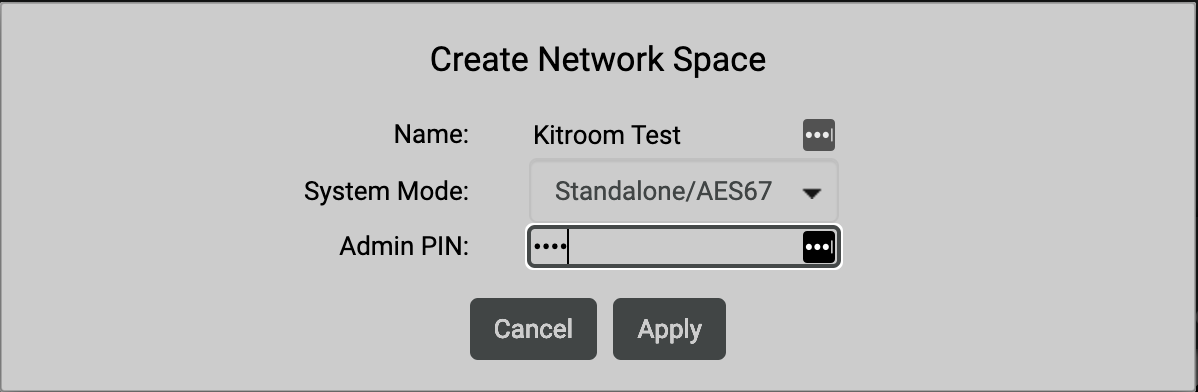
Create Network Space with a Production Name, Select the Standalone /AES67 System Mode and set the Admin Pin as 0000 (You'll be entering this a lot):
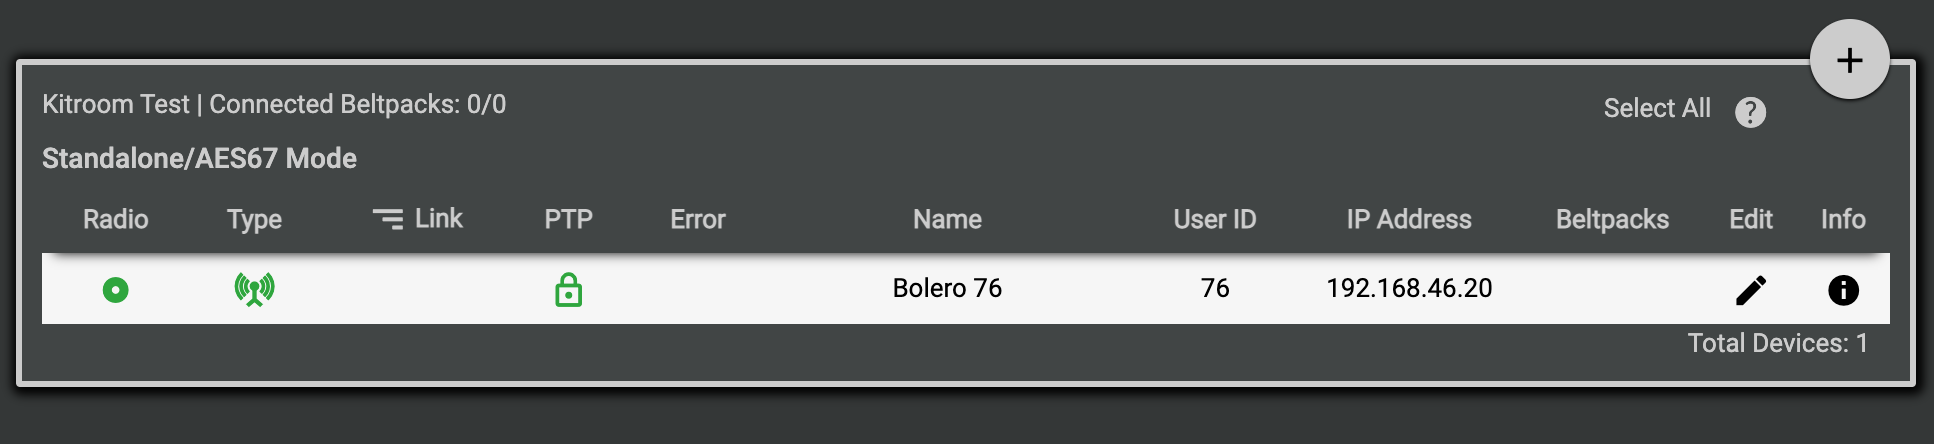
Highlight the Antenna and select Edit:
Name your Antenna and assign a User ID; in addition you can configure the IP Settings and change a few General Settings. The Antenna, will need to be configured to a 192.168.43.0/24 address.
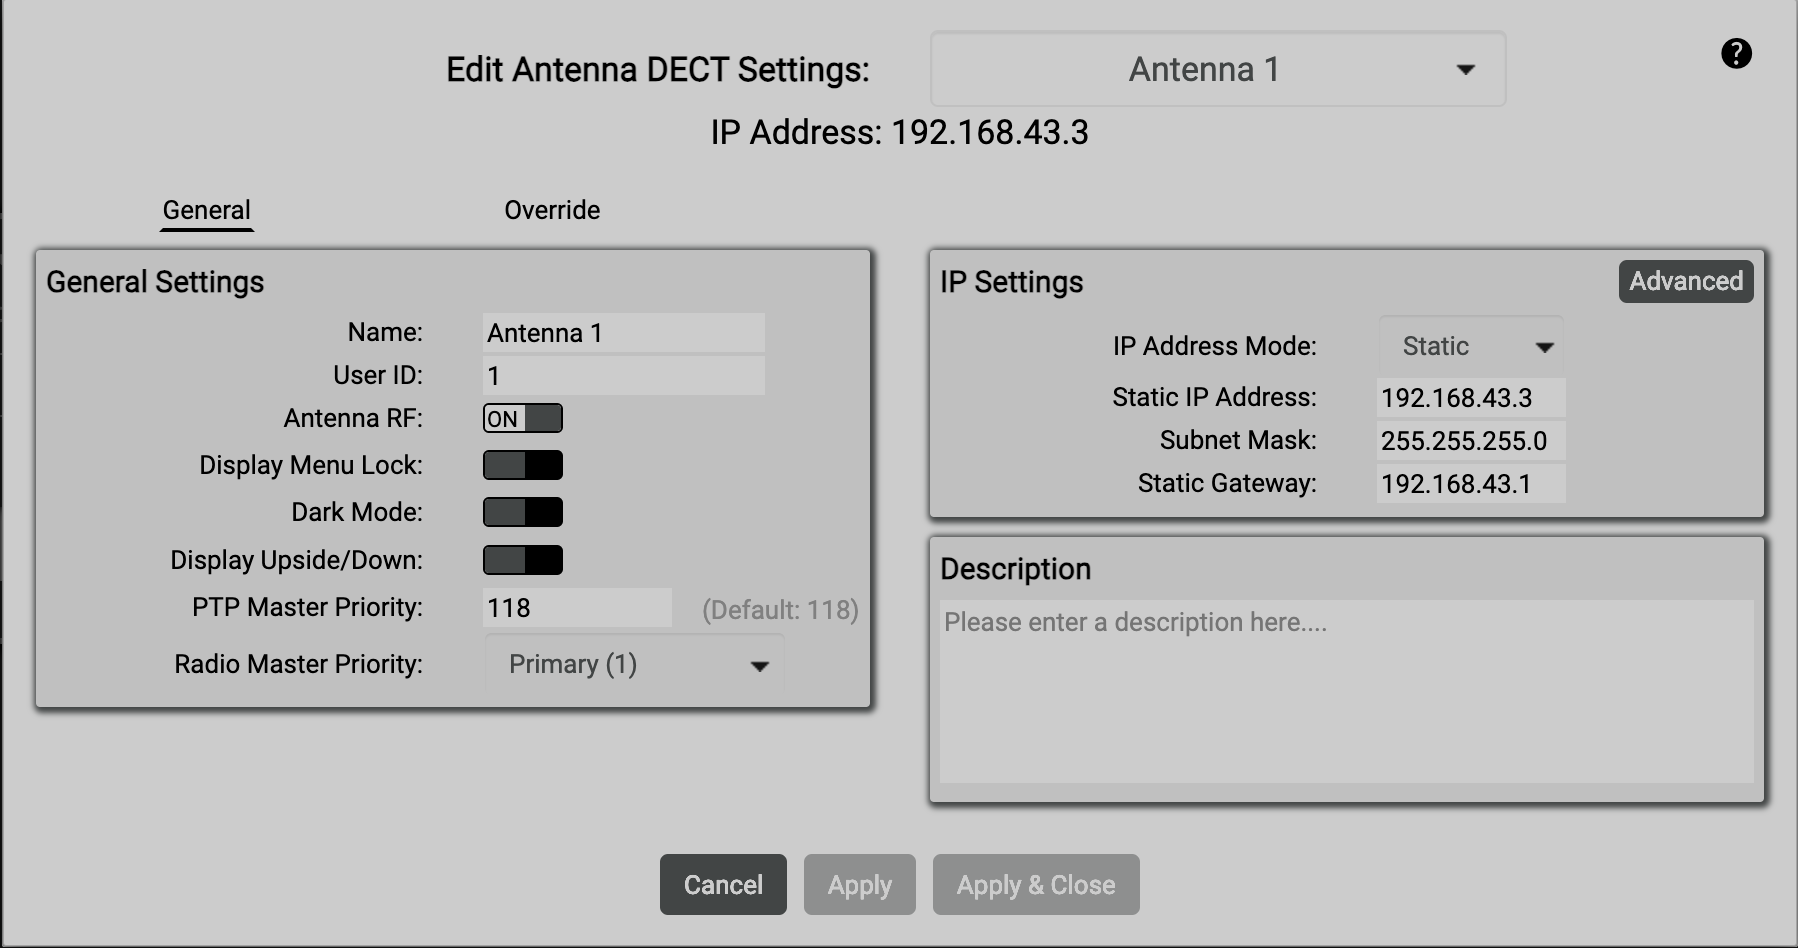
Edit Antenna DECT Settings: IP Address: 192.168.43...
The Antenna has now been configured. Navigate to the newly configured addressed if changed to proceed with the configuration.
All Bolero devices (NSAs, beltpacks, and antennas) need to be on the same firmware version.
For more Information on updating the Antenna and NSA, follow this Guide: How to: Update Bolero Antenna Firmware
For more information on updating the Beltpacks, follow this Guide: How to: Update Beltpack Firmware
Register Beltpacks
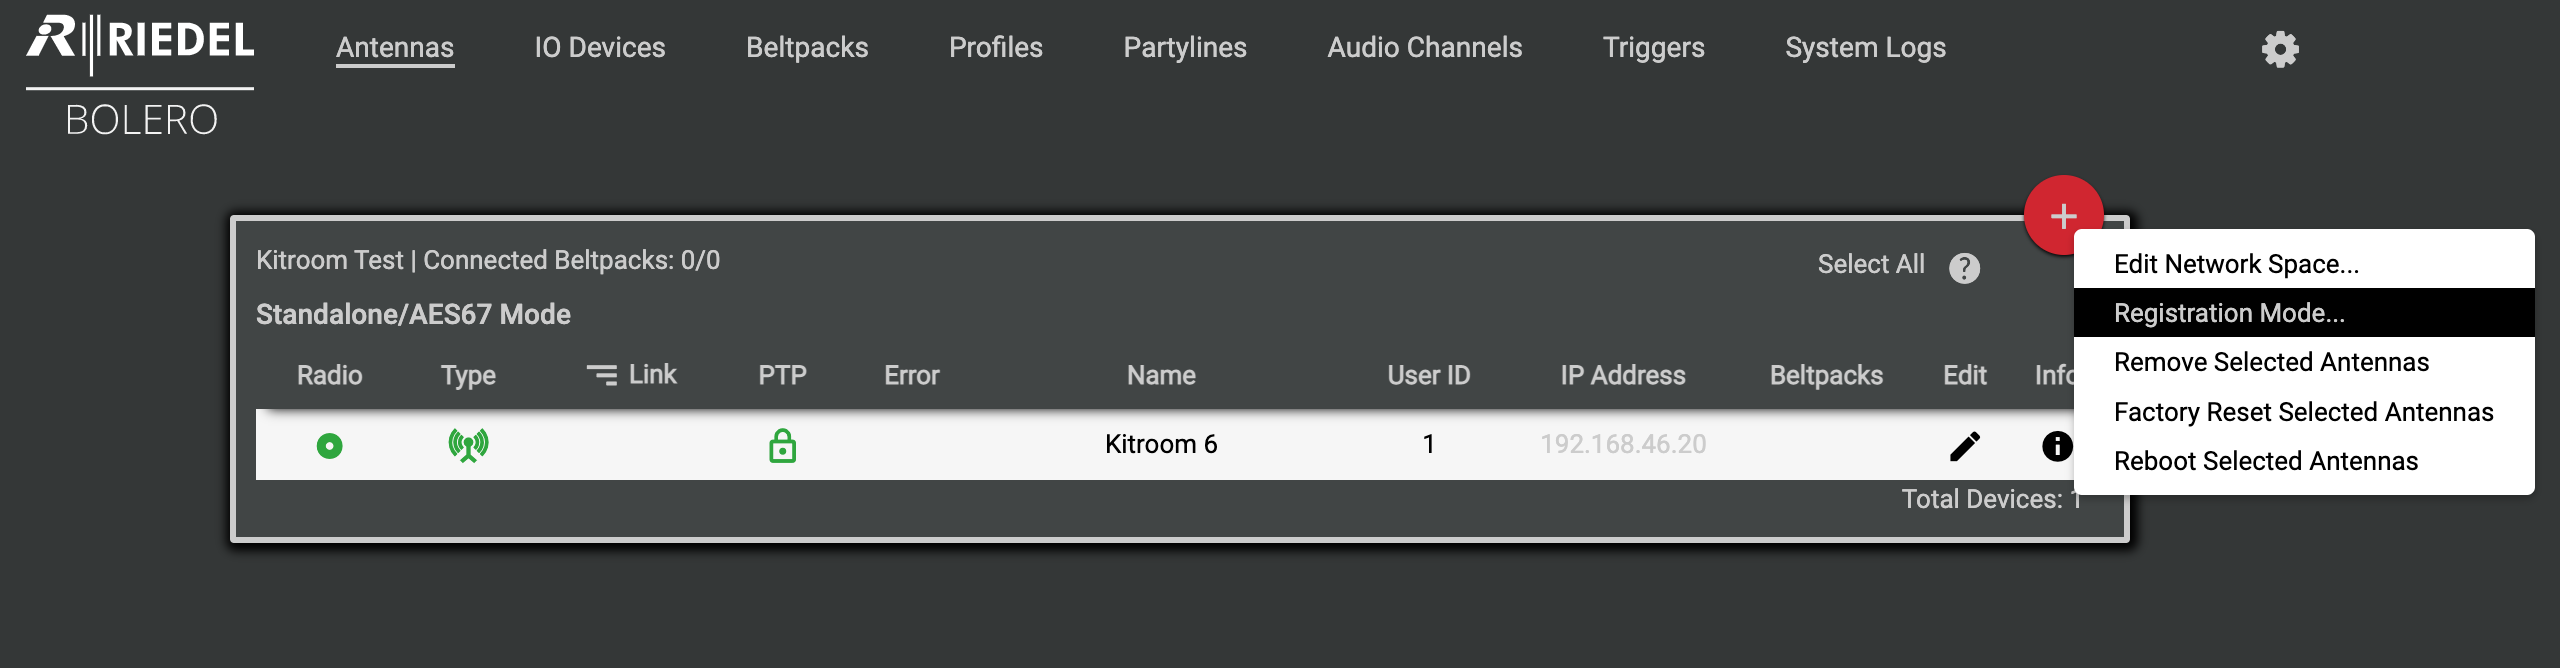
On the Antennas Tab, Highlight the Antenna and select the +, Select Registration Mode…
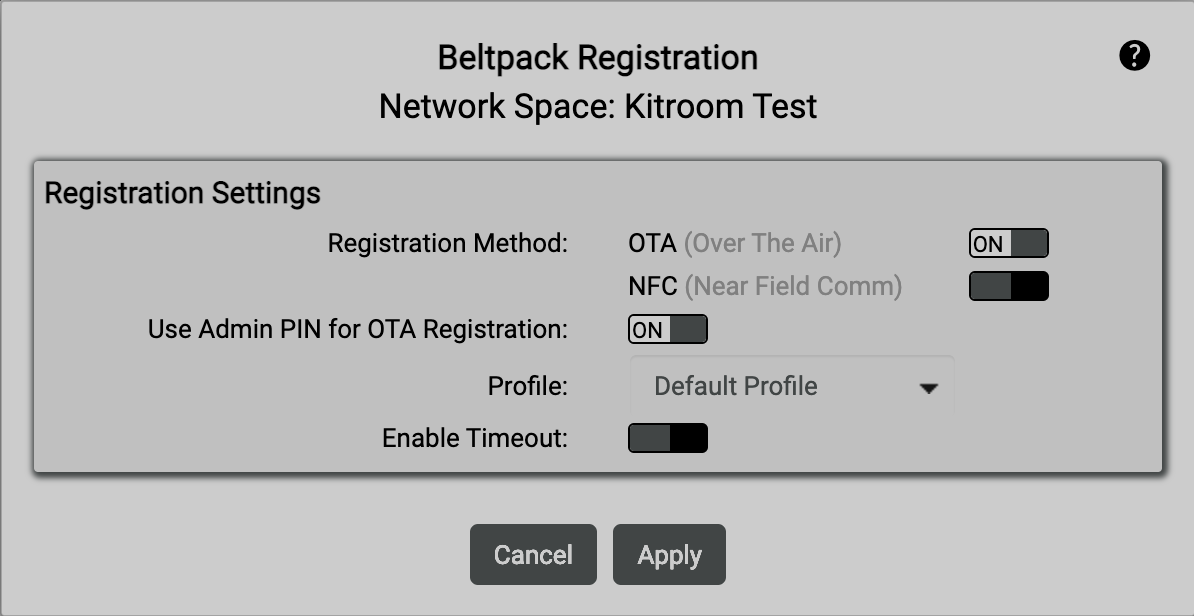
Enable OTA (Over The Air) and disable Enable Timeout.
Riedel do not recommend NFC in a live environment — NFC sensors are often broken, or antennas are out of reach.
Connect Beltpack
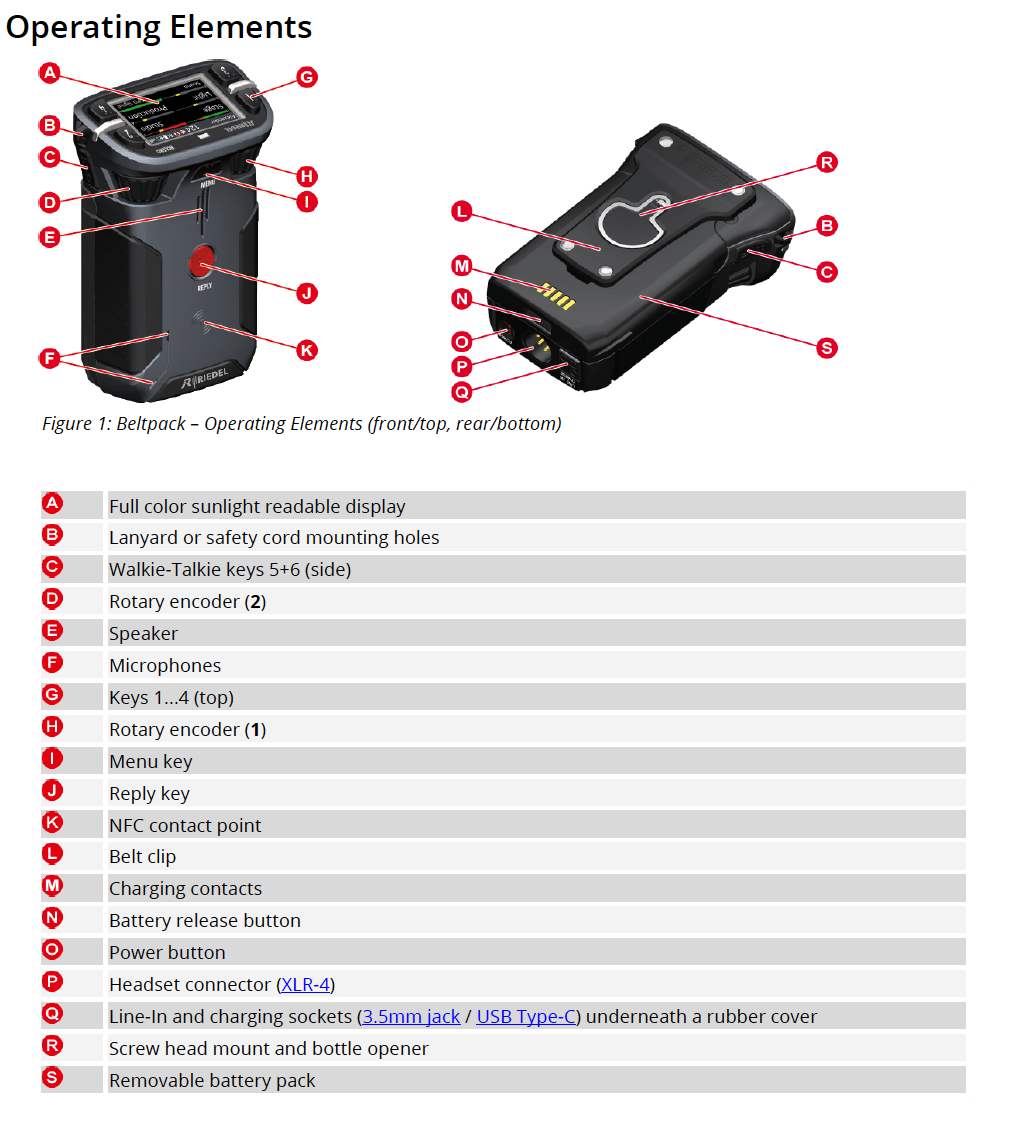
Operating Elements 0__ Figure 1: Beltpack - Operat...
Power on the Beltpack (O)
Hold down the Menu (I) for 3 seconds
Scroll down (D) to Registration
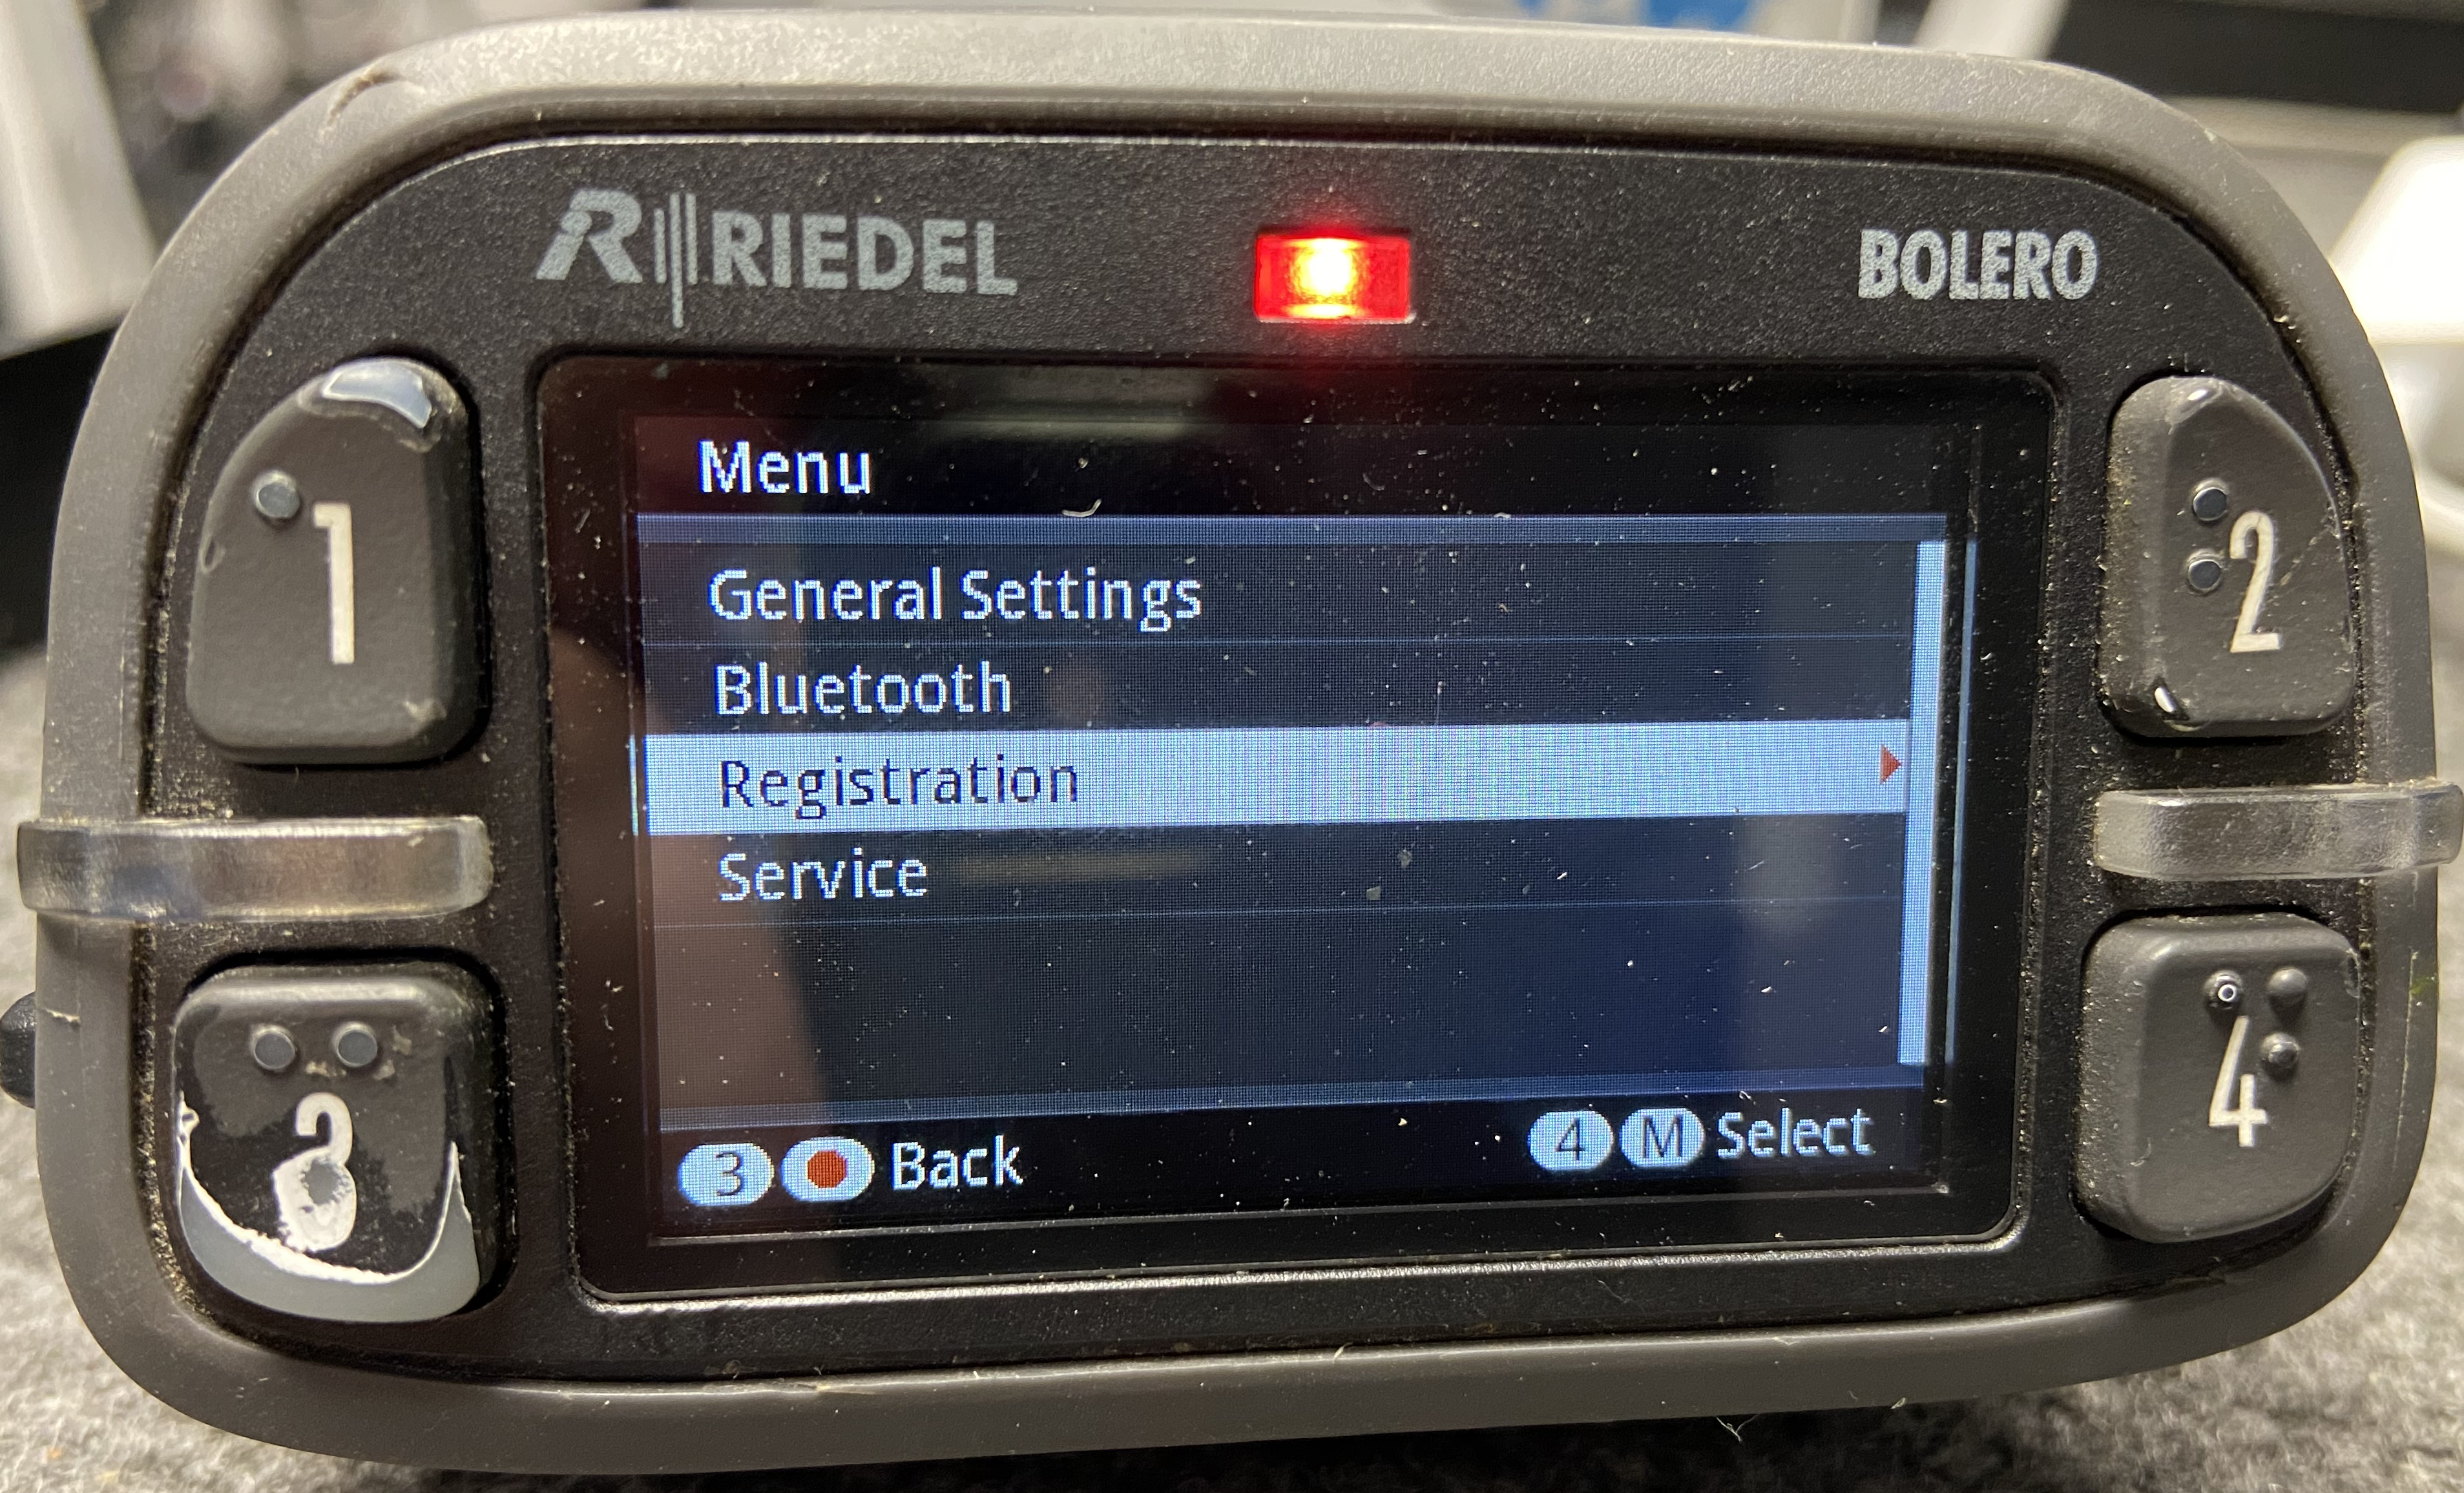
Select (4/M)
Select (4/M) Register to net
Confirm (4/M) Register to net (Should match your configured Antenna)
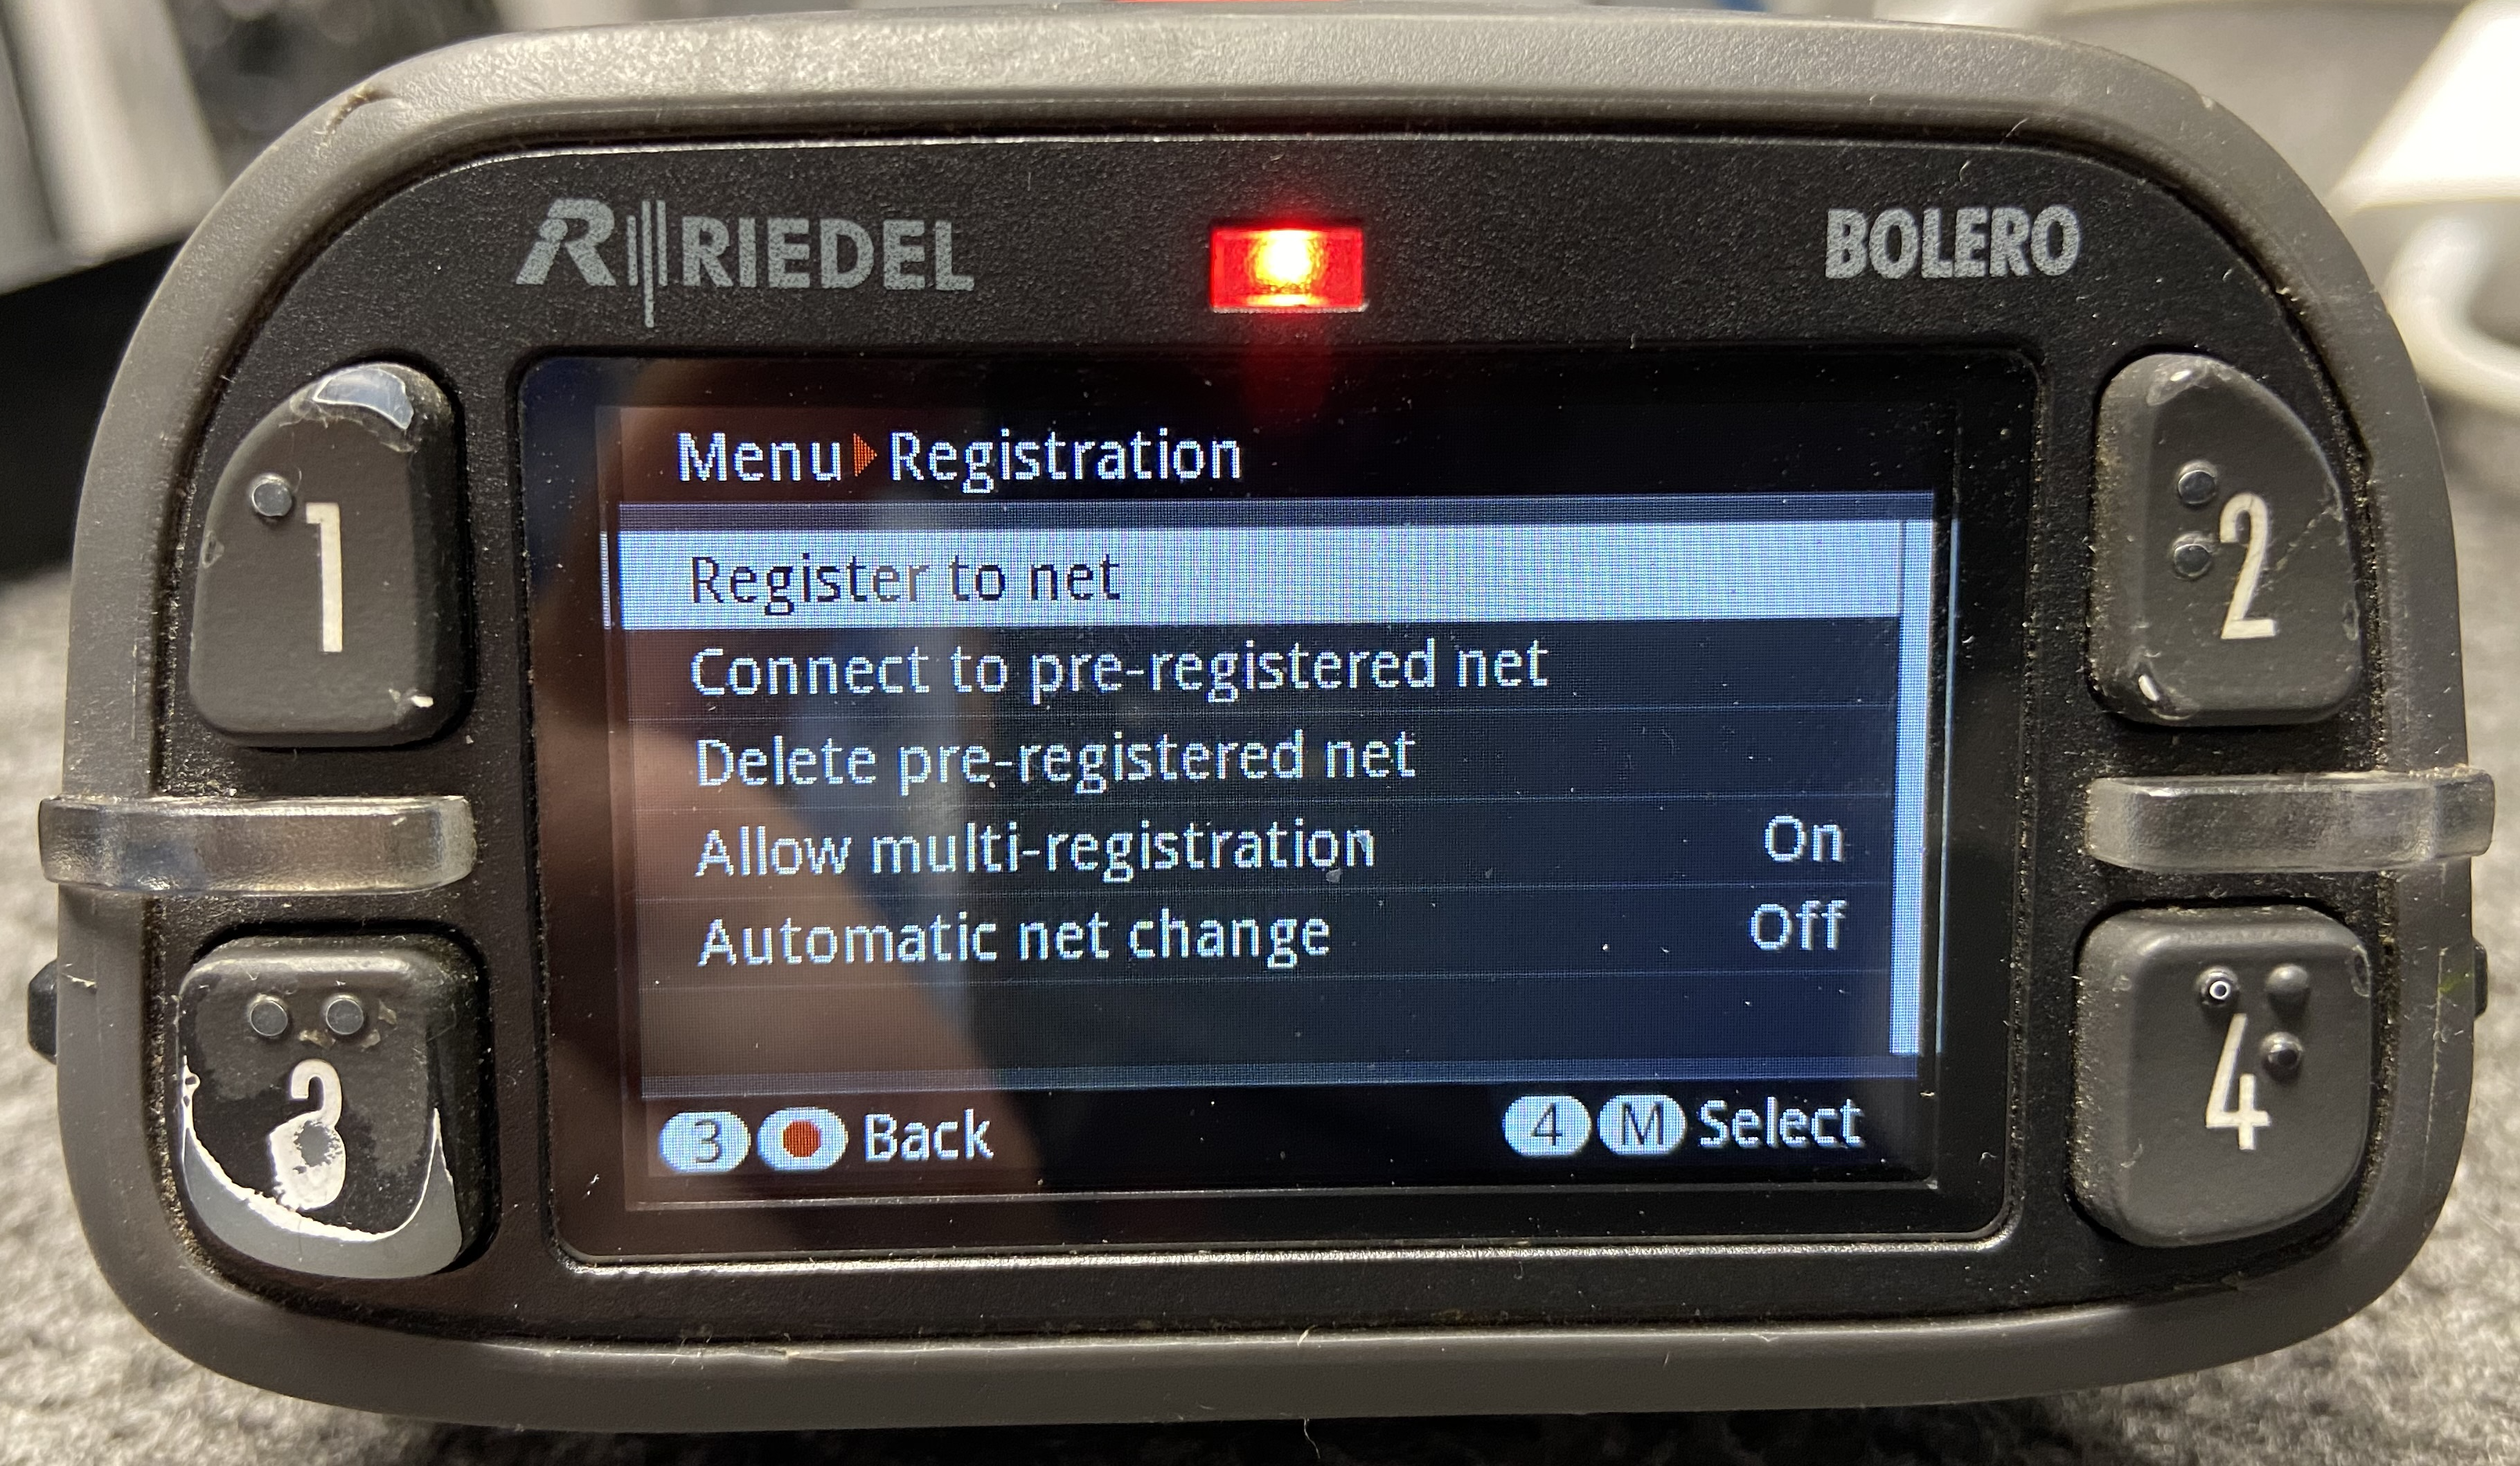
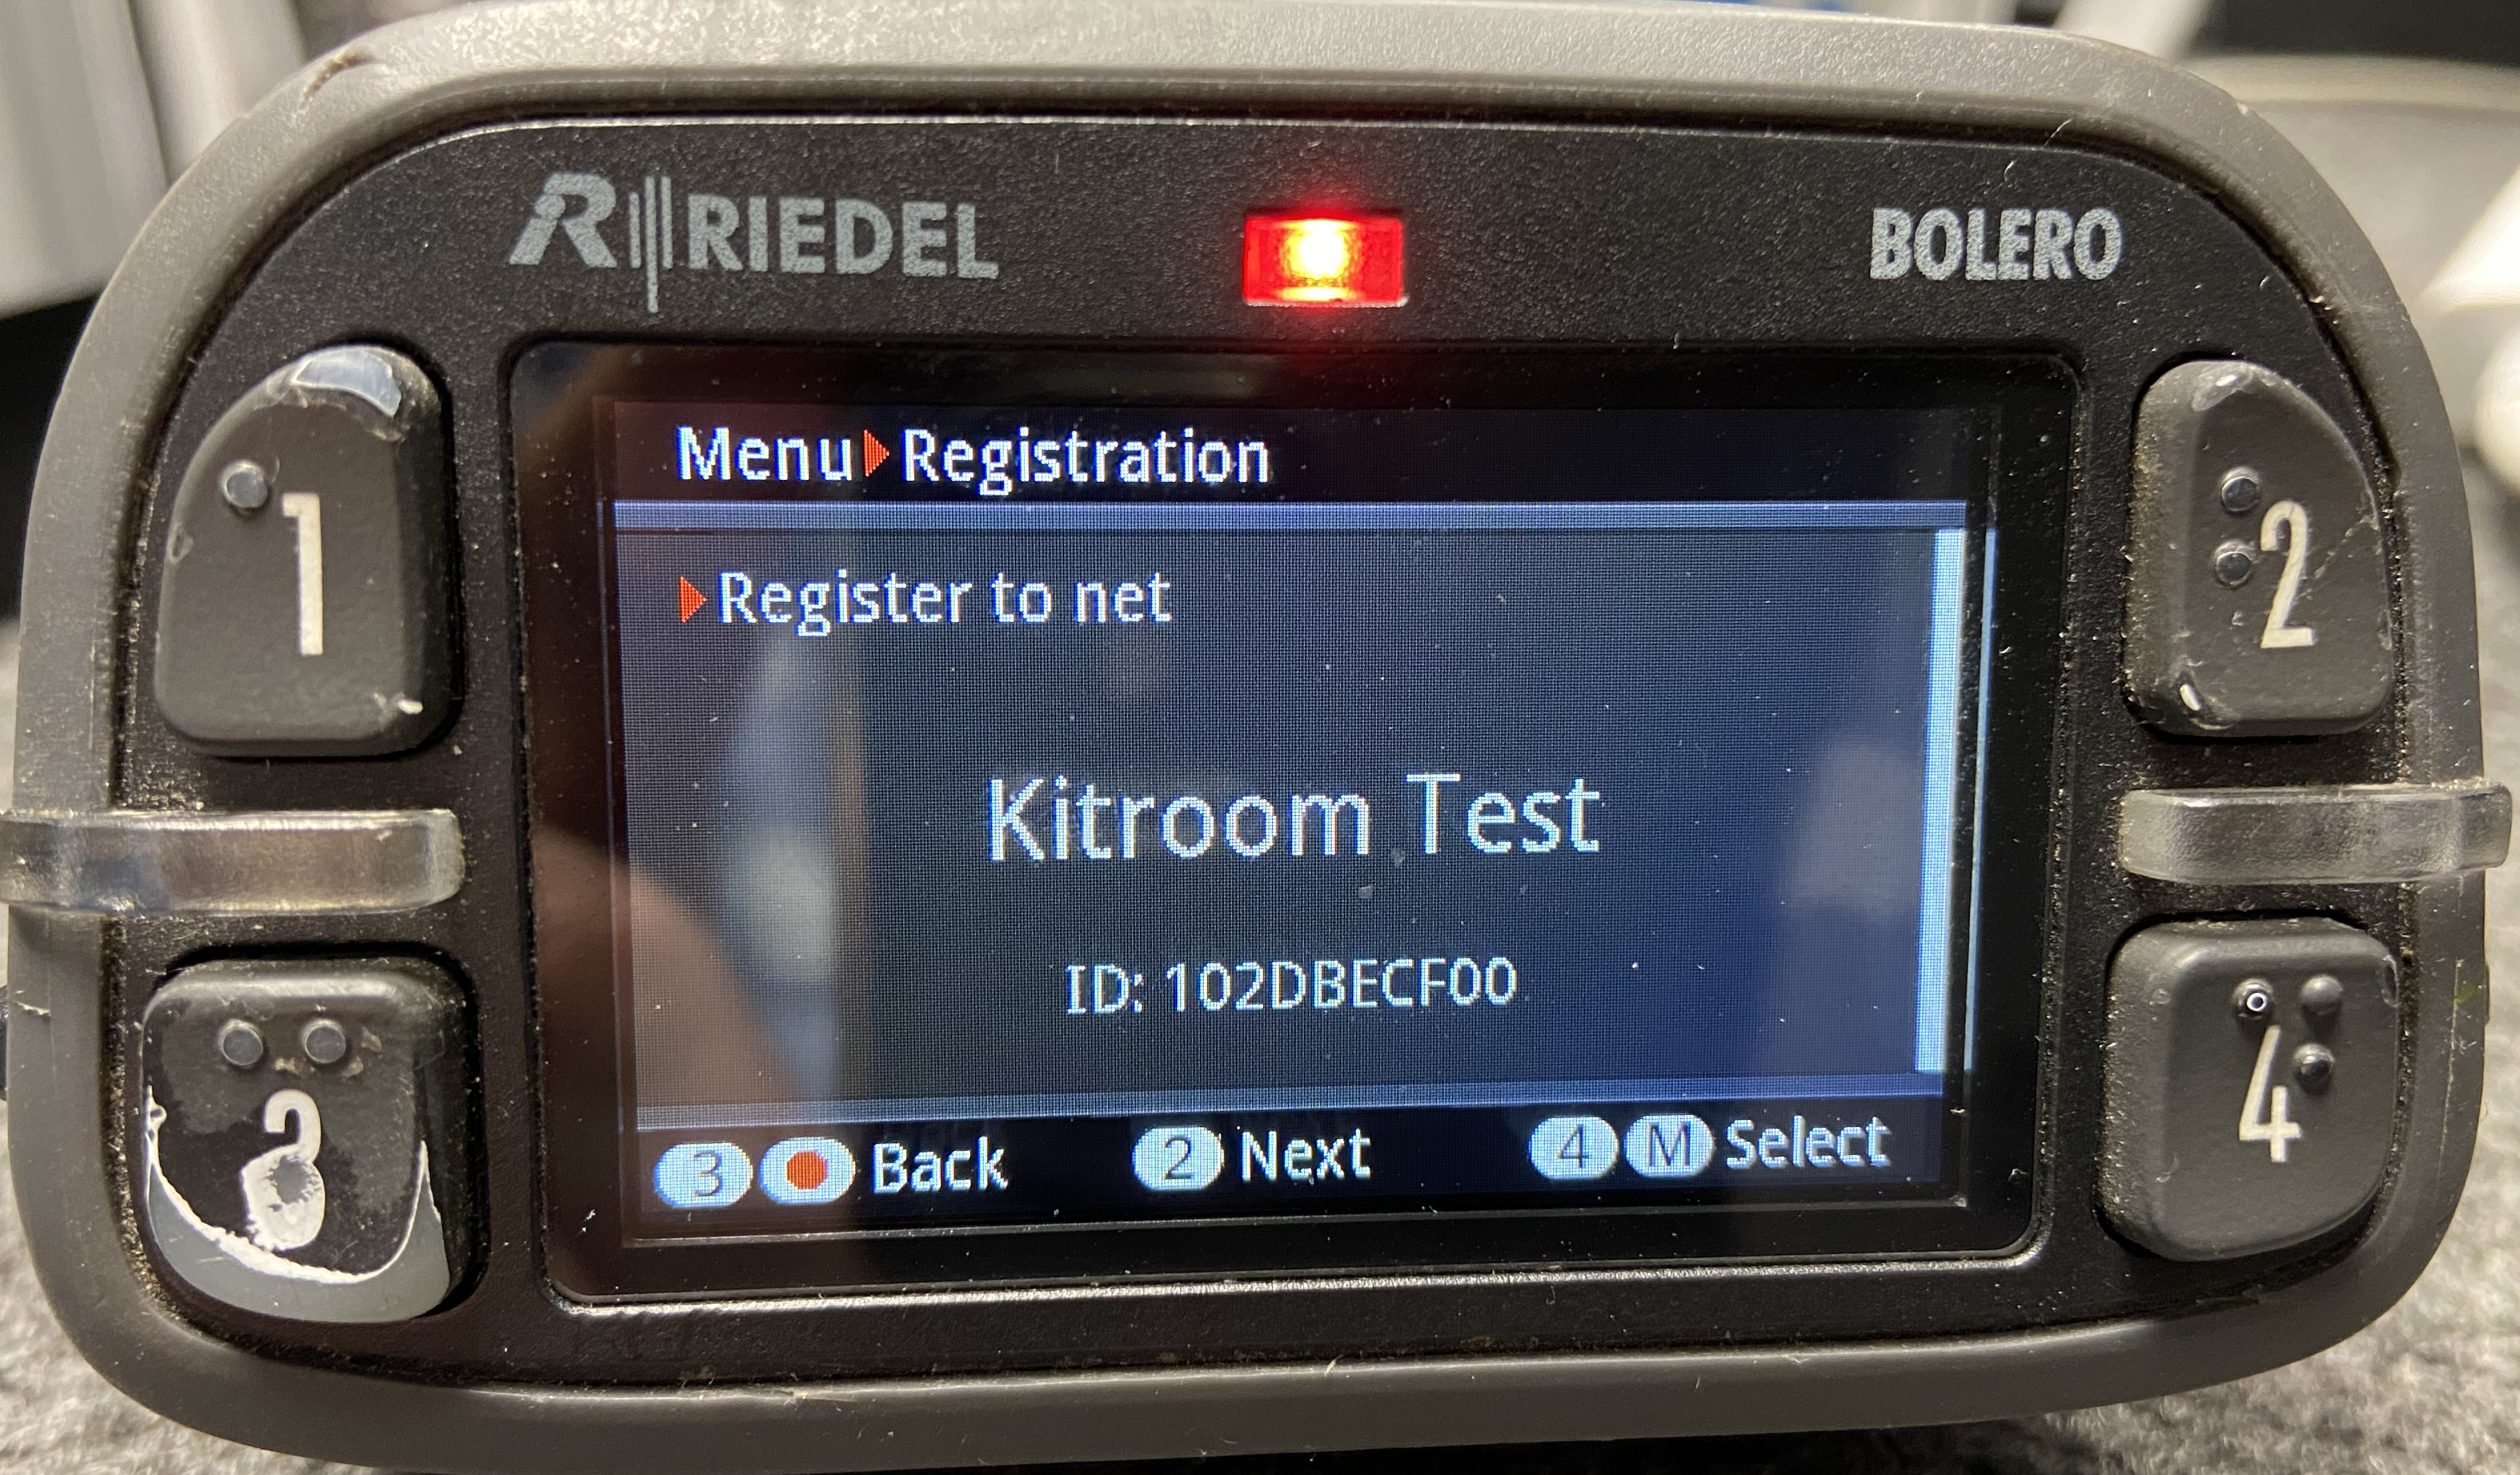
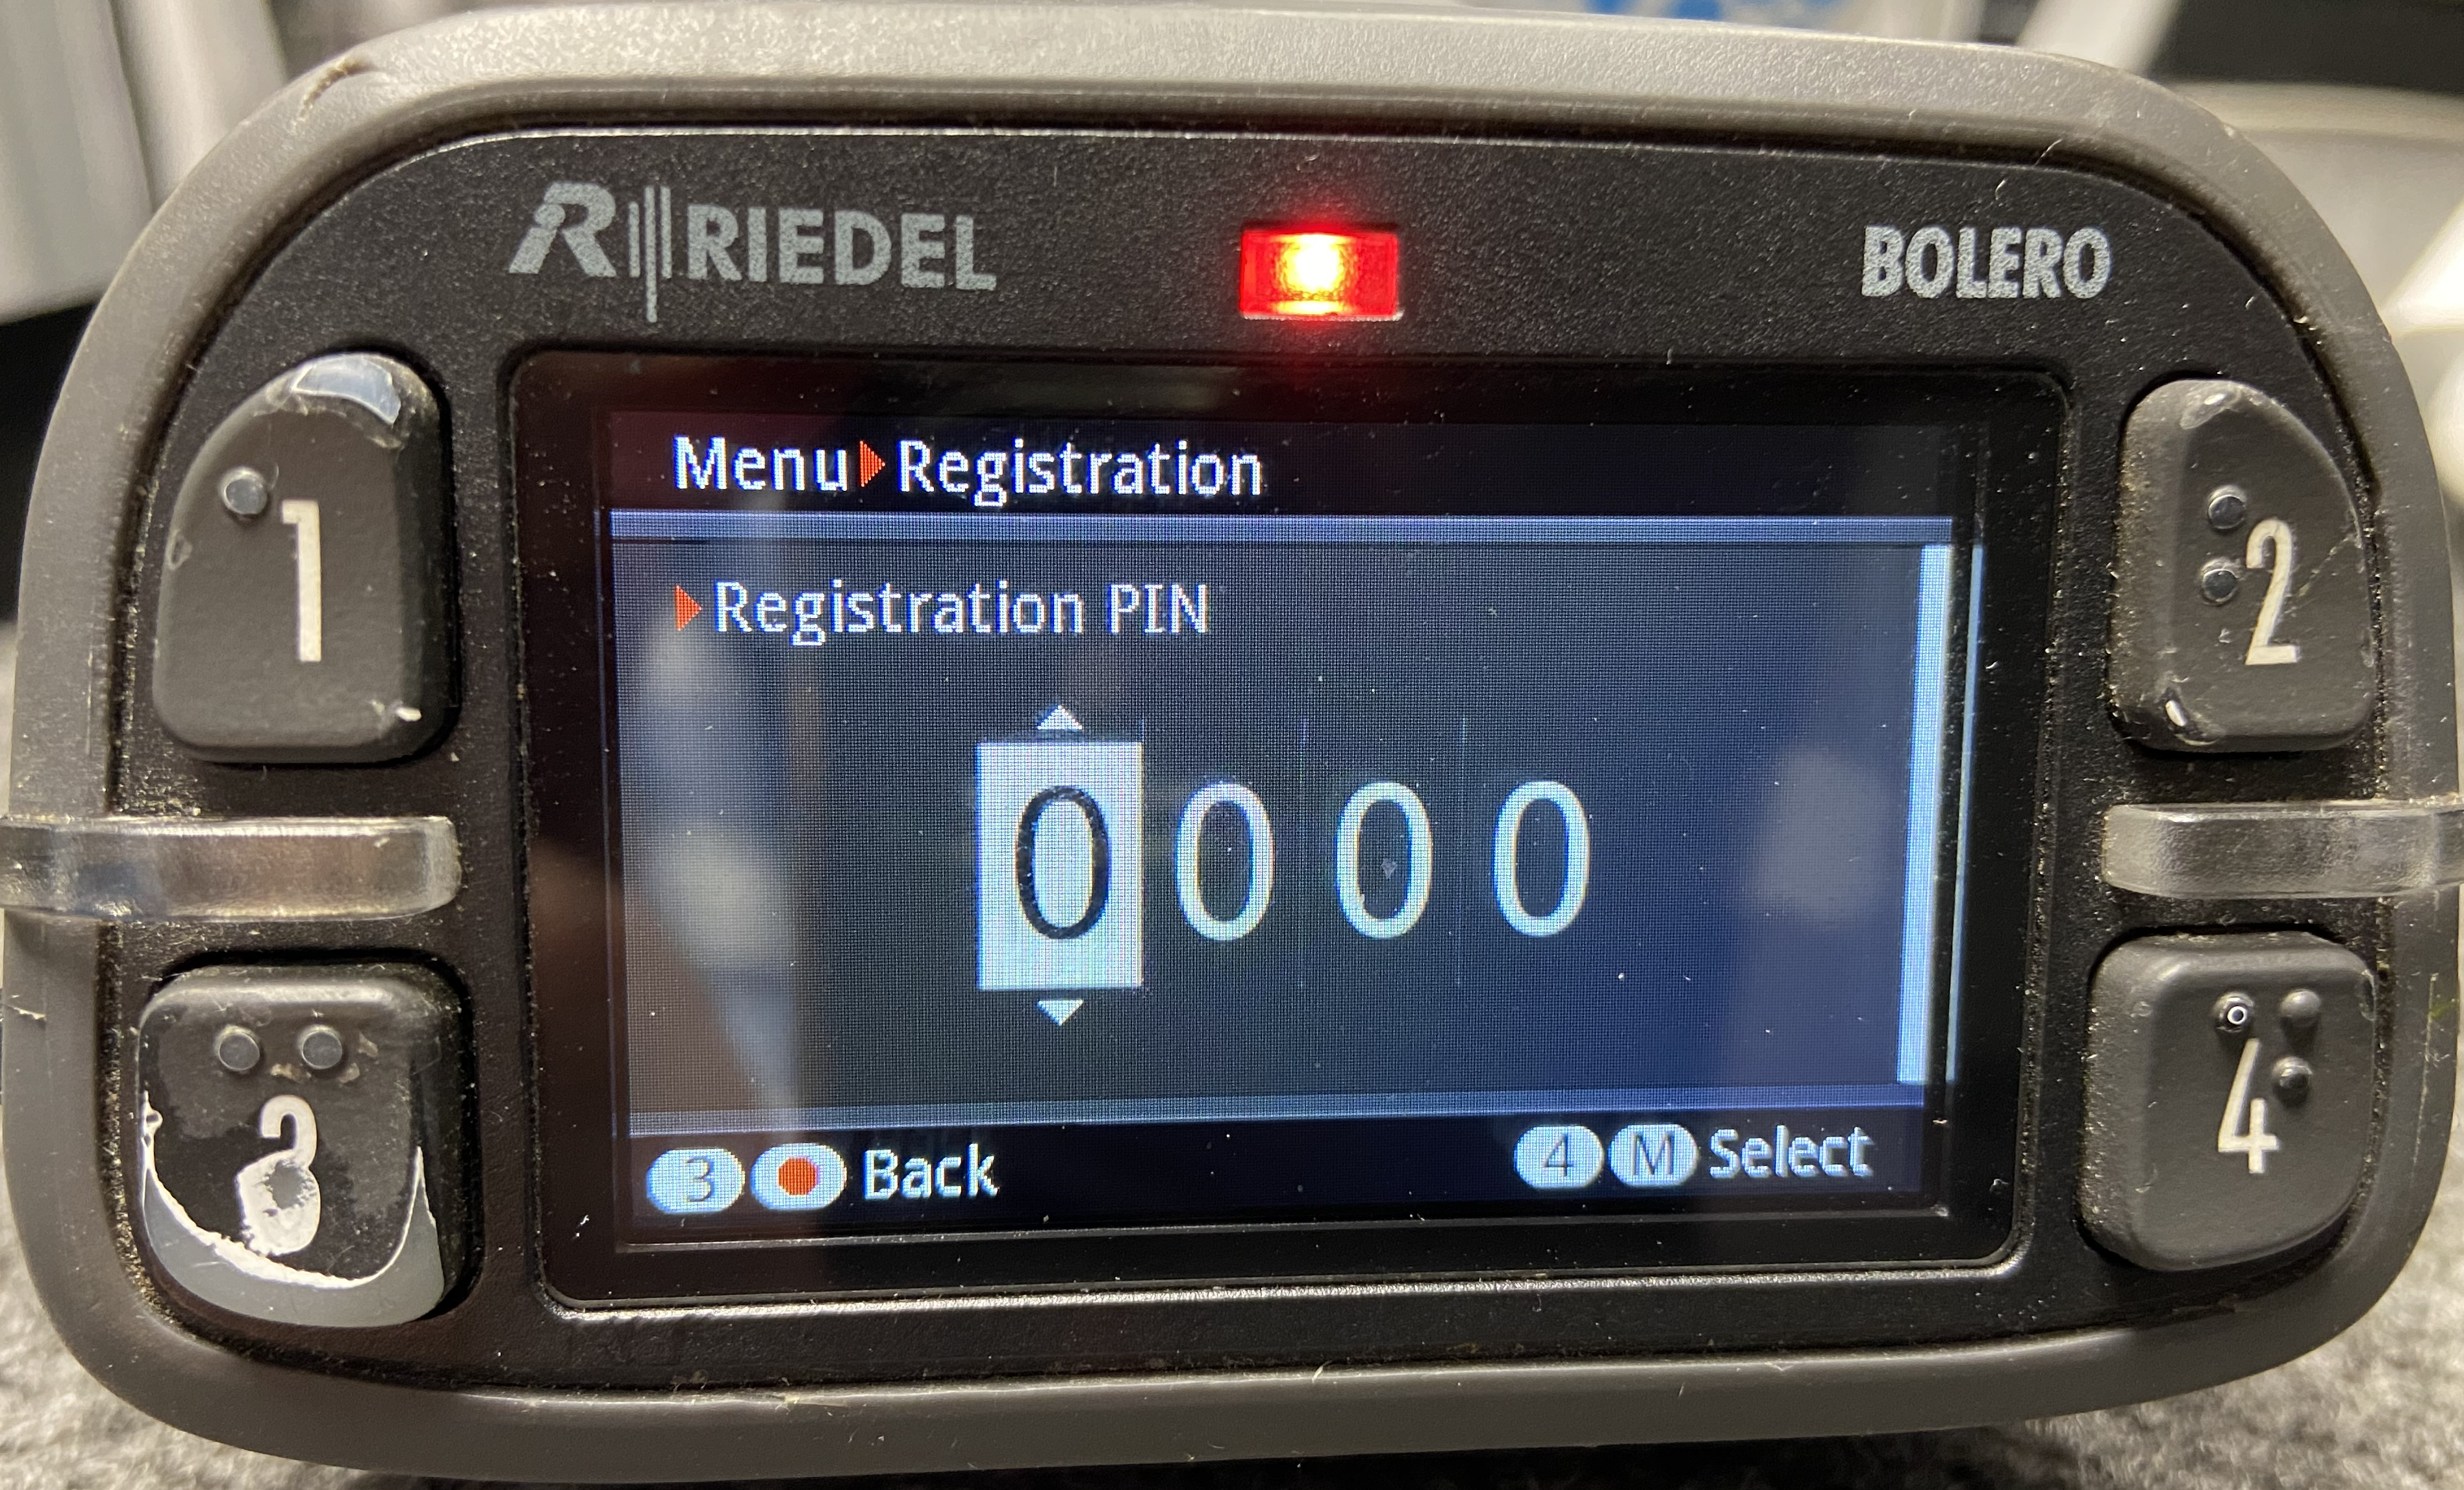
The Beltpack is now connected to the Antenna and can now be configured
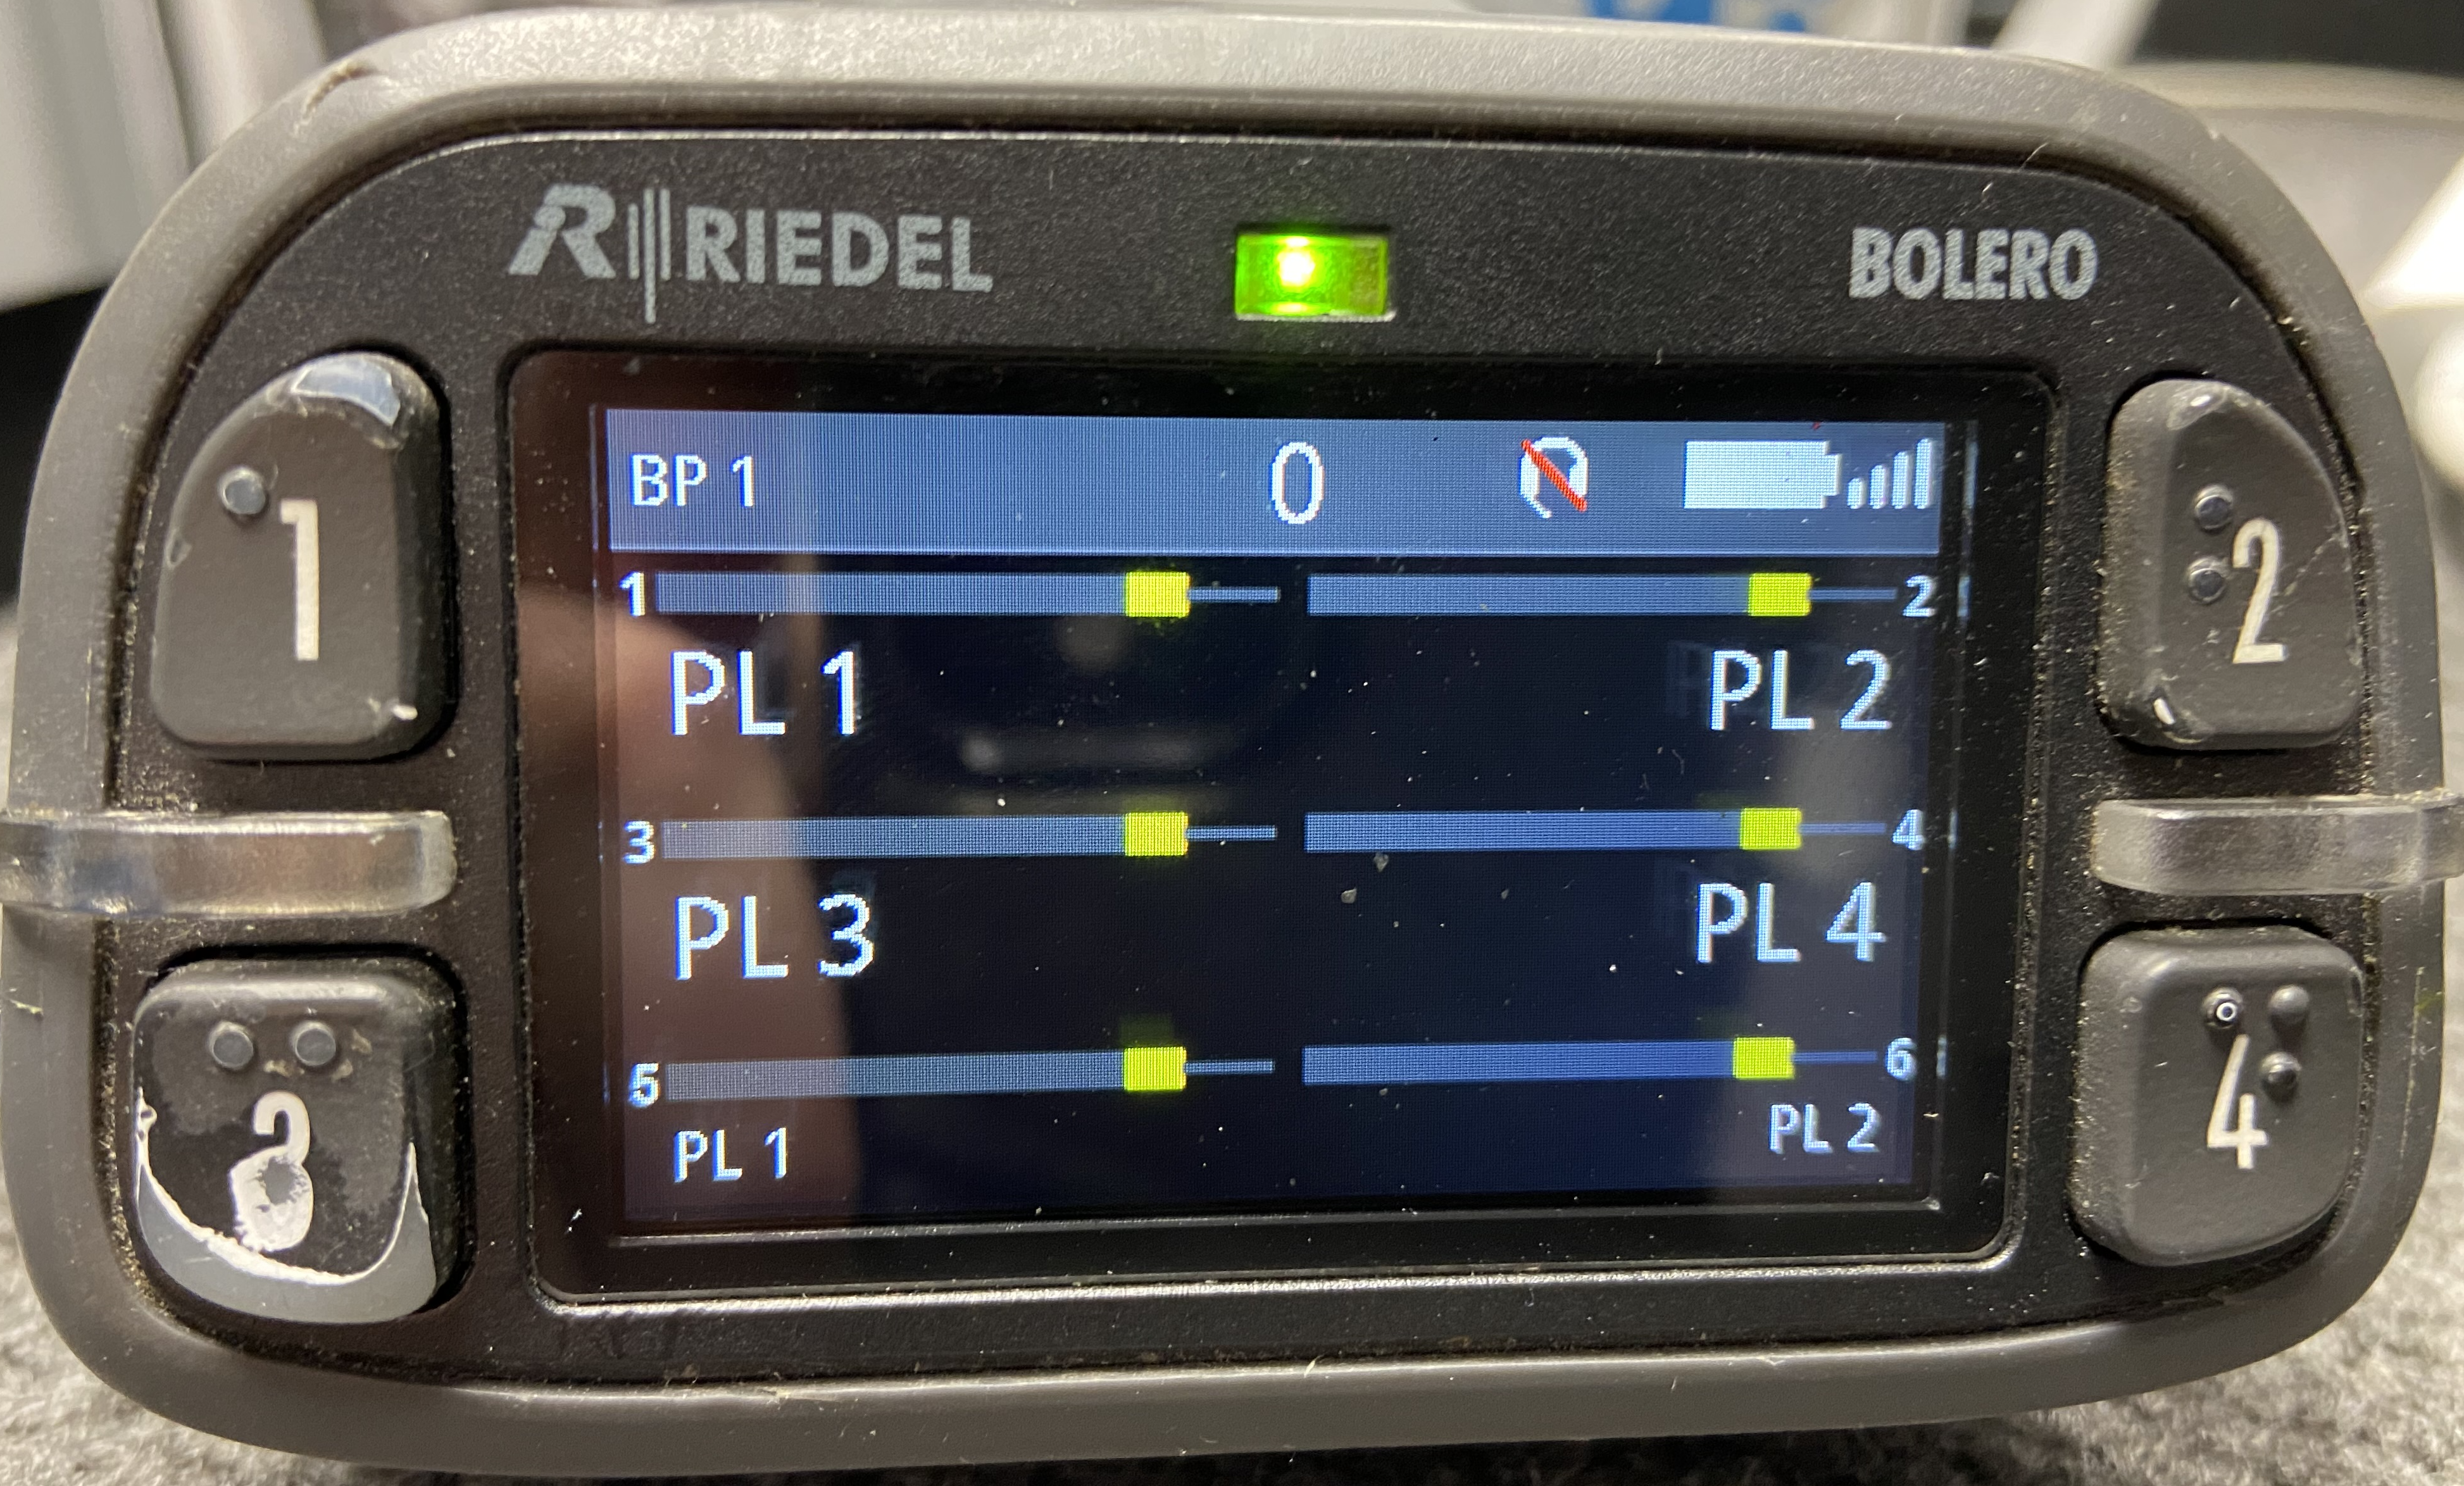
Navigate to the Beltpacks Tab, all registered Beltpacks will be displayed
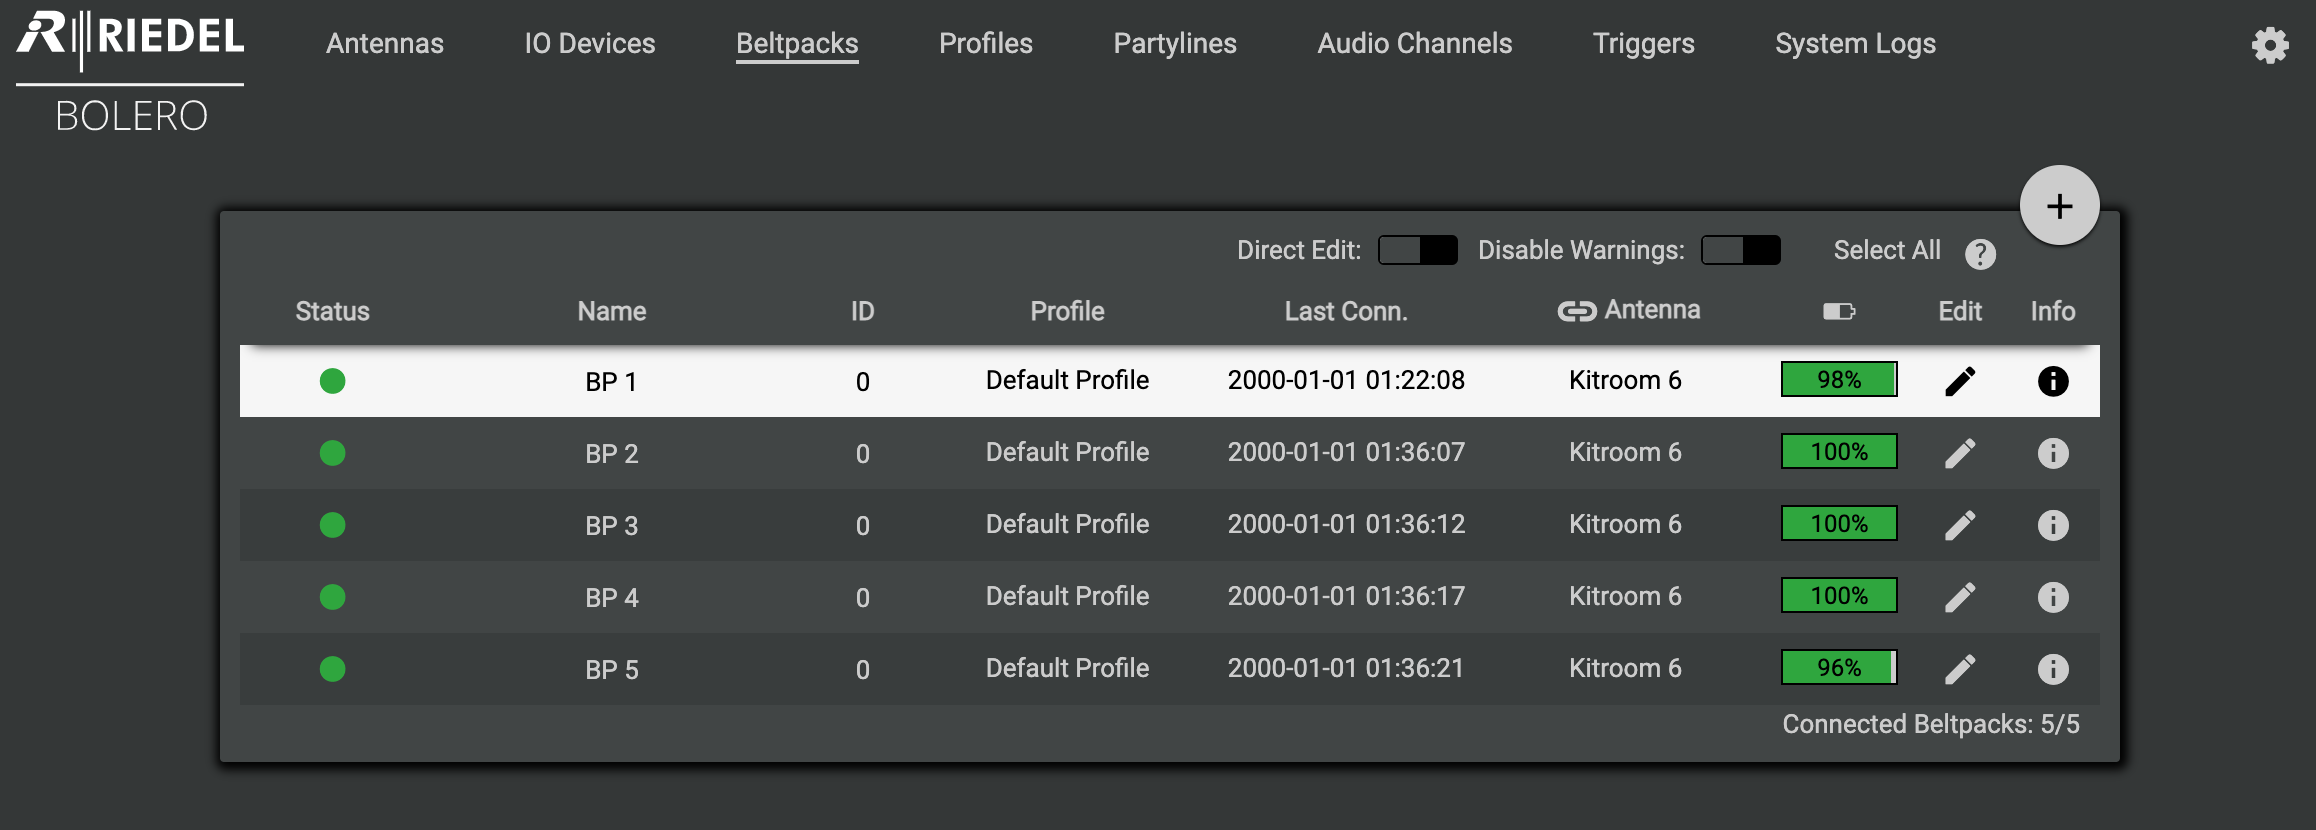
Select all registered Beltpacks followed by the +, Navigate and select Auto-assign User ID's
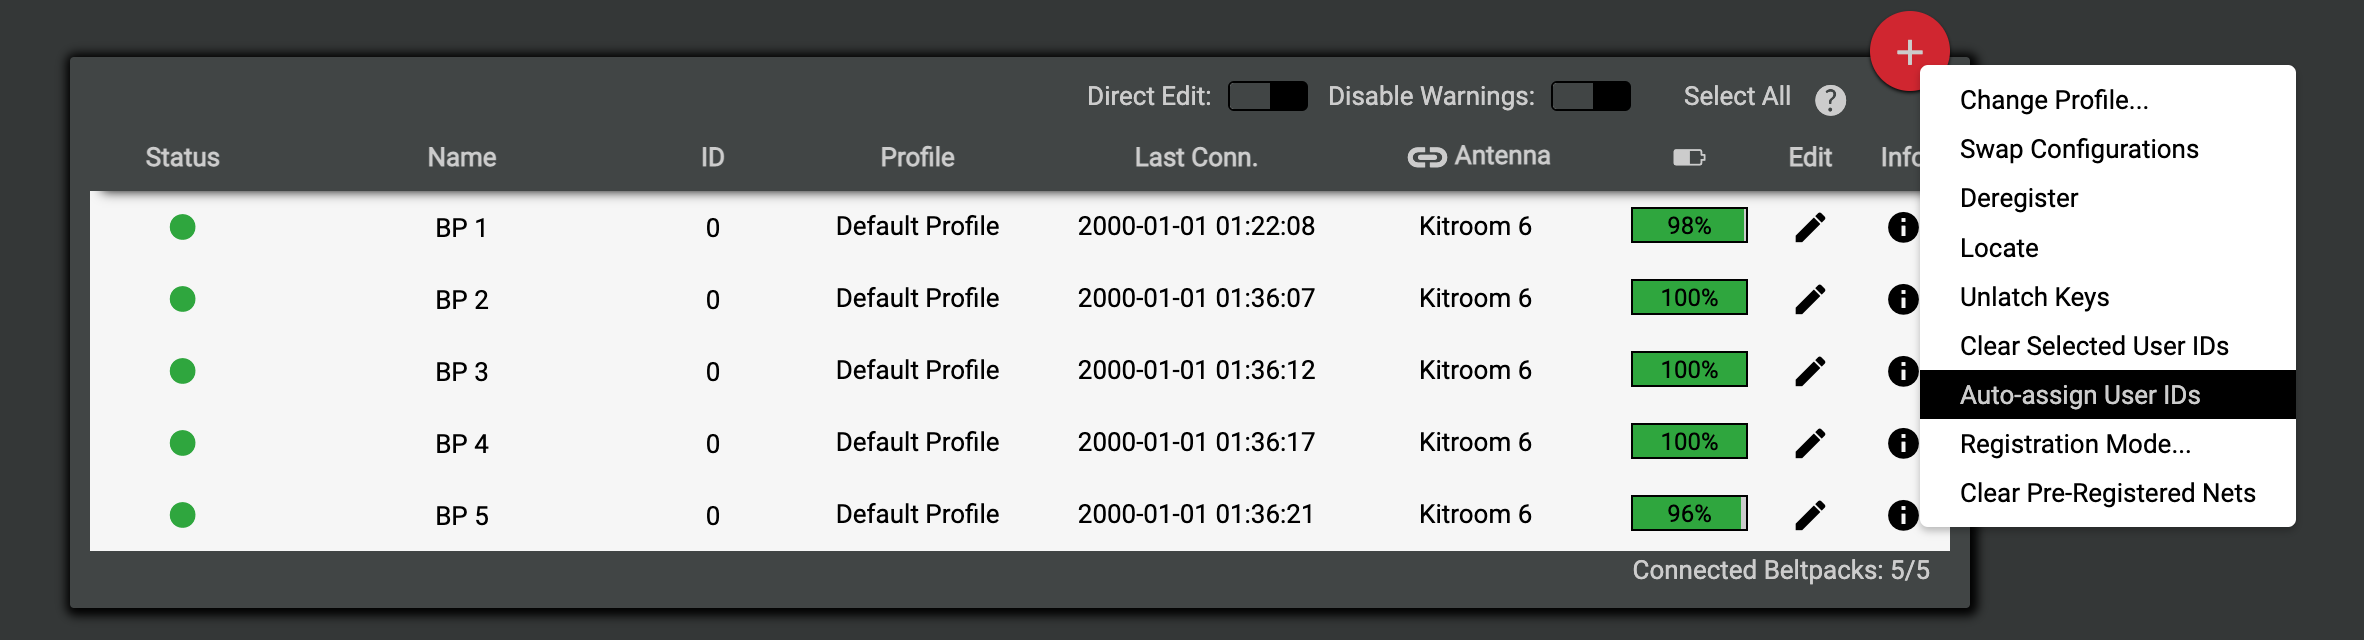
All Beltpacks will now be assigned an ID
Toggle the Direct Edit button and name all of your Beltpacks
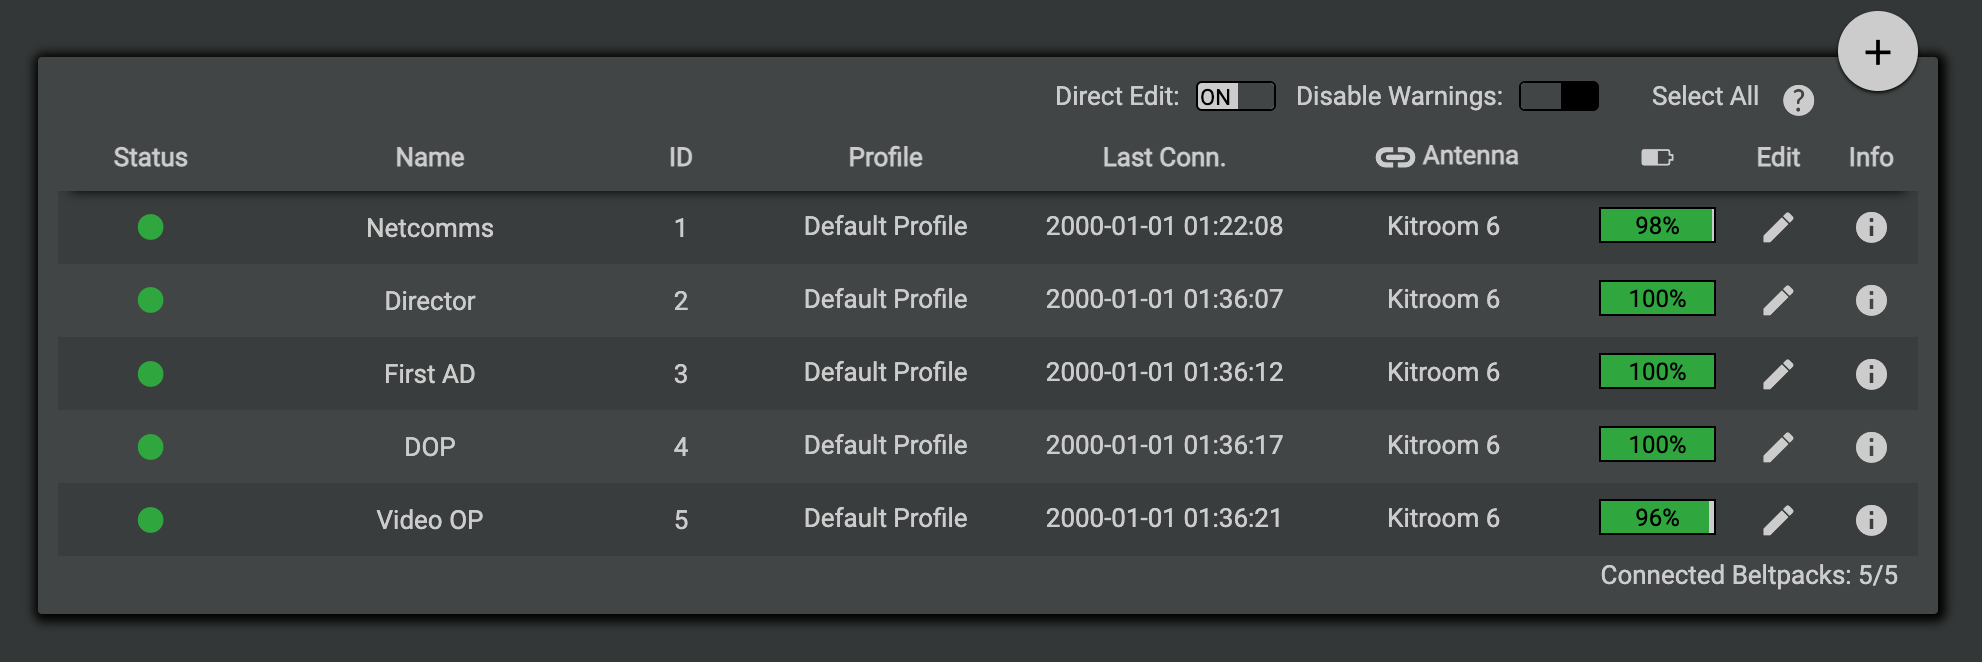
Turn off OTA Registration on the antenna once all beltpacks have been connected.
Network Stream Adapters / IO Devices
The Network Stream Adapter's (NSA) are used for connecting external sources to be configured for use within the Bolero system, Walkie Talkies, VOG, Dante System, etc.
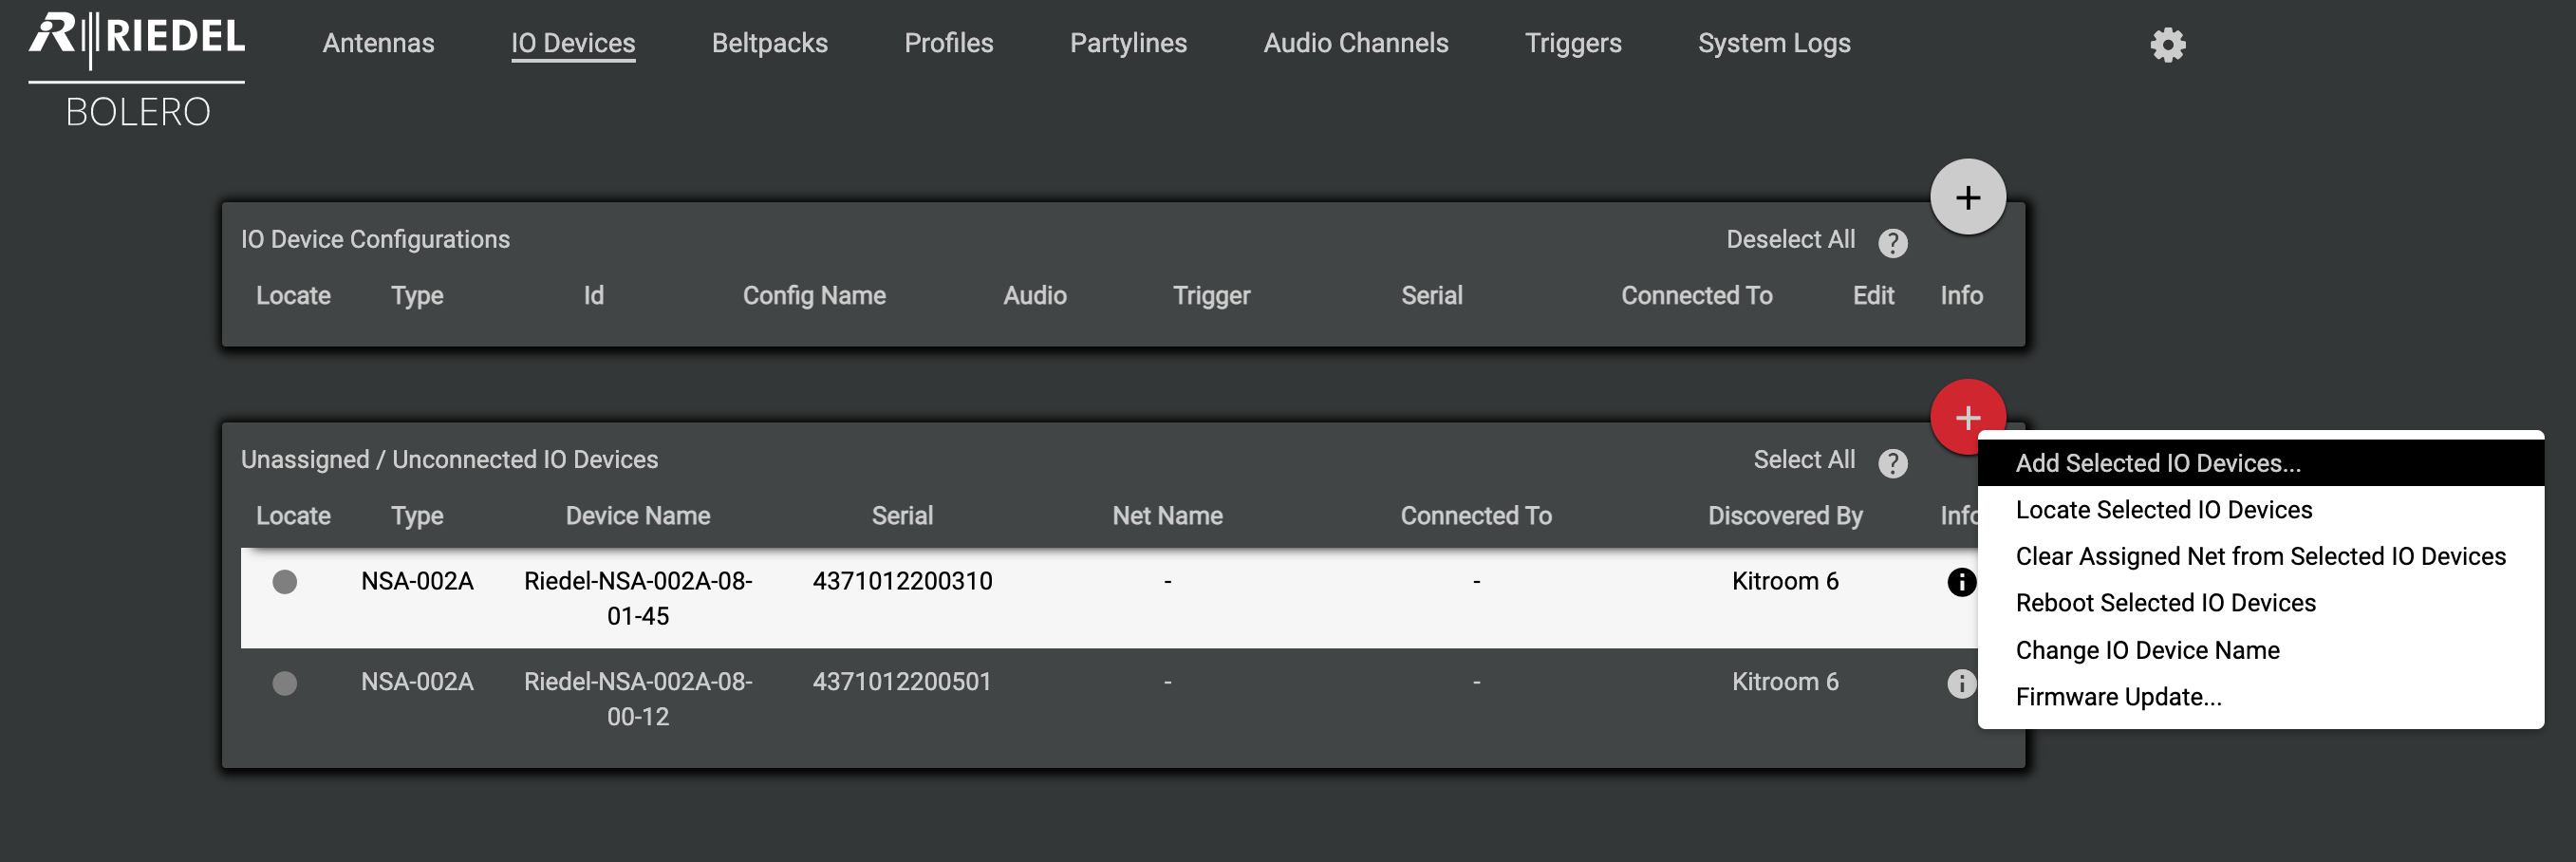
Navigate to the IO Devices Tab
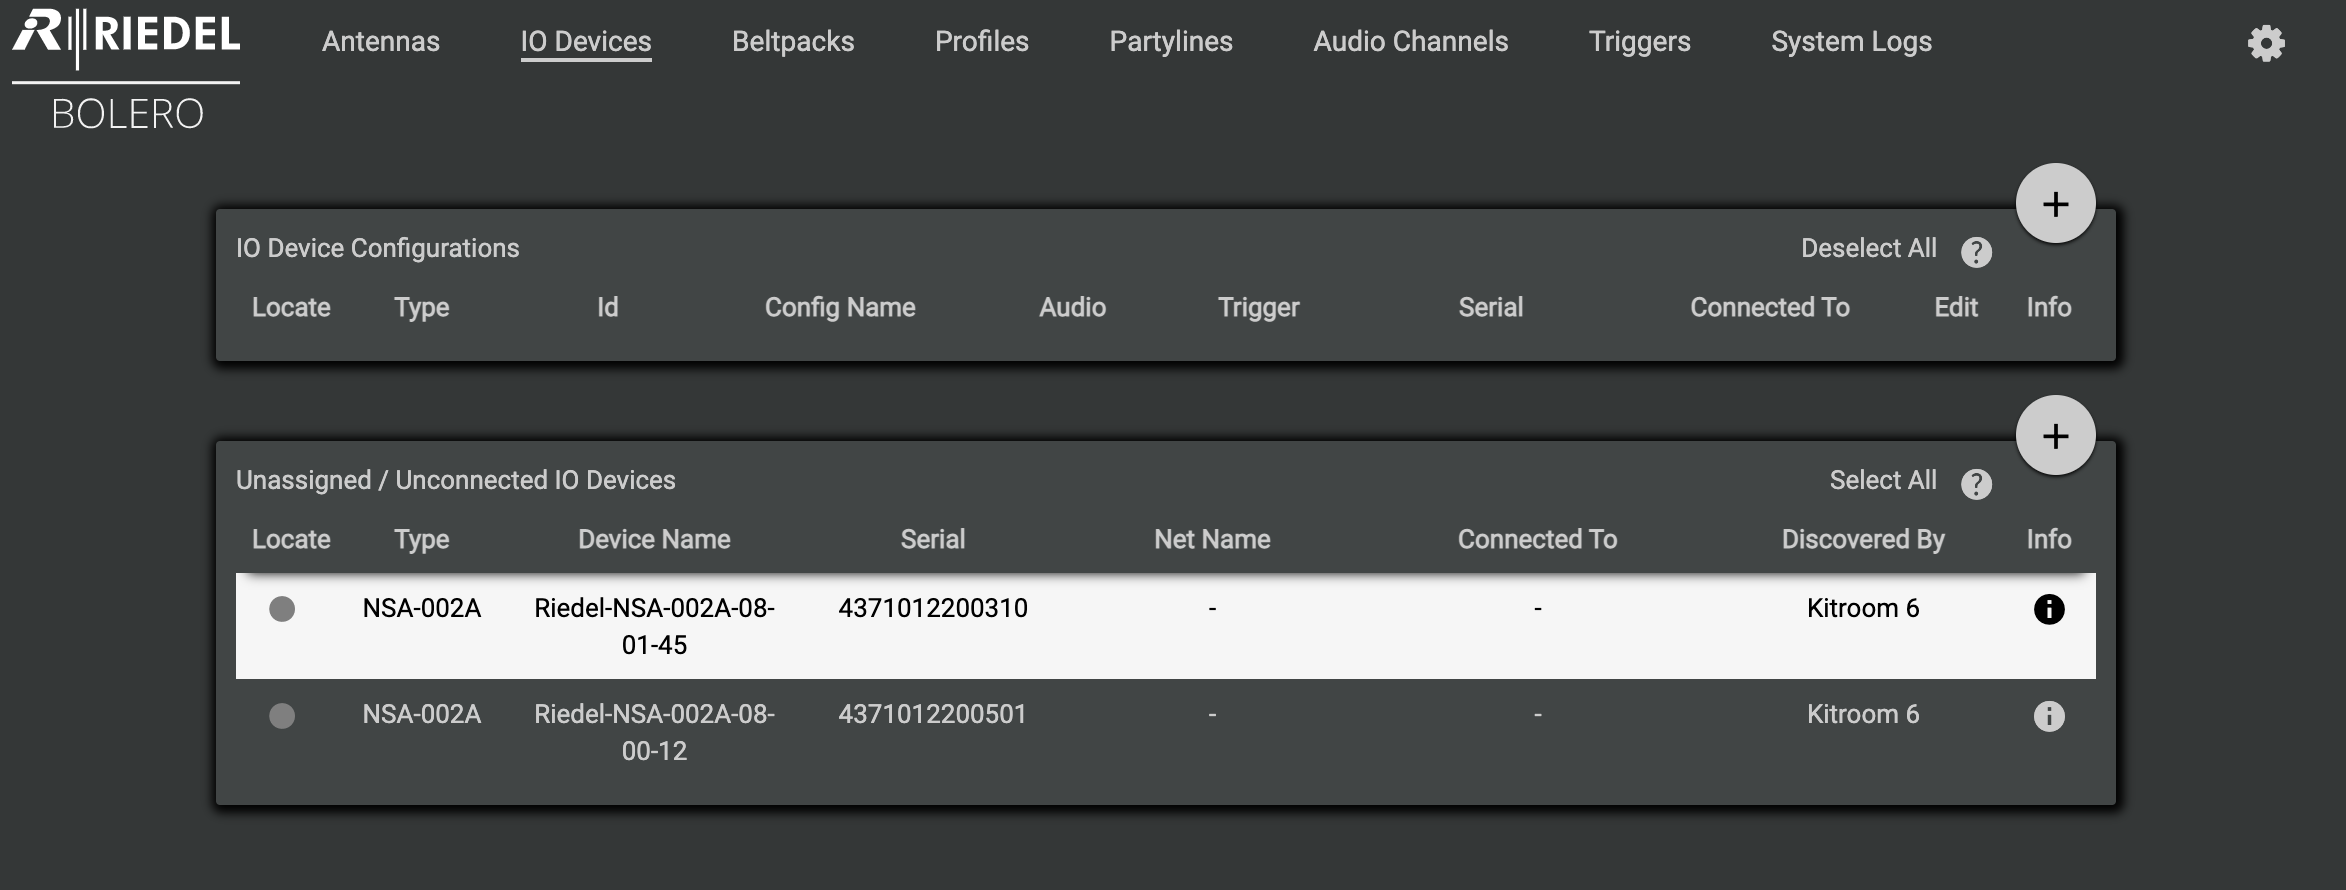
The previously connected NSA's will be available to connect to your Network
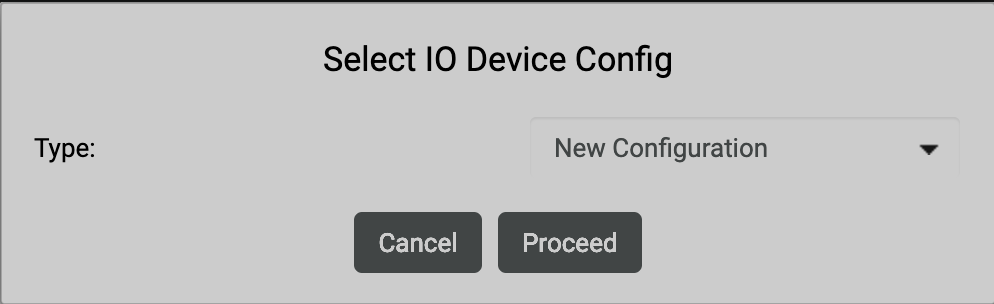
Highlight the unassigned NSA's (1 at a time) and select + followed by Add Selected IO Devices…
Proceed
Name the NSA
In addition, you can configure the Audio Channels and Triggers, this can be modified in the future. Just leave with the default settings for now
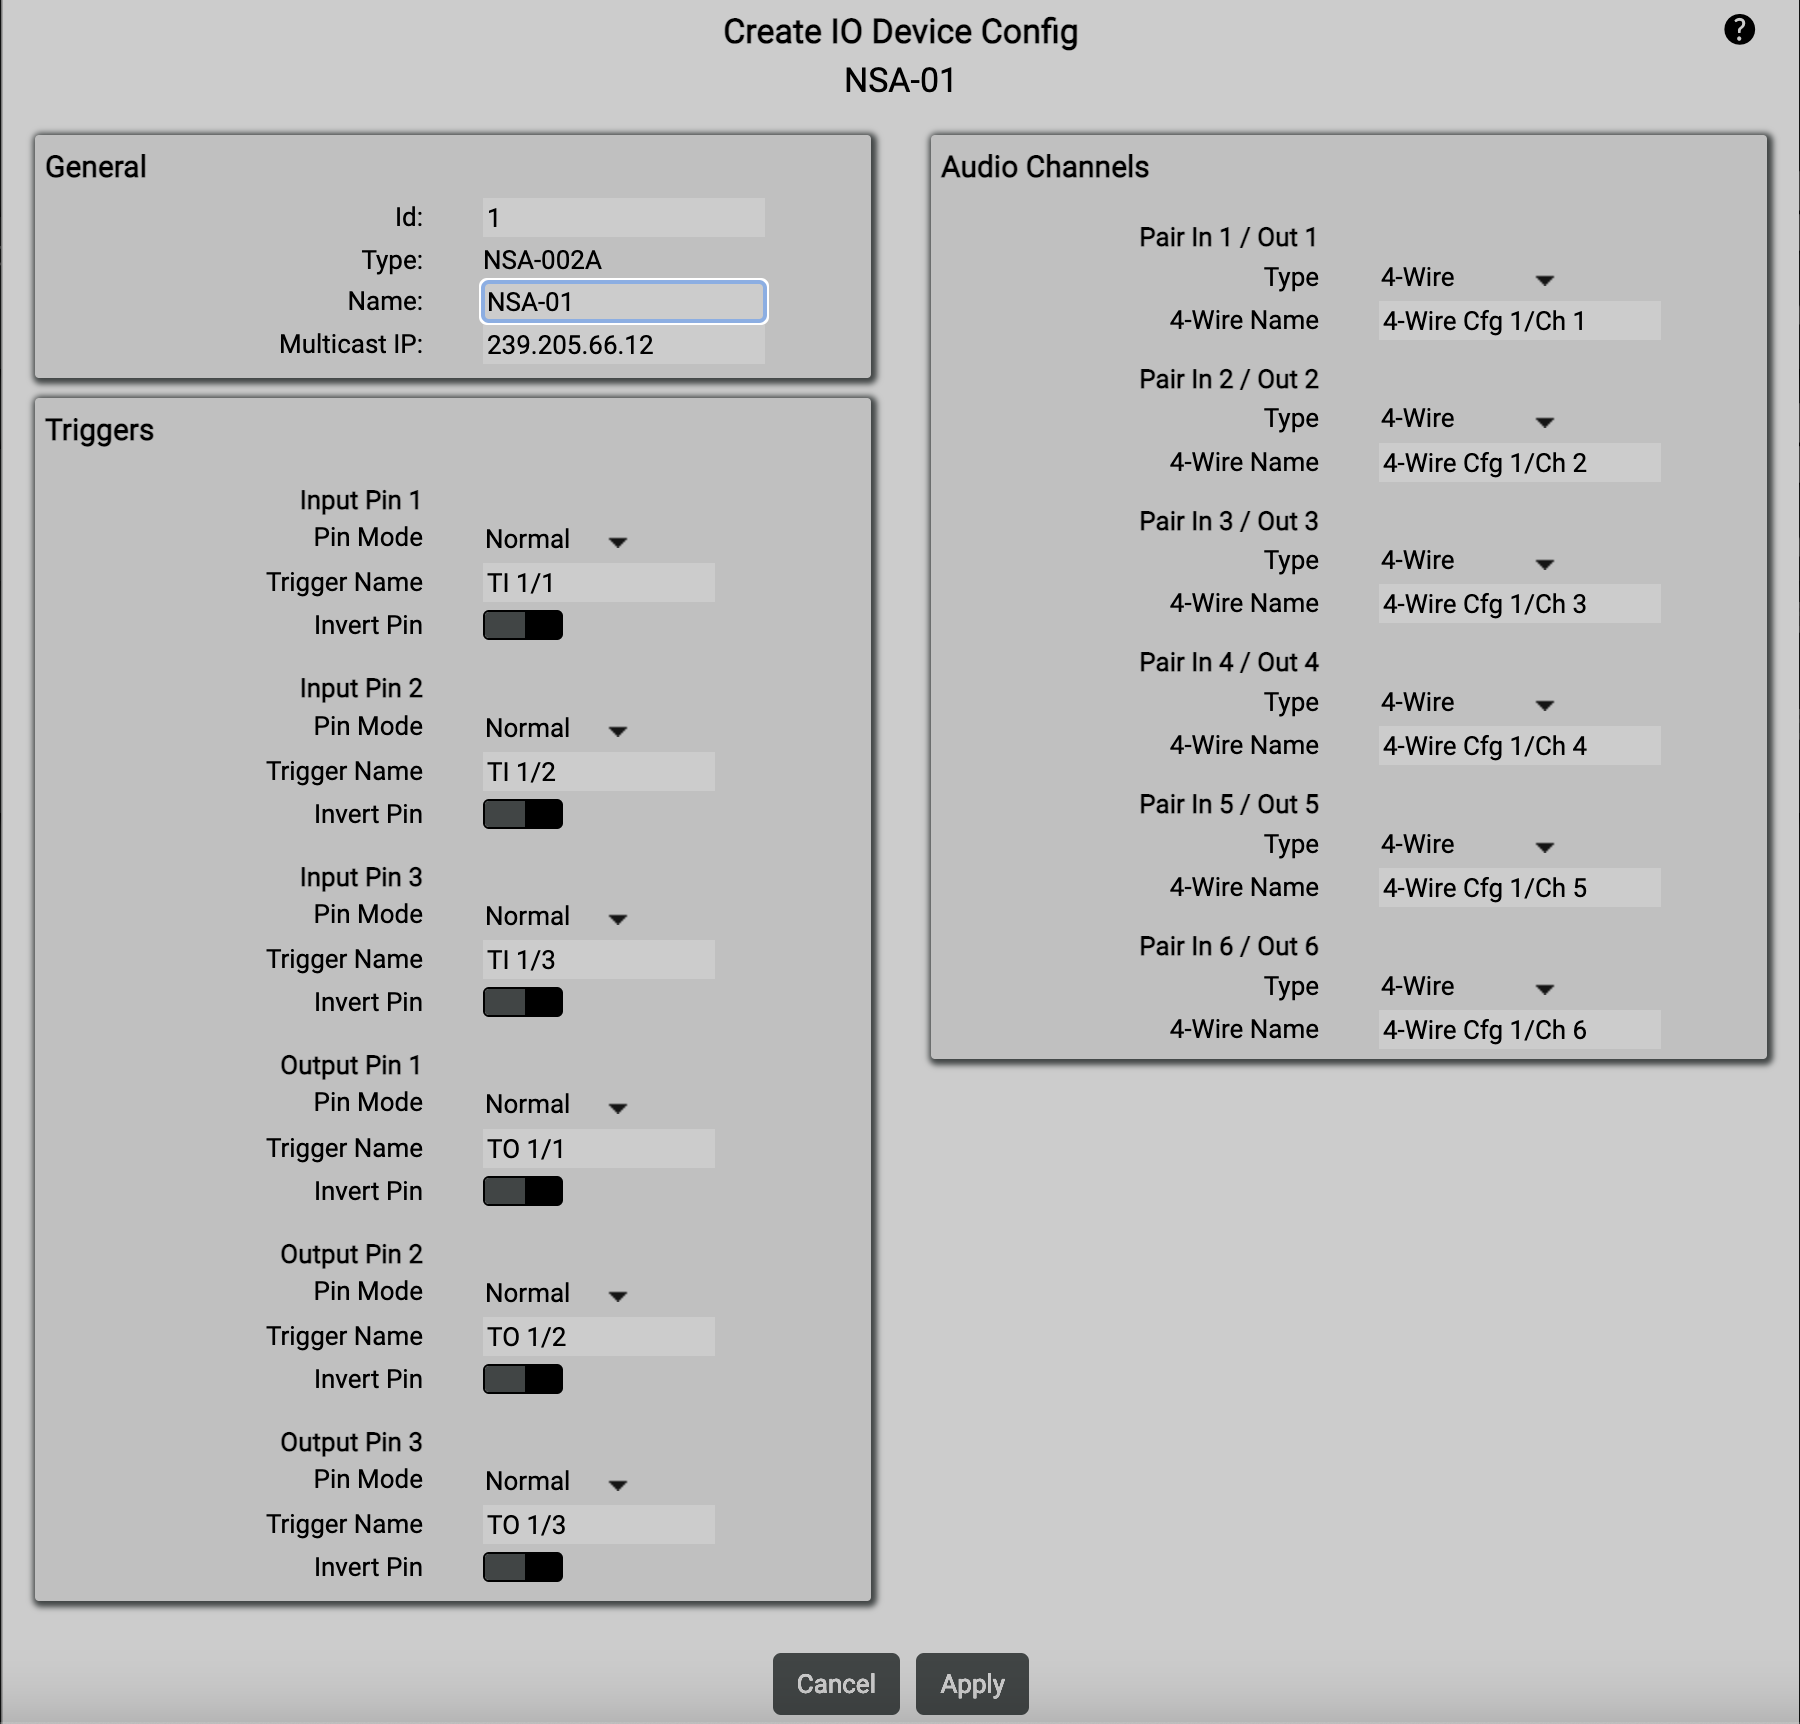
Create 10 Device Config NSA-Ol General Id: Type: N...
For information around integrating the Riface DM4600 radios with the Bolero system, follow this Guide: How to: Bolero And Riface Radio Integration
For information around integrating the Tait Base Station with the Bolero system, follow this Guide: How to: Bolero And Tait Integration
Configuration
Partylines
Partylines are "Conference/Group's"; these are configured so that a pool of users can Talk and Listen at the same time like on a conference call.
To create a Partyline, Navigate to the Partylines Tab and select the + followed by Create Partyline…
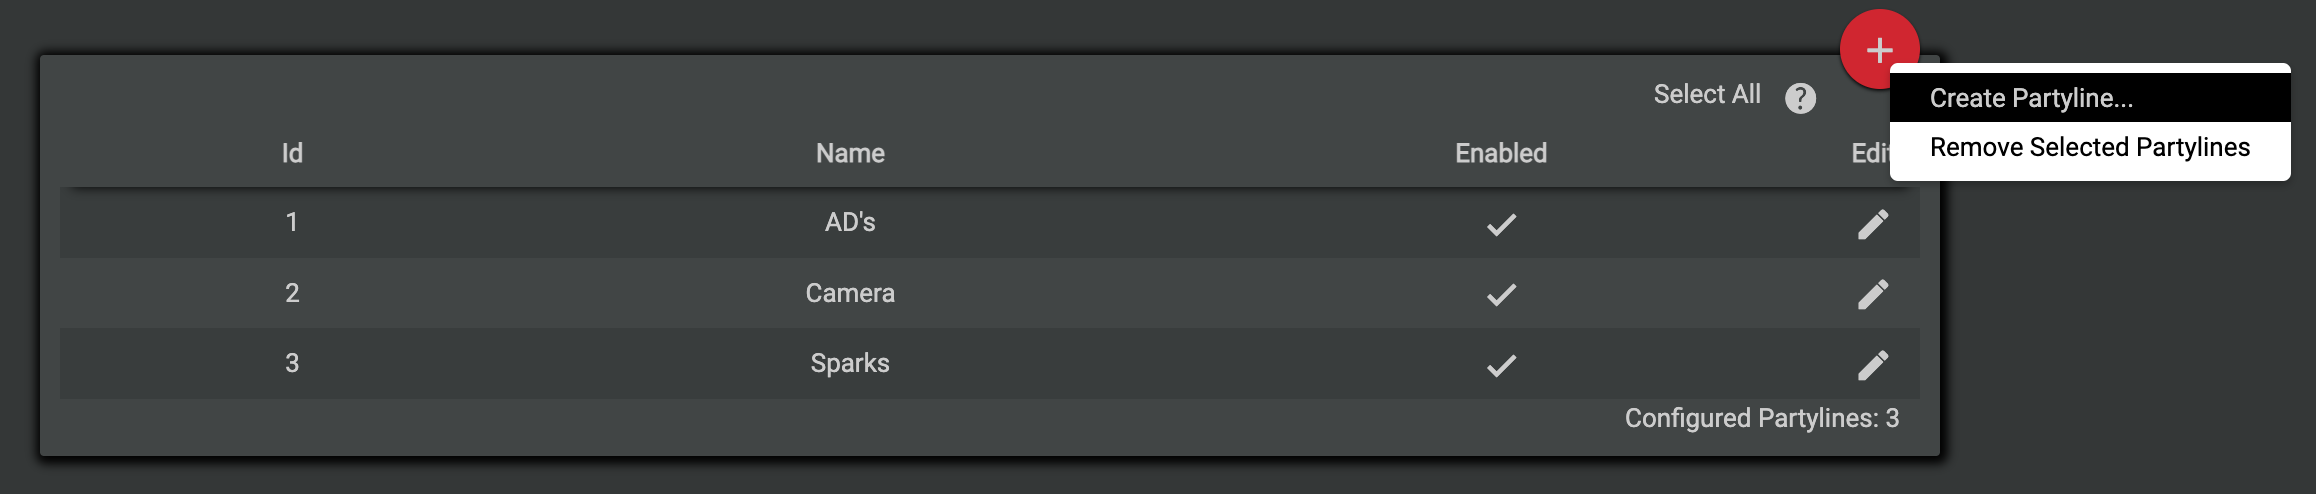
Name the Partyline and assign an ID

Profiles
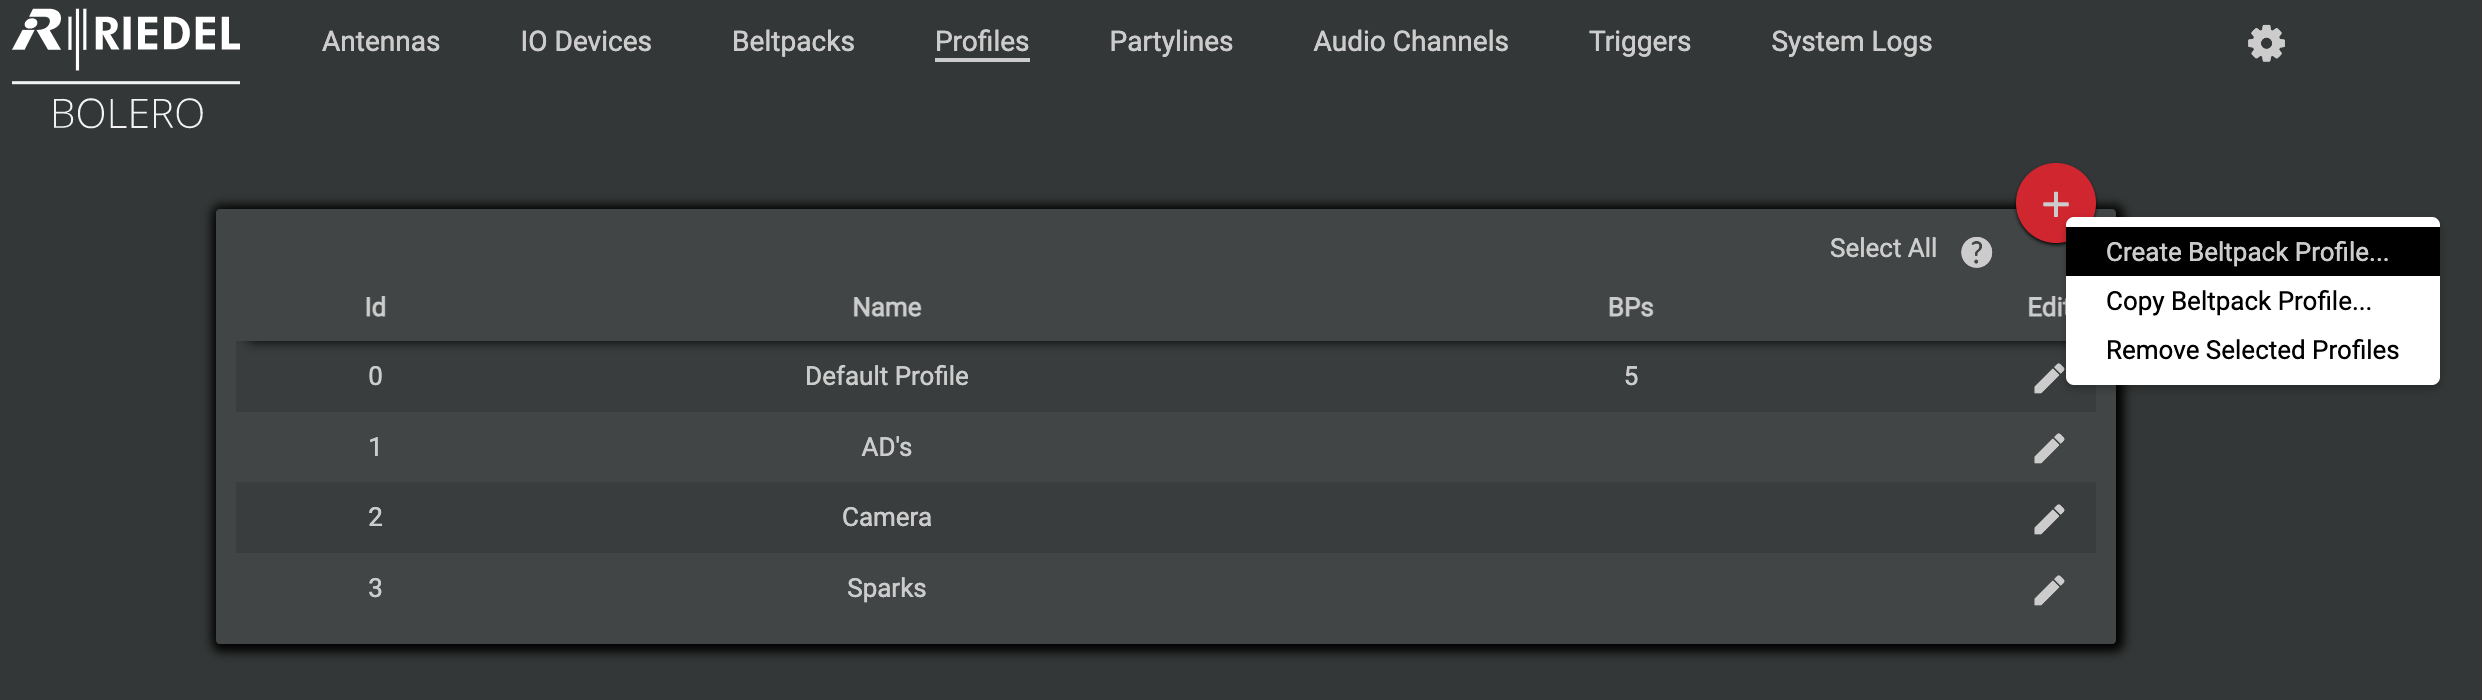
Within the Profiles tab you can configure Group Profiles which can be easily assigned to Beltpacks.
To Create a new Profile select the + followed by Create Beltpack Profile…
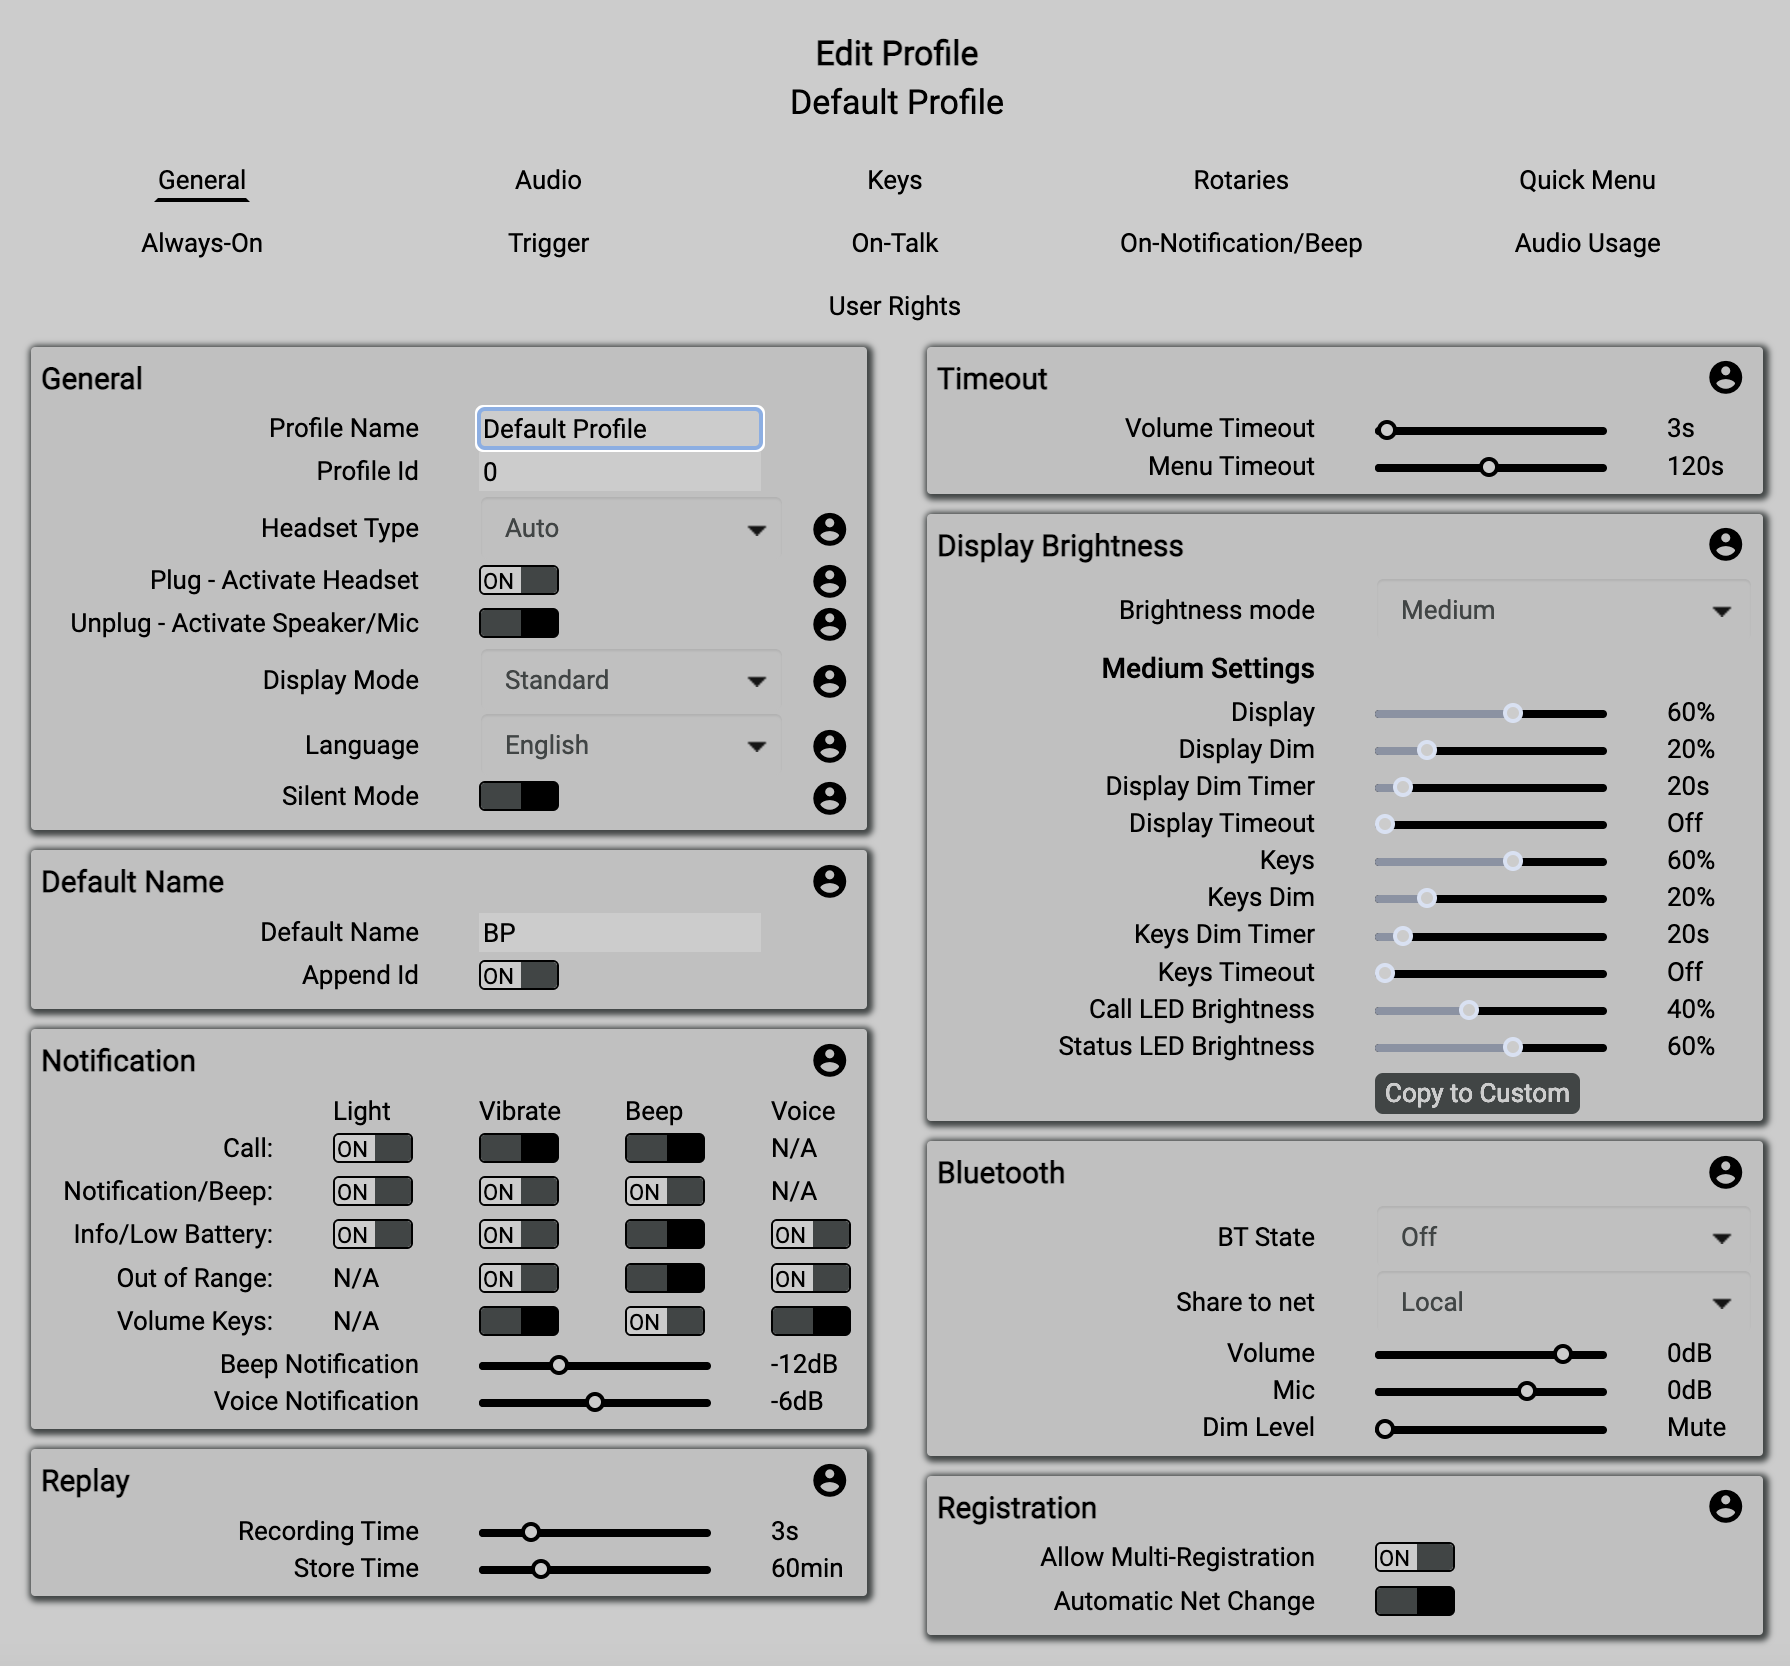
General
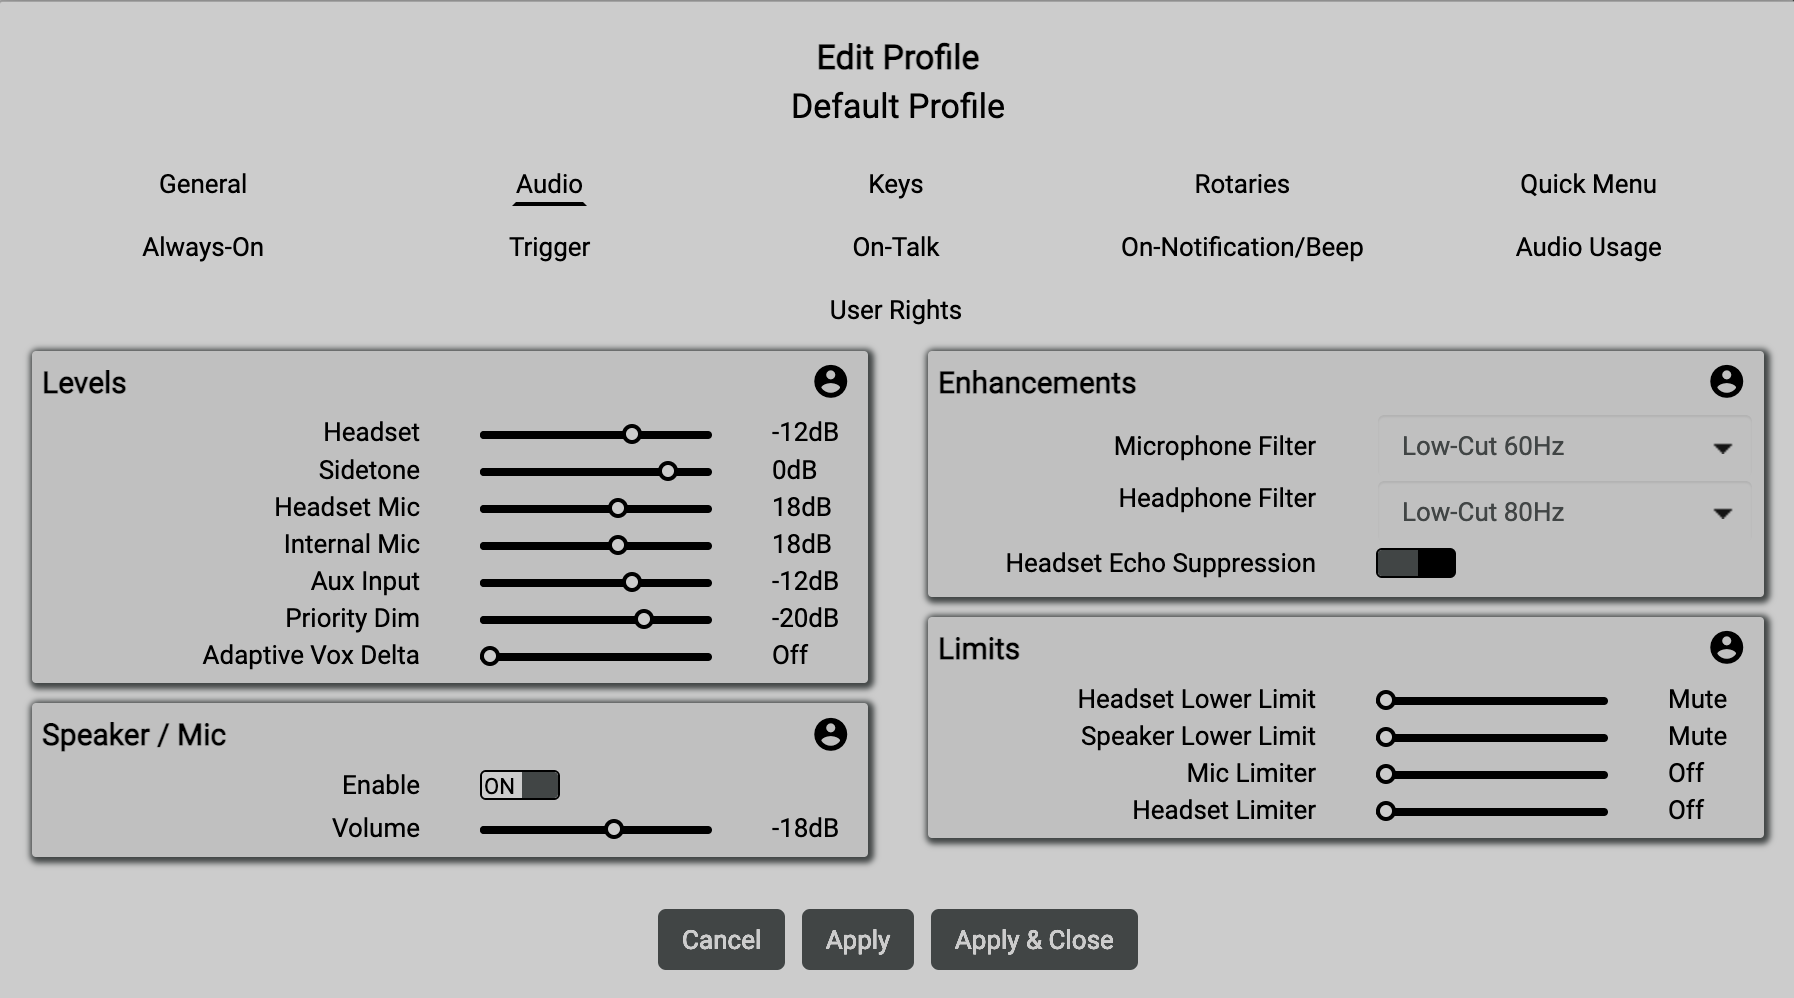
Audio
Keys
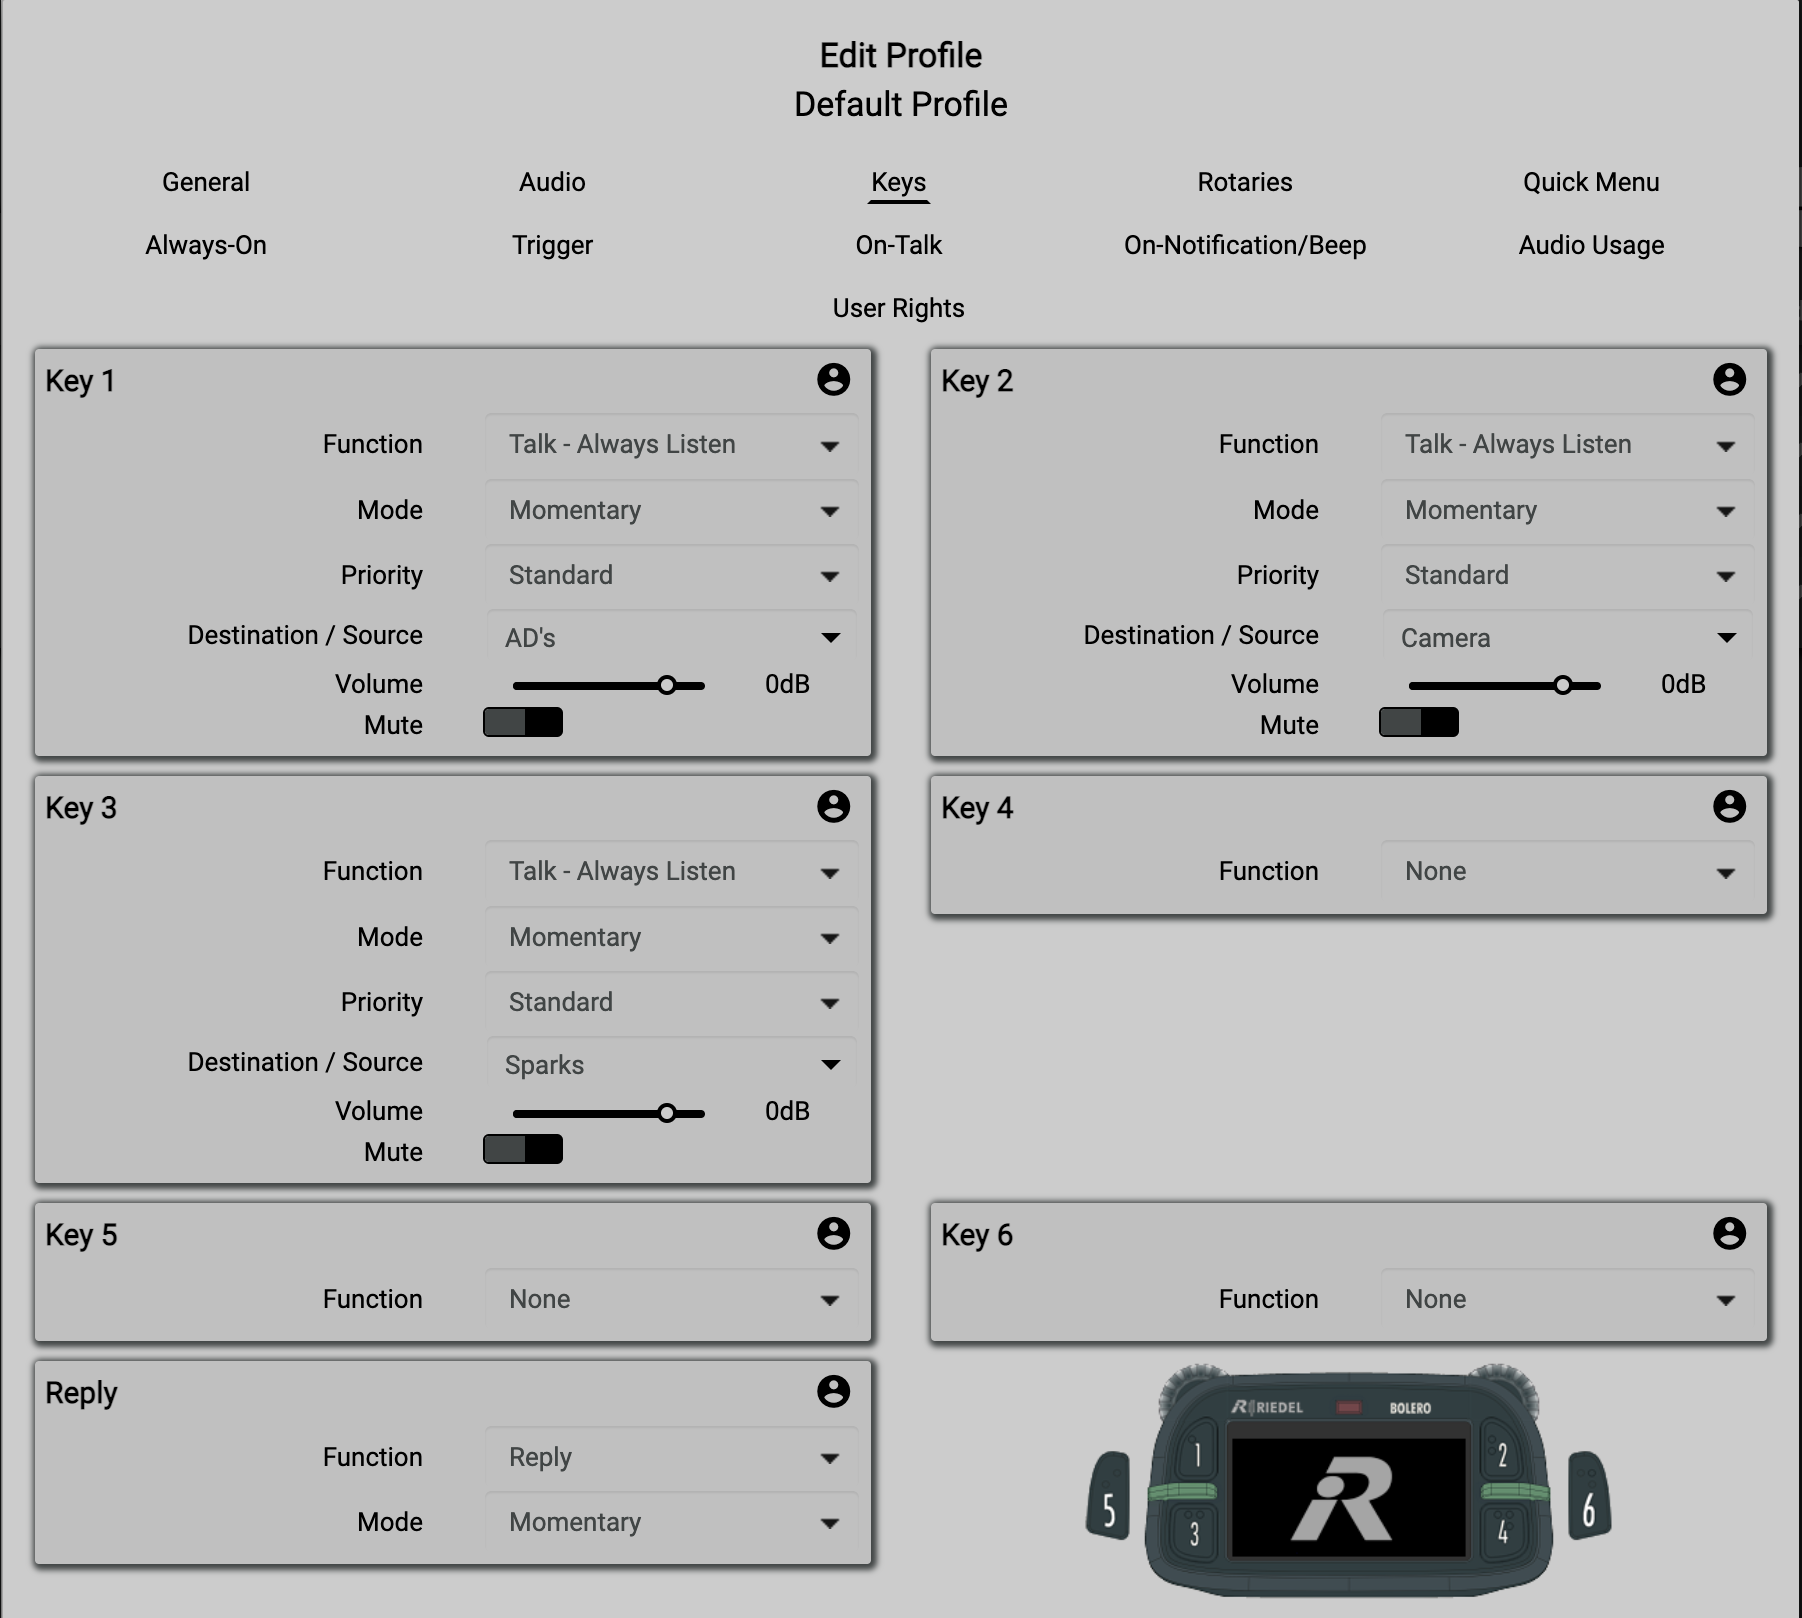
This is where you will spend most of your time.
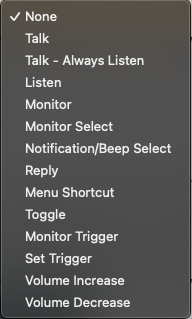
There are 6 Keys which can be assigned with functions. Functions range from Talk (Walkie Talkie), Talk and Listen (Partyline- Only), Listen (Listen Only), Monitor (Snoop) Reply, Menu Shortcuts, *Triggers and more.
Always-On/Triggers/On-Talk
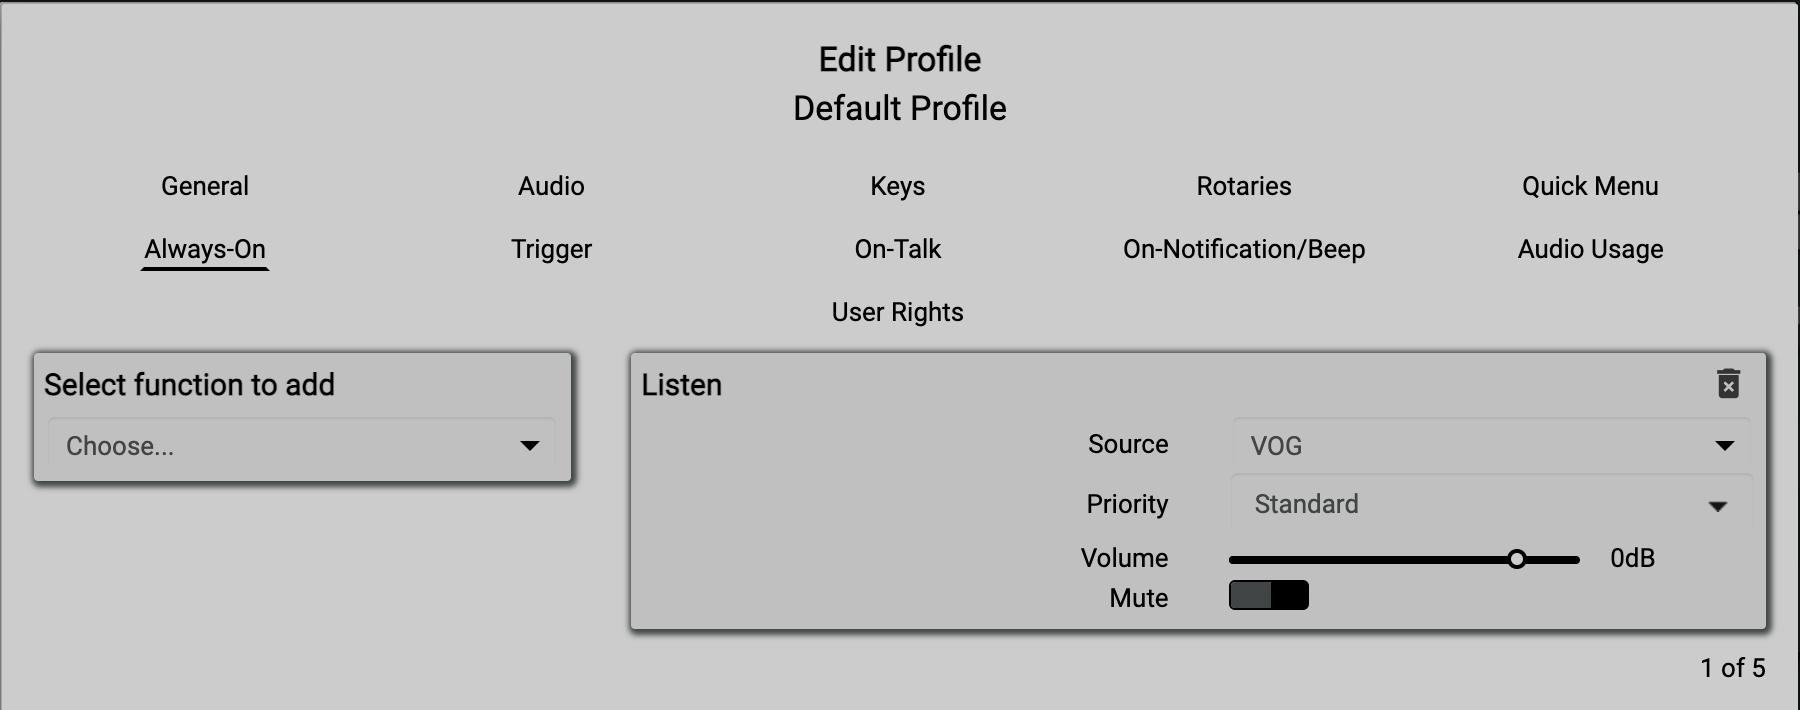
General Always-On Select function to add Choose......
Always-On / Triggers / On-Talk do not need a push button — they run in the background on the beltpack.
Example: set Always-On Listen on the AD profile so they never miss the First AD.
User Rights
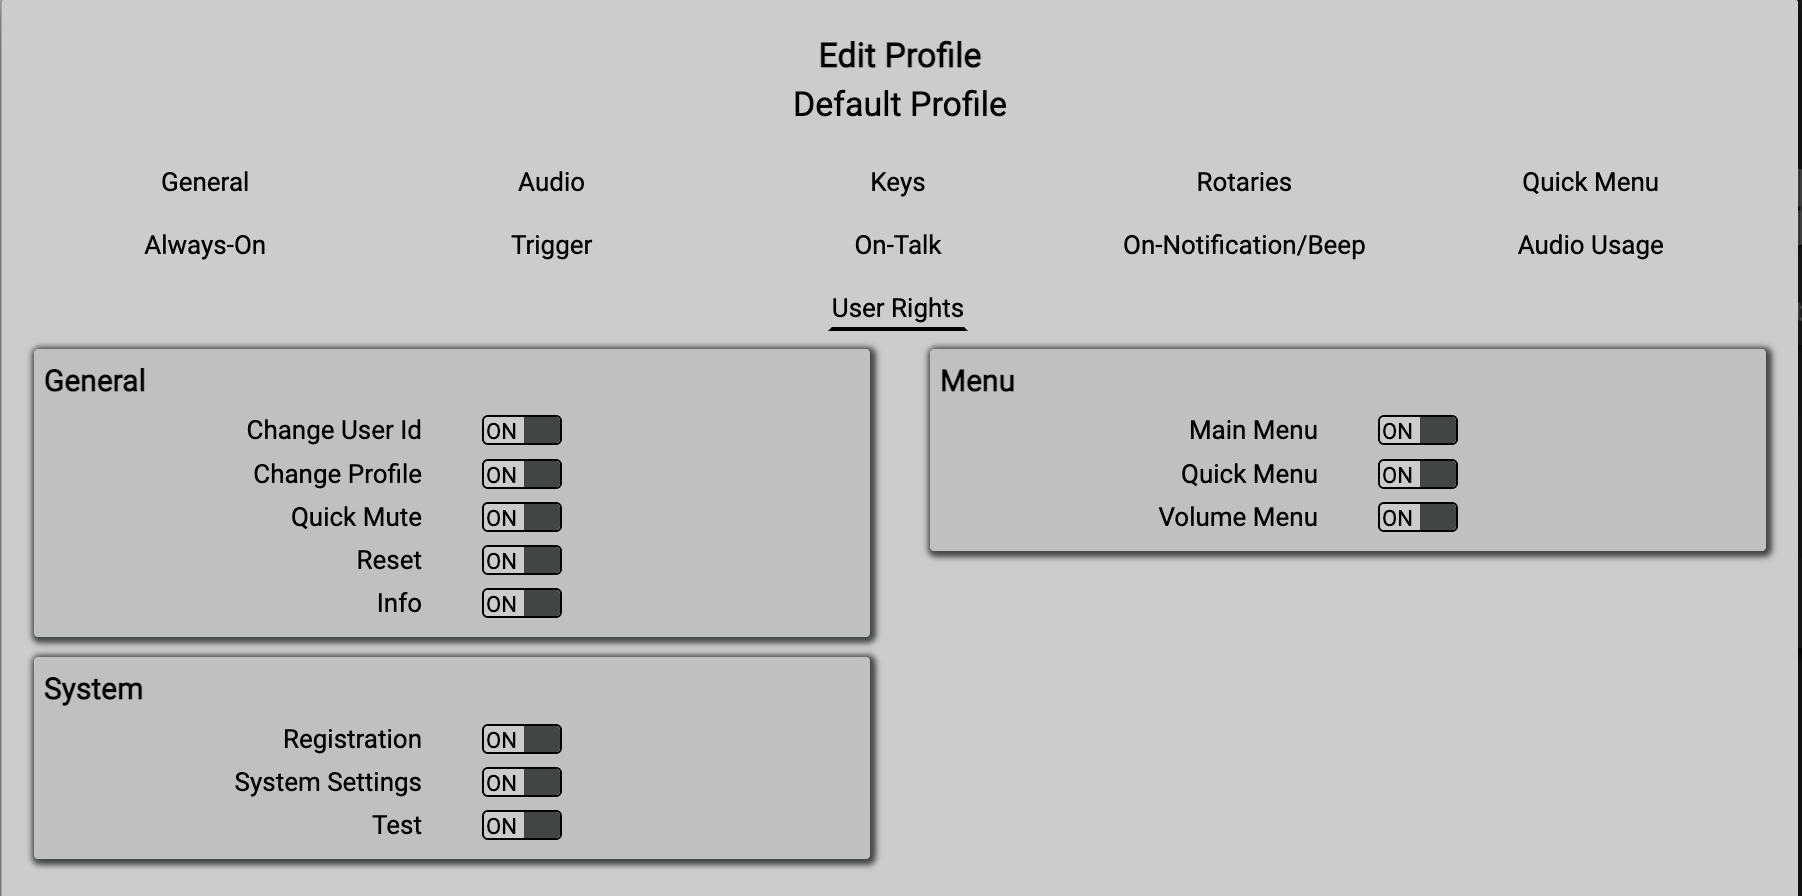
General Always-On General Change User Id Change Pr...
This is all the base information you will need to get started with configuring your base Bolero system.
Cheatsheet Monday Board: