Cheatsheet_ LTO Archival
Introduction:
One of the packages we offer at CineArk is LTO archival. This cheatsheet will work on the assumption you have read through the relevant Cheatsheet for the LTO drive you are using. LTO Archival requires an eye for detail and careful management of the data that you are backing up. If any issues arise, you should discuss these with James, Kylie or Callum.
Required Components:
LTO Station Hardware:
1 x LTO Drive
1 x LTO Cleaning Tape
LTO Tapes
LTO Tape Labels
Thunderbolt Cables
1 x UPS
1 x Mac
1 x RAID
DIT Hardware:
Shuttle Drives
Accompanying Cables
Cases
Software:
Yoyotta
OneDrive
Amphetamine
Silverstack
Hardware Set Up:
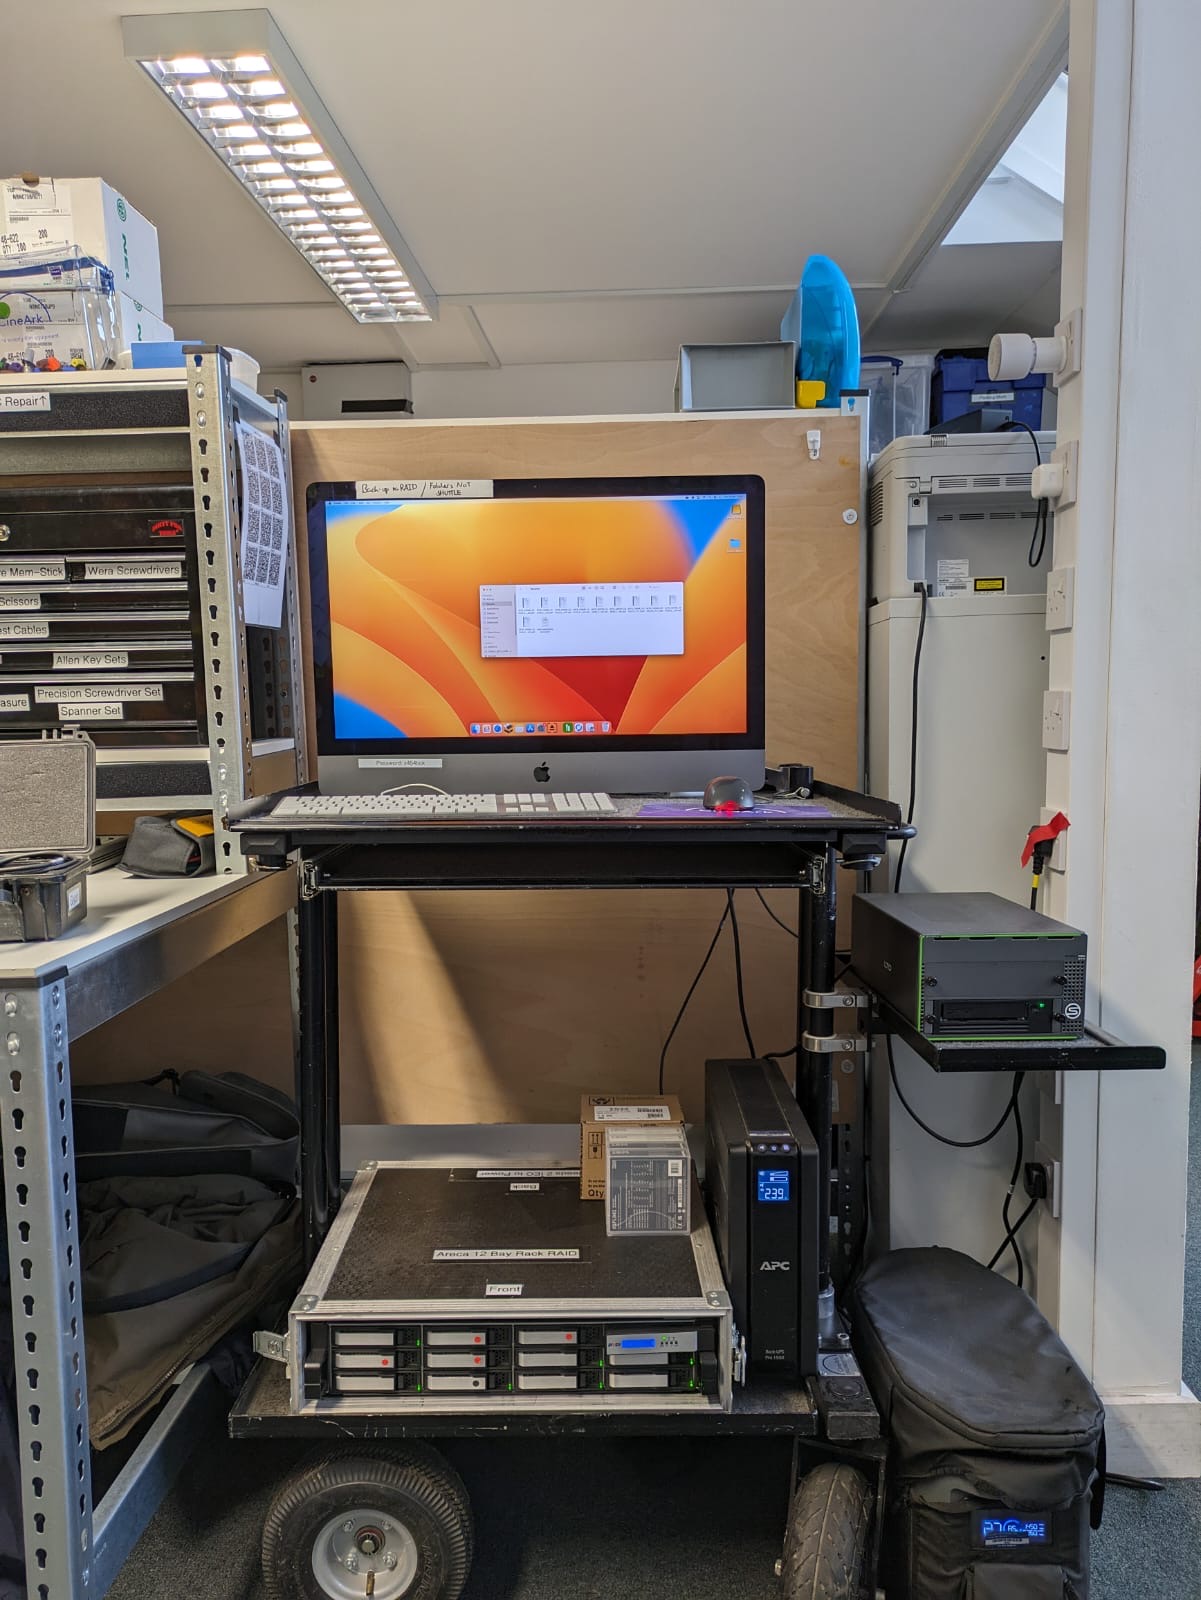
As this will likely be used for the majority, if not all, of the show booking it, find a home for the Mac where it will likely not be disturbed. For Wales, we built this onto a data cart and placed it in our cart nook. Please set up your LTO station hardware so that it is running into the Mac. It will look something like this:
Software Set Up:
OneDrive:
We use OneDrive to make the reports easier to access, especially remotely.
Sign into lto.station@cineark.net
Create a folder for your show
Create a reports folder within this
Amphetamine:
This software is to keep the mac awake and to prevent it from going asleep unexpectedly.
This can be set up to suit the user. In my case, I use indefinite mode.
Silverstack:
Silverstack will be used to offload the rushes onto our back-up RAID
Create a project for your show
Create a folder within the RAID for your back-ups to go to.
This should be named after the show. For example: TMIMB
Under the Offload section, select the back-up RAID as a destination
Modify the destination path to only include the Bin Name.
This will prevent unnecessary folders from being created.
By default, Silverstack should verify All Destinations. Keep this.
Keep MD5 as the checksum.
Yoyotta:
Log into our Yoyotta Account and activate the license
You will find the details in the product description on Current
Create your project
Again, this should be named after the show.
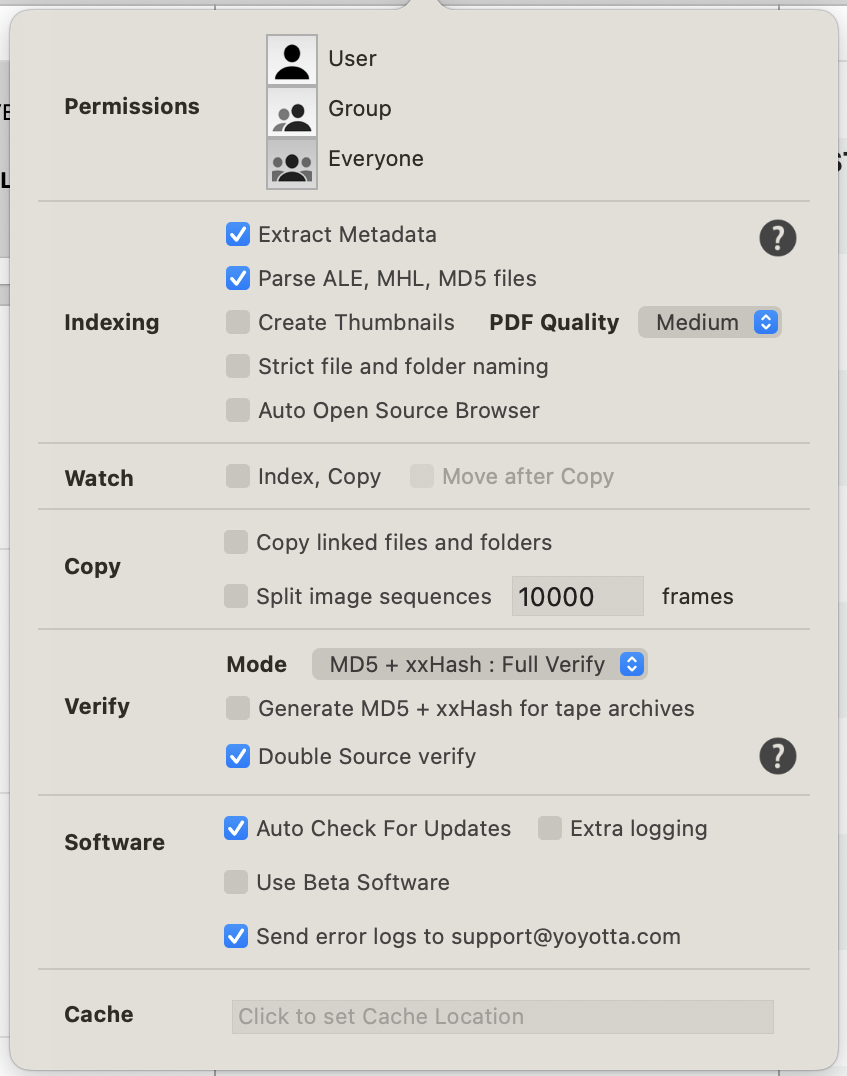
Click the sprocket and match the following settings:
Open the Source Browser, by clicking on Edit Paths…
Note: You need to have a source selected to do this
You do not need to transfer this
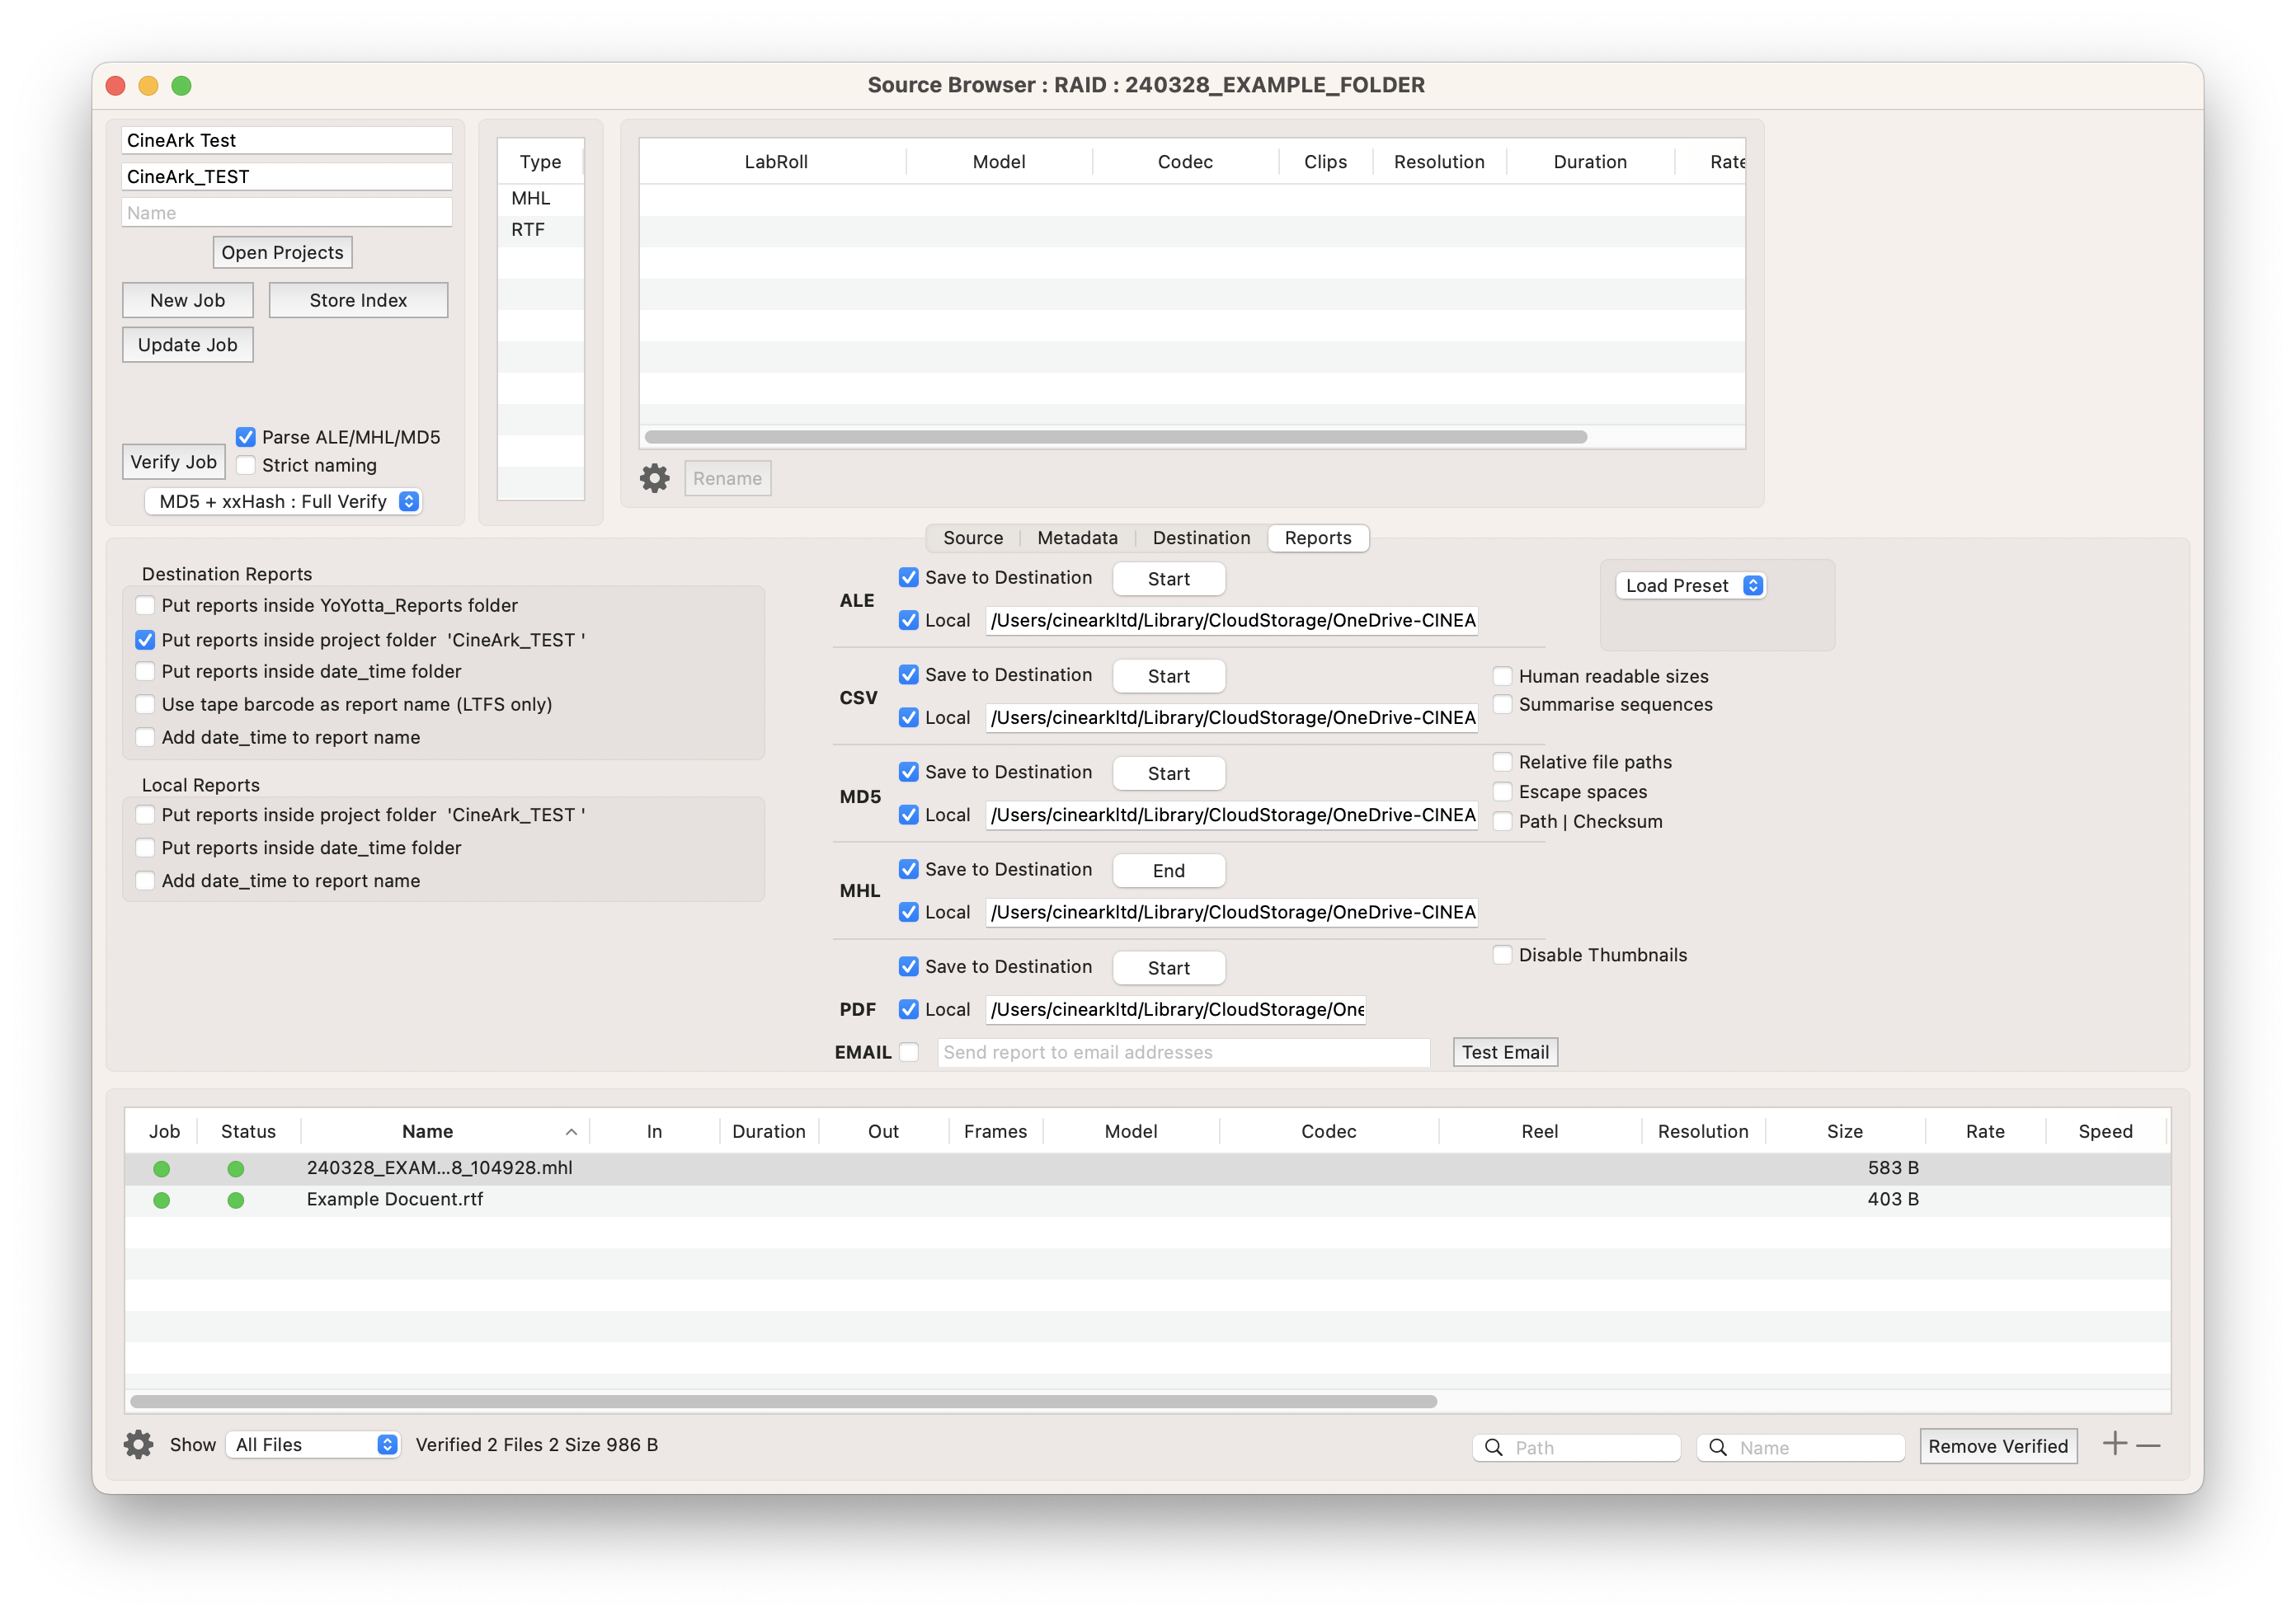
Select Reports and match the following settings:
There should be a preset called Standard_CineArk which you can use
Source Browser : Model RAID : CineArk Test CineArk...
Please note: You will need to set the local reports save location to the folder you created on OneDrive.
LTO Tapes Preparation:
Permissions Indexing Watch Copy Verify Software Ca...
Place the first tape into the drive
Format the drive
The naming convention of these will be pre-agreed
For example: MBM001, MBM002, MBM003 and so on.
Untick Compression
Set it as a destination
When you have used all of the tapes in a box, keep the cardboard box.
You will use this to send them back to production at the end of the show.
Shuttles and a Note on Workflows
This may change based on the show that you are doing this for. Typically, Shuttles (AKA Rushes) containing the previous shooting day will arrive in the morning and will be collected the next morning when the next shuttle arrives.
You MUST ensure that you do not mix your shuttles up. If this does occur, this must be flagged immediately. Any delay may result in the loss of data. To reduce the risk of this, you can adopt a left to right workflow, using the mac as a centre line, where only a shuttle that has been cleared may move to the right of the mac and therefore be ready to collect. Being accurate and clear with your labelling, such as using colour coding, may also mitigate this.
In the context of Man In My Basement, we used a combination of Left to Right and colour coding to ensure this. At the very end, for a shuttle to leave our possession, the unit was green taped, noted and placed into the kit-out rack with a delivery note confirming which shuttle it is. This way, we had 4 layers of protection.
It is also worth noting that, as this is data, there must be no room for doubt or error. If there is any doubt in anything, verify the information first before proceeding. For example, we were given a shuttle when we were expressly told we would receive a RAID. This was a red flag and the driver was certain this was correct. A quick phone call to the DIT, however, proved our concerns correct.
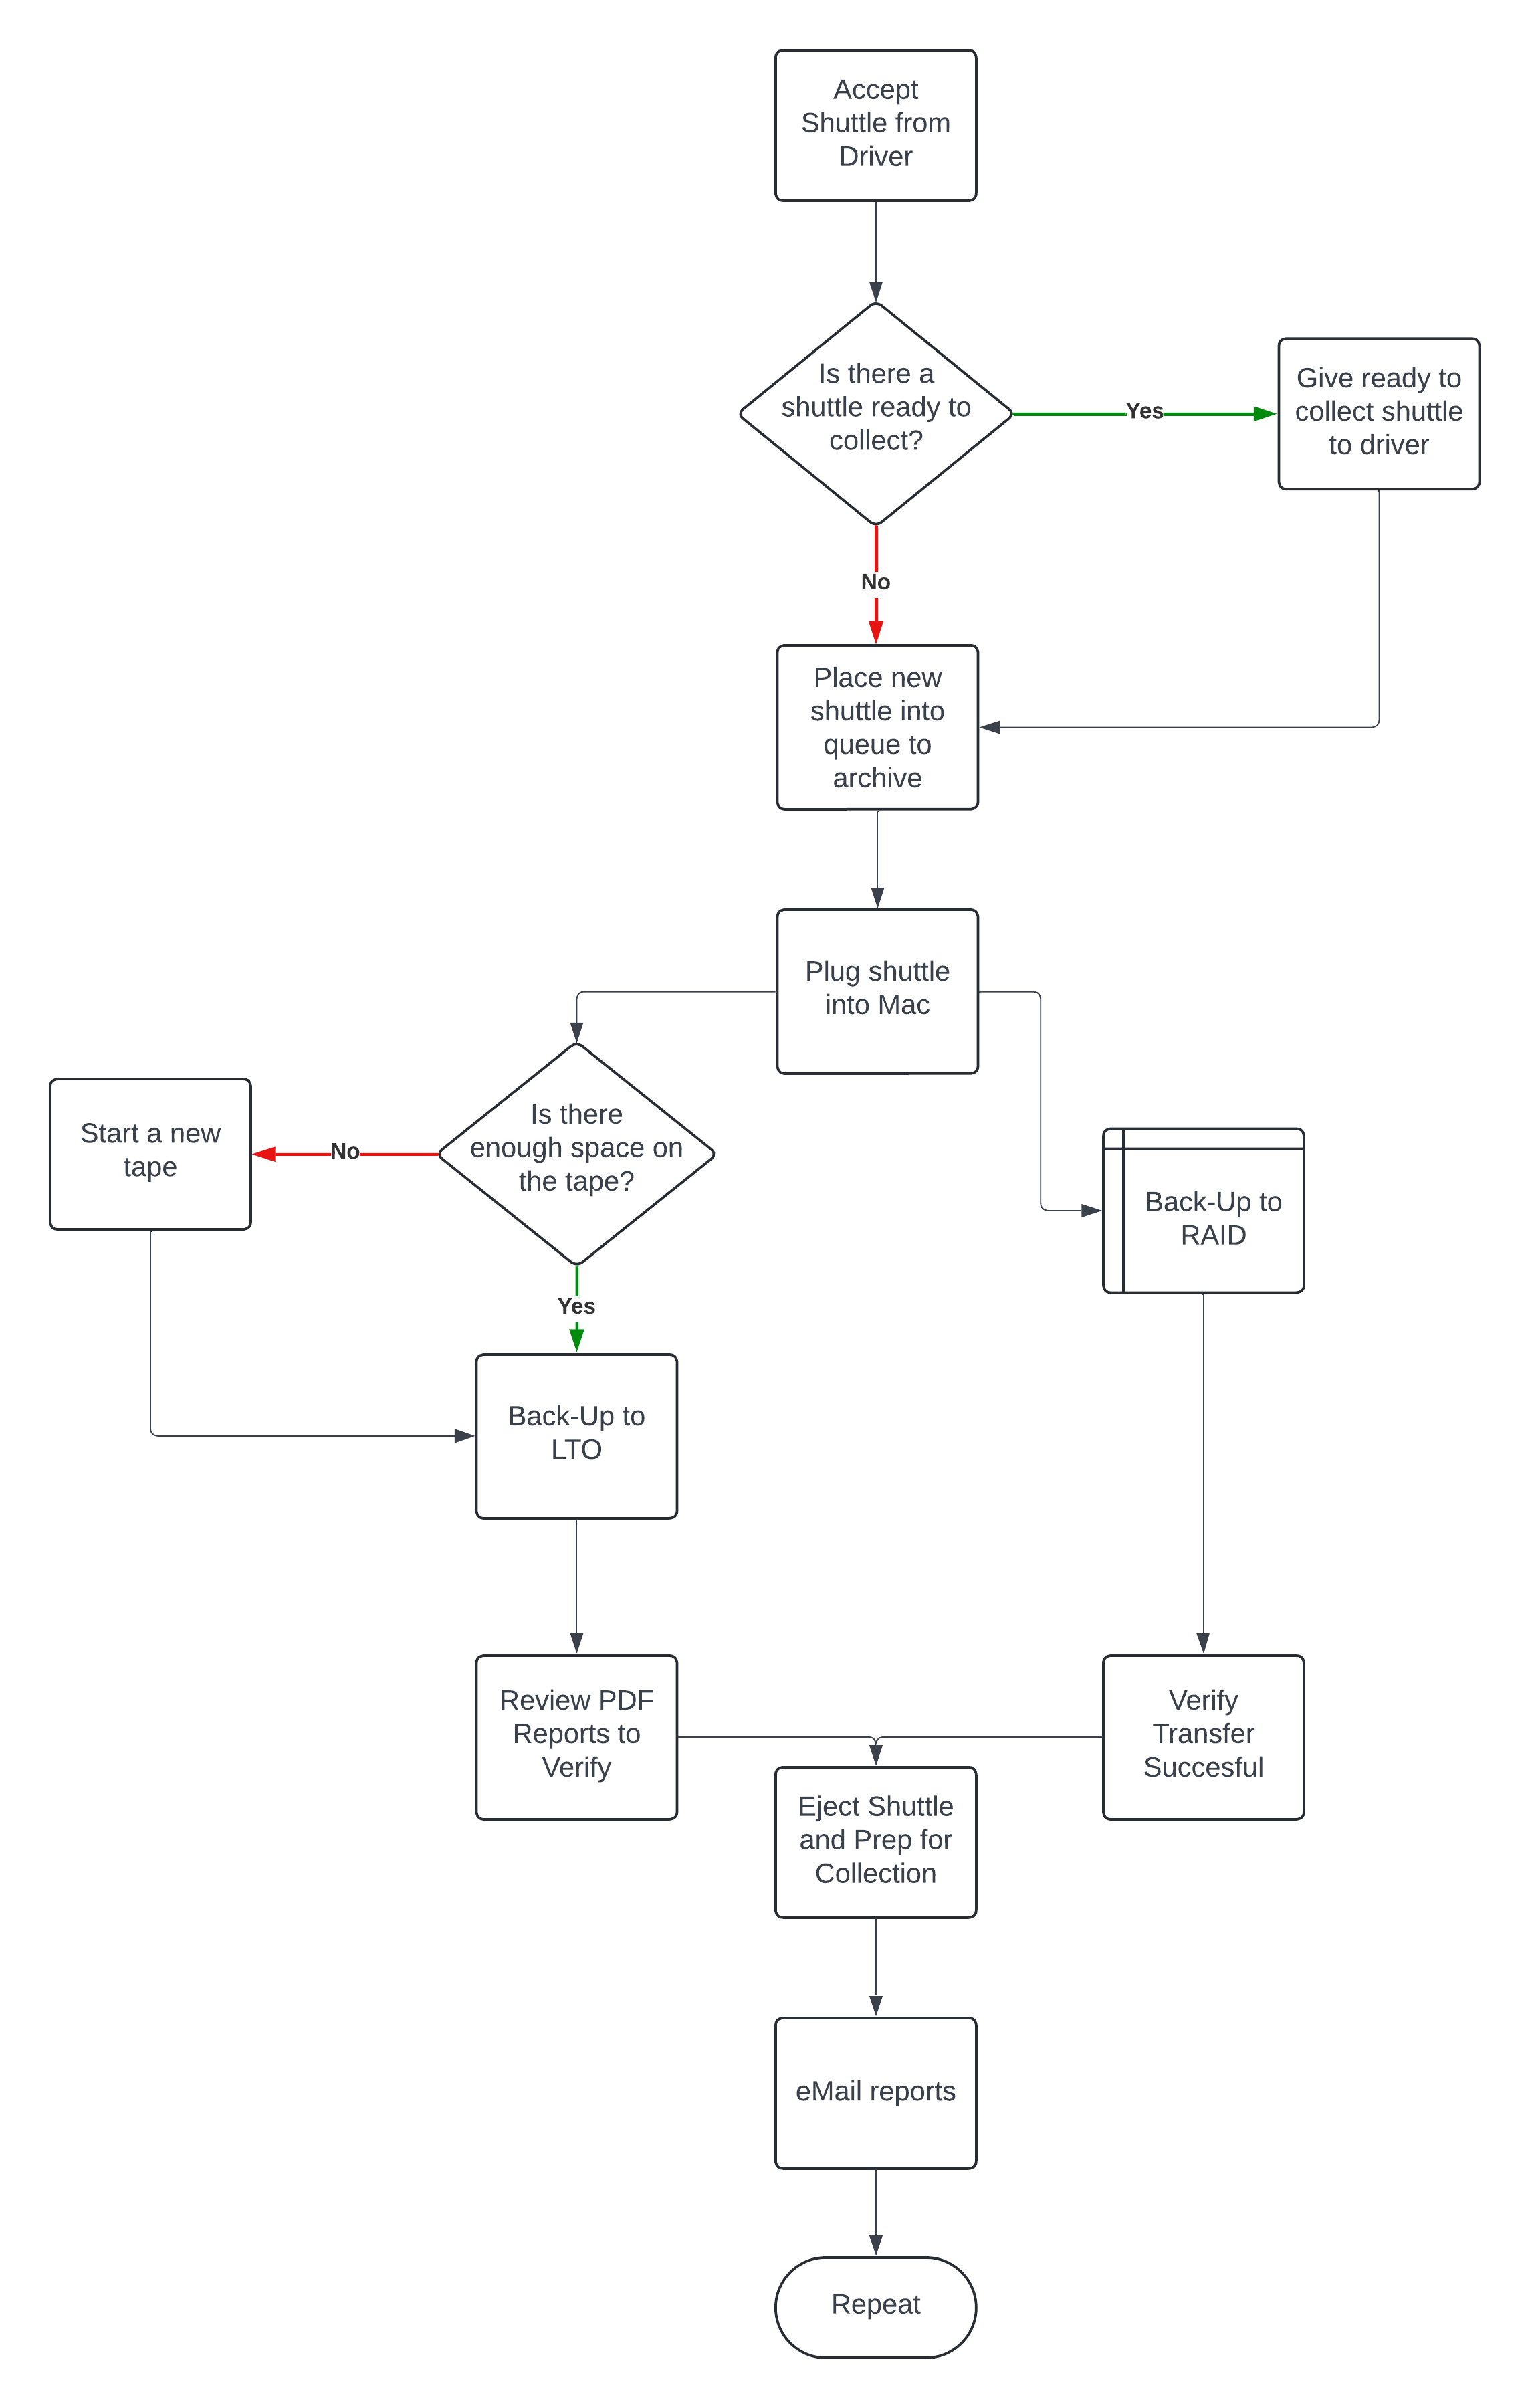
Workflow Diagram:
Digital Workflow:
ن م -O مي ج .
I have gone on the assumption that you already have a tape pre-loaded into the drive. If you don't see, LTO Tape Preparation.
Mount the shuttle drive
Using Silverstack, offload to the RAID
DO NOT OFFLOAD THE DRIVE, offload the folder instead
Even if there are multiple folders, offload these seperately.
Using Yoyotta, select the folders to offload from the shuttle.
DO NOT OFFLOAD THE DRIVE, offload the folder instead
Even if there are multiple folders, offload these seperately.
Compare total transfer size to the remaining space on the tape, we want to aim to keep shoot days together on one tape. If this is not possible, start a new tape. Keep in mind, the tape will want to keep some space at the end for it's logging.
Make a note of what folders are being written to the tape. You WILL need this later.
You can refer to the offload reports, in the event you have forgotten to do this but this shouldn't be relied on.
Once the transfers are complete, go through the PDF report and verify all intended files have been transferred.
For example: if there are 48 .ari files, then you need to see 48 show up on the report. If this is not the case, then something has gone wrong.
Once each shoot day is complete, send the reports to the operators.
This will change on a job to job basis.
Rinse repeat.
Moving To The Next Tape:
Now that the current tape is full, it's time to move onto the next:
Eject the tape
Place the correct naming label onto it
Triple check this.
Create a P-touch label, outlying what folders are stored onto this tape and other details
The template for this can be found in the CineArk LTO Folder on OneDrive
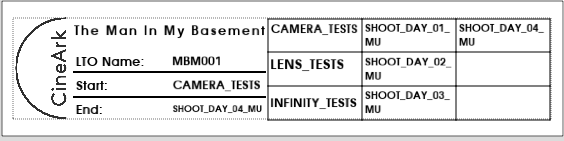
The Man LTO Name: — Start: In My Basement CAMERA I...
Place into the storage case
This storage case should be kept someone away from the rig. The further away the better.
The idea of this is, in the event of a fire or other hazard, there is reduced risk of damage.
In an ideal world, these would be kept in a data safe.
At The End Of The Show:
Now that the show is over, we have some time to triple check for errors and correct if needed.
Confirm all shuttles have returned with the operator.
Verify all shoot days/rushes have been backed up to tape
Verify all tape labels are correct
Do this one by one.
Take all tapes out of storage and package them up in their original boxes.
Get them ready for collection.
Jobs done!
Well Done - Imgflip